Fear the Marshmallows
October 14th, 2010 | 22 Comments
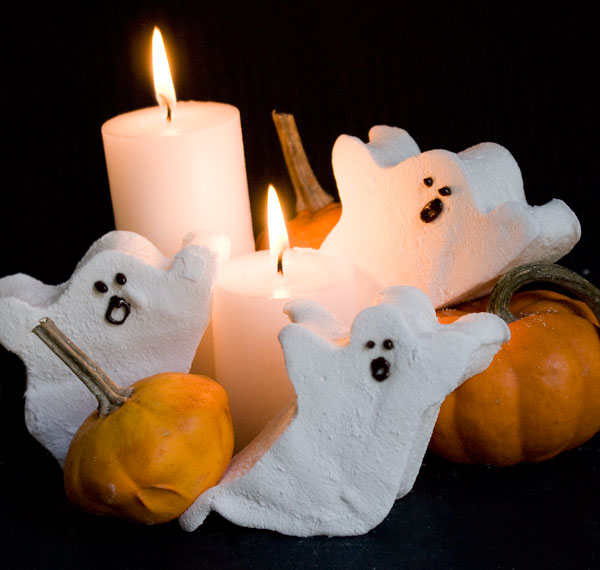
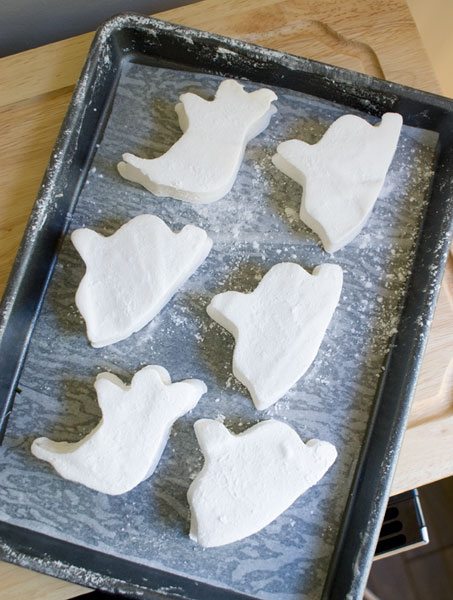
Do these scare the pants off you? Eh, me neither. But they’re cute! Maybe you can scare your kids by biting their heads off, in good ol’ Ozzy Osbourne fashion. Not the kids’ heads. The marshmallow ghosts’ heads.
Man, oh, man did I love Halloween when I was a kid. My sweet tooth started going off like some sort of homing device when October 31st drew nearer. Off I’d go with my little friends, in our finest homemade cowgirl outfits, door to door, to collect candy.
It finally dawned on me that it was time to call it quits on the Trick-or-Treating when, one particular year, as I was standing on the neighbor’s porch holding out my beggar’s purse, I realized I was able to look him square in the eye. We were now the same height. He looked behind me for an actual child, saw none, and resentfully handed me Kit Kats with a dose of evil eye. A flush of embarrassment came over me, the same one that swells up when someone points out that your skirt got caught up in your underwear, revealing a butt made lumpier thanks to years of candy consumption. Ahhh, poetic justice.
I was in high school, for crying out loud! Couldn’t I have figured this out myself? I guess I didn’t want to let it go. Thankfully, Trick-or-Treating isn’t the only way to have fun with this greatest of days.
One hotel I worked in invited neighborhood kids to put on their finest goblin dress and come by to collect our specially made treat bags. We filled them with whatever our conspiring little heads cooked up: iced sugar cookies decorated with mummy heads and witches, caramel corn, lollipops with red food coloring dropped in to look like pearls of blood, licorice bats. And one year we made the marshmallow ghosts. We put them between ghost shaped graham crackers, added some chocolate and threw them over a portable flame. Who, I ask you, wouldn’t go batty for that?
How about you? Do you have any Halloween memories?
Marshmallows!
You’ll need a Candy Thermometer for this, and if you want shapes, you’ll need Metal Ghost Cutters. If you want simple cubes, you can cut them with a knife.
The marshmallow batter can be spread out as thick or as thin as you’d like. For a ‘smore, I think thinner’s better, so the shapes fit between the crackers more comfortably. This batch will make about 15-20 ghosts, depending on your cutter size, or a few dozen big 1″ cubes (6 dozen? I lost count). They’ll keep for at least a week in an airtight, Tupperware-style container.
This ratio of ingredients comes from Gourmet but I changed the method to make it go a little faster.
For the marshmallows:
3 1/2 envelopes (2 tablespoons plus 2 1/2 teaspoons) (25 g) unflavored gelatin
1 cup (240 mL) cold water, divided
2 cups (425 g) granulated sugar
1/2 cup (120 mL) light corn syrup (I know people get worked up about the corn syrup, but it’s only a form of sugar, like any other, and helps the marshmallows keep their texture longer.)
1/4 teaspoon (1 g) salt
2 large egg whites
1 tablespoon vanilla extract (or play with other extract flavorings)
For the outer coating:
1/3 cup (40 g) confectioners’ sugar
3 tablespoons (25 g) corn starch
1. The makings of ghosts:
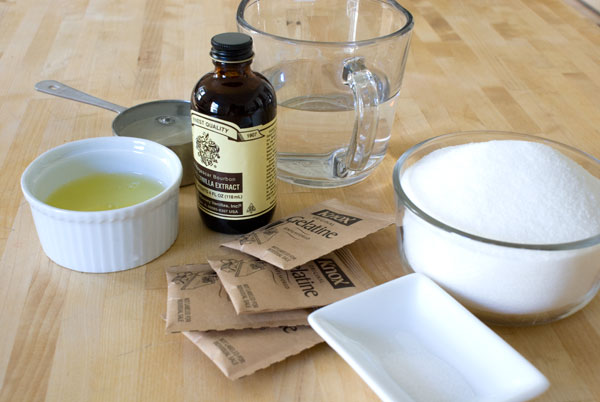
2. First, sprinkle the the gelatin over half a cup of the water while I cackle all witch-like.
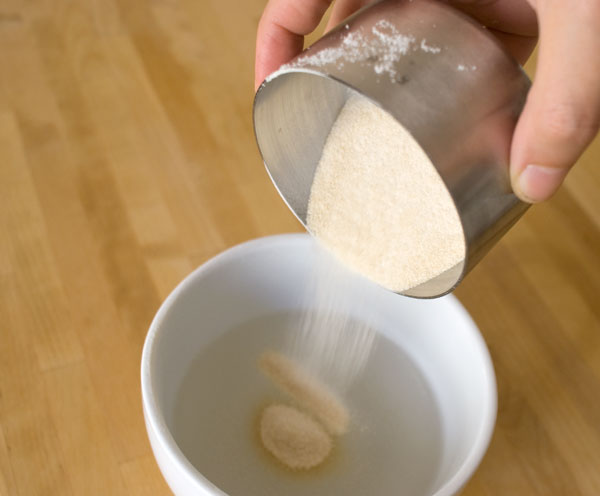
Let it rest for 5 minutes, and continue with the recipe. In 5 minutes it absorbs the water and looks like this:
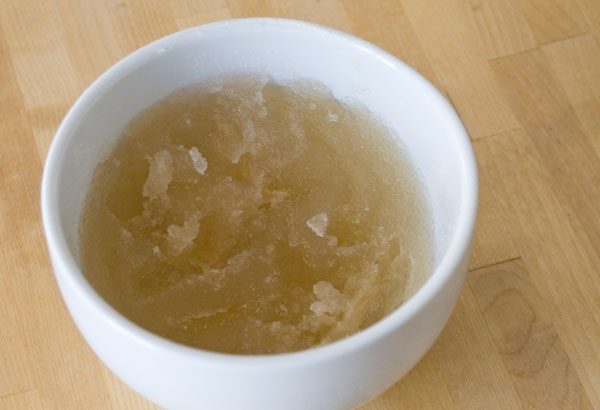
Oh, what ugly madness, you may think! That’s because I poked it.
3. Meanwhile, grab a high-sided pan, about 13″ x 9″, and give it a spritz with some cooking spray…
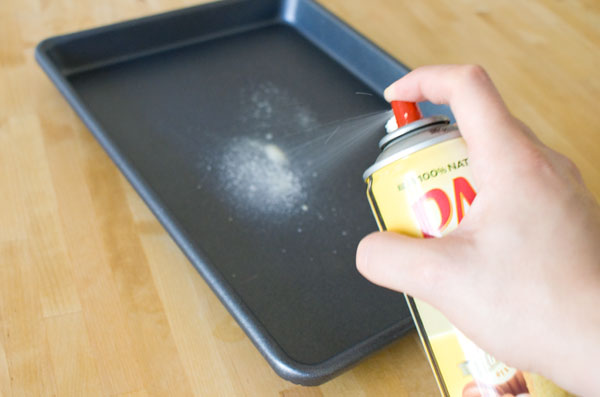
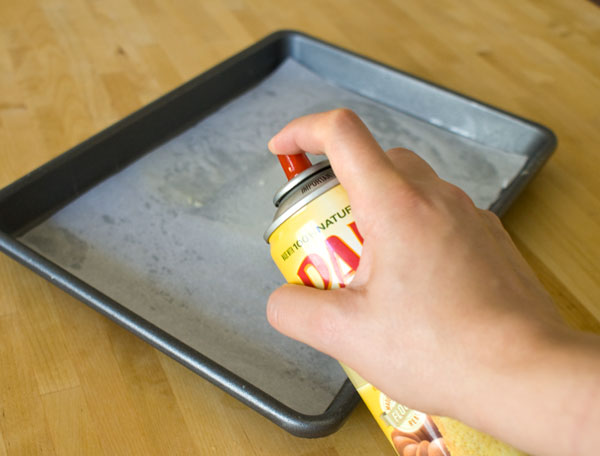
…line it with parchment, and spritz again. The coating under the paper “glues” the parchment to the pan so it doesn’t slide around when the marshmallow goo gets spread. The second coating keeps the marshmallow from sticking to the parchment.
4. In a small pot go the sugar, corn syrup, salt and the remaining half a cup of the water.
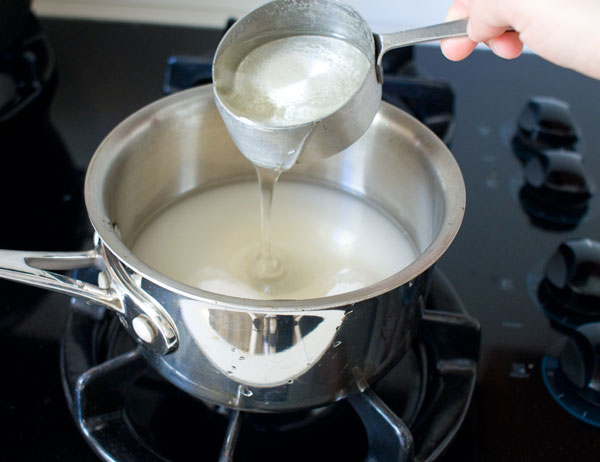
This goes over a high flame like the Salem Witches (mwaaa haaa haaa) along with a candy thermometer. This is going to get cooked to 250 degrees F (121 degrees C.) and will take about 7 minutes. Don’t go far! Watch it like a ghoul!
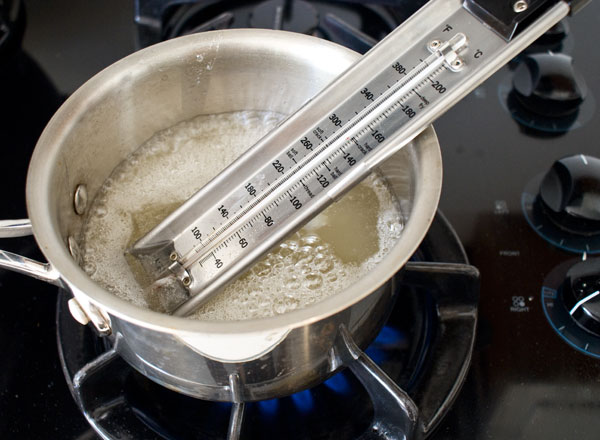
5. While that’s cooking, the egg whites make their way to the KitchenAid bowl, and await their doom.
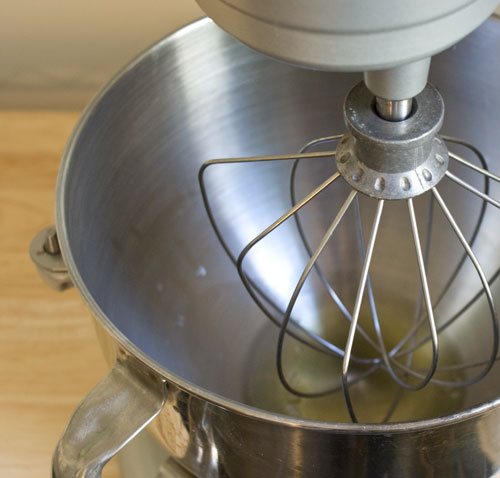
Here’s where it pays to be alert and nimble because everything happens quickly.
When the sugar is a few degrees away from the goal temperature (of 250 F), at around 245 degrees F, start whipping the egg whites on medium speed. They’ll hopefully be foamy and close to soft peak stage by the time we need them, without being fully whipped. Keep an eyeball on them. (eye of newt. mwaaa haaa haaa.)
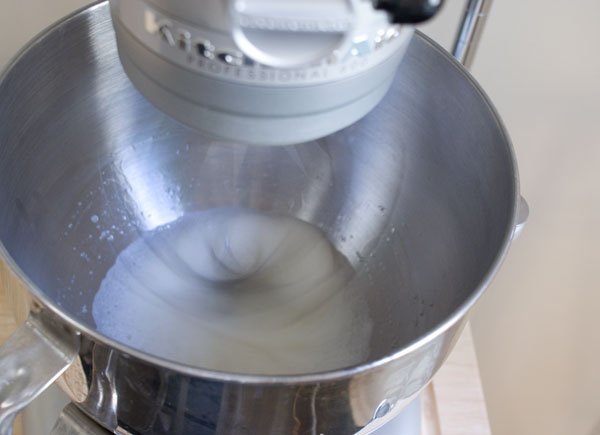
The sugar will come to temperature of 250 degrees F quickly. Shut off the heat, and dump the gelatin blob into the hot, hot, sugar all at once, being careful not to let it splash back on your arms. (Or your arms will look unintentionally Halloween appropriate.)
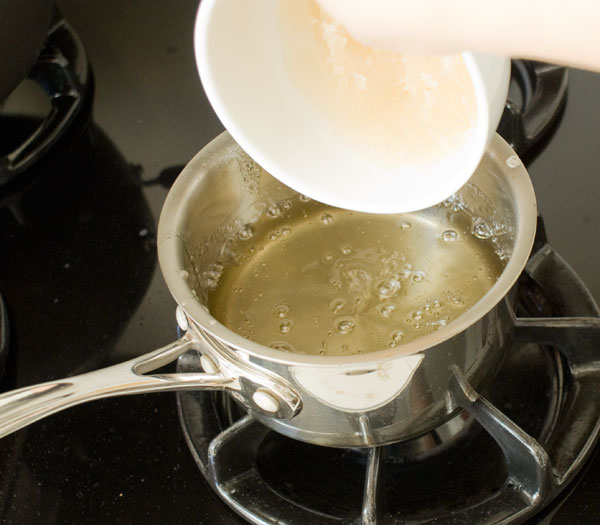
The heat of the sugar will start to melt the gelatin immediately. Do not stir. Swirl the pan gently until it’s completely dissolved. It should take mere seconds. About 30 seconds.
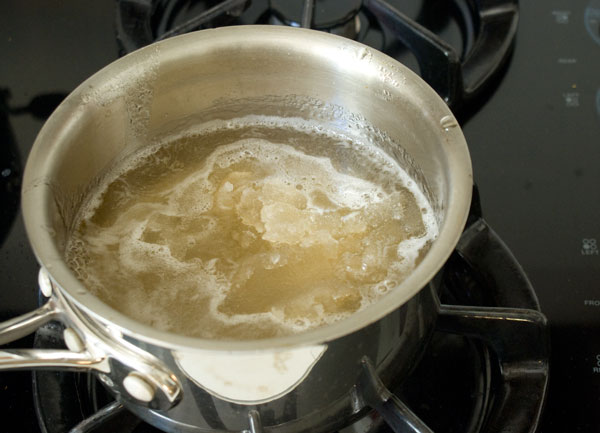
It’s melllltting!!!!!
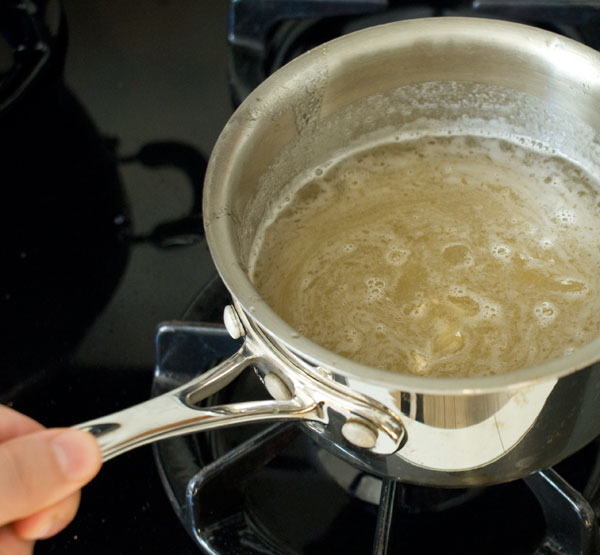
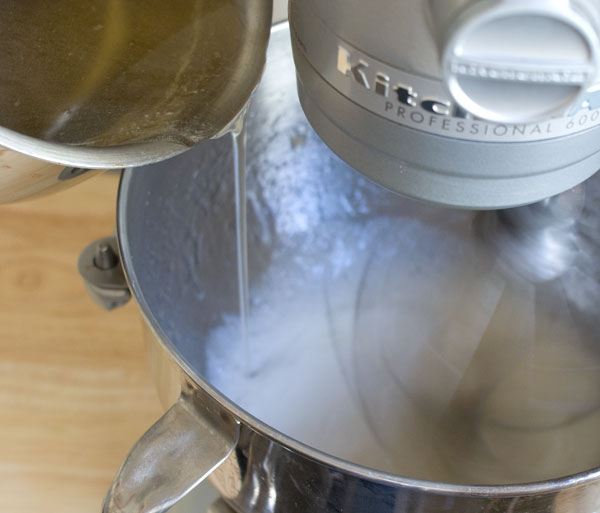
6. Once it’s completely liquid, I change the whipping egg speed to high, and I slowly pour the sugar down the side of the mixing bowl WHILE the egg whites are whipping on high. A steady stream, if you will.
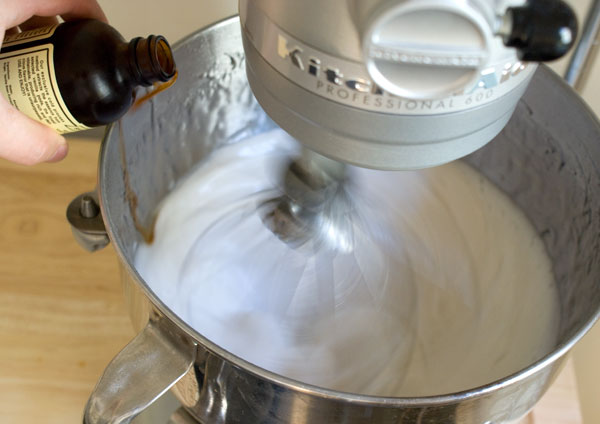
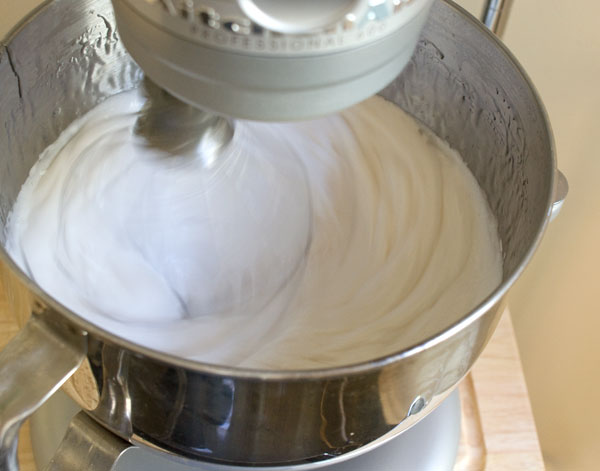
Add the vanilla extract. Don’t mind my inexact measure. I like living on the edge. Once everything’s in, it may look a little soupy at first. But then, as it whips and cools, the gelatin starts to set and fluff higher.
…and then gets really bodacious. The streaks starts to hold their shape. This takes about 5-7 minutes.
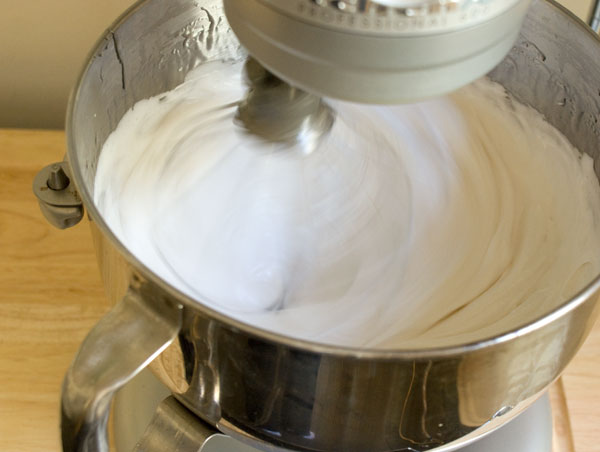
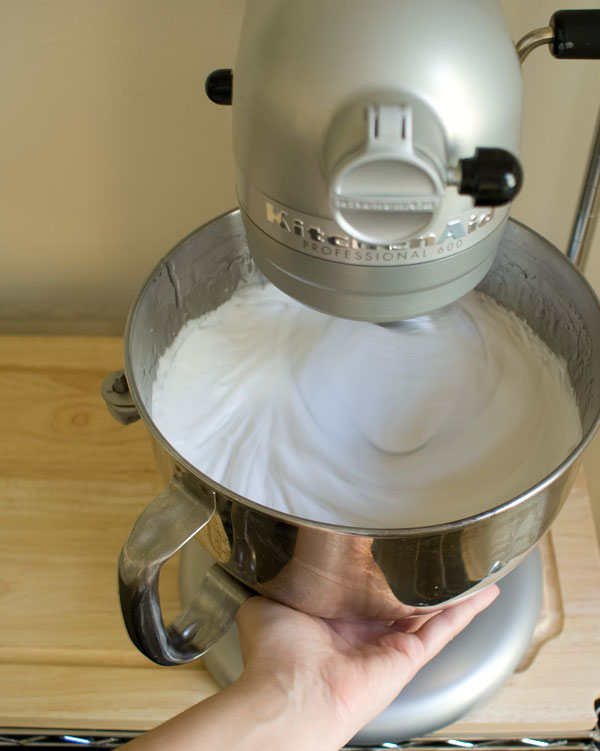
The best time to stop is when the bowl is in the lukewarm range. Touch the side. The bowl should be slightly warmer than room temperature. No need to get worked up about this. It’s just a generality, and there’s plenty of room for error. The stuff shouldn’t get too cool in the bowl, because it starts to firm up, and becomes more difficult to pour out. (Then it will just be stickier and stringier to deal with, but you’ll still get marshmallows.)
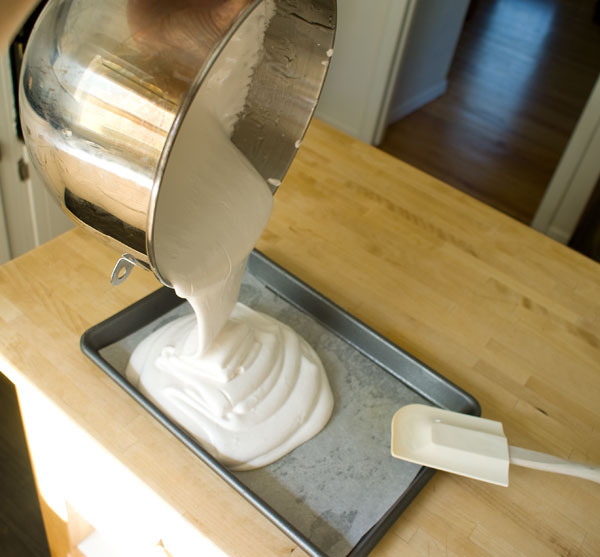
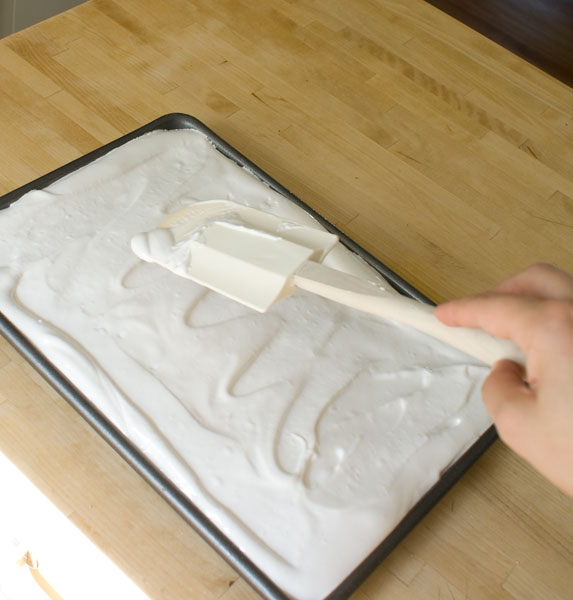
Quickly, pull out the whip, and shake off the excess batter (but resist the urge the scrape it clean with a spatula or it will look like you’ve been playing with silly string.) Quickly again, pour the batter into the prepared pan. With a few sure strokes of a rubber spatula, help it along by scraping the bottom. If any batter resists, just let it die its proper death.
Spread it around to even it out, and let it rest, just like this, UNCOVERED and UNREFRIGERATED for at least 3 hours or overnight.
(FYI —The dirty dishes clean up easily under hot water, which will dissolve all the stuck-on sugars.)
Now, it’s later.
Time to make that telltale marshmallow powder that gets all over your clothes. (It’s needed so these babies don’t stick to each other.)
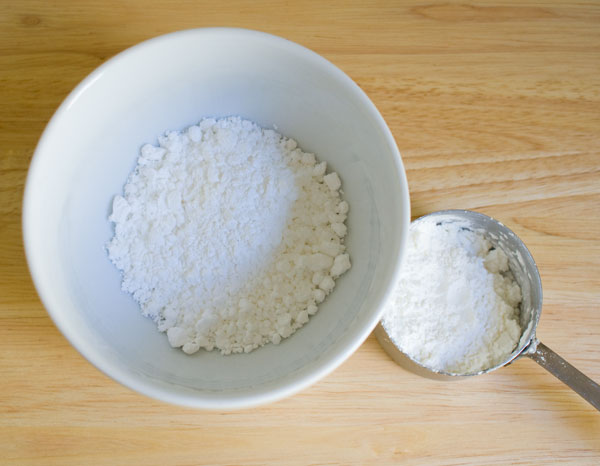
1. Here’s the powdered sugar and the cornstarch.
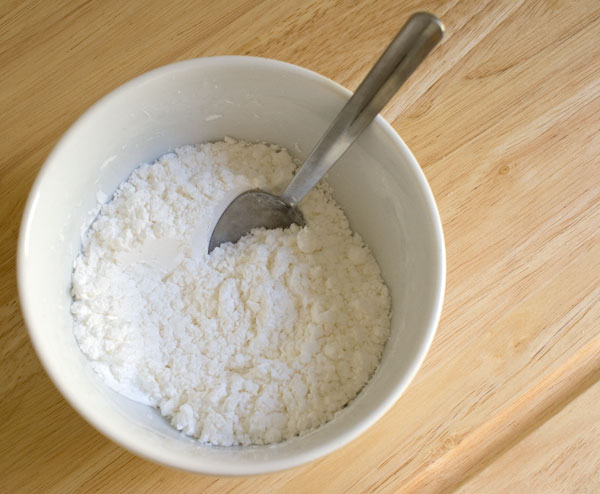
2. Here’s the powdered sugar and cornstarch, mixed.
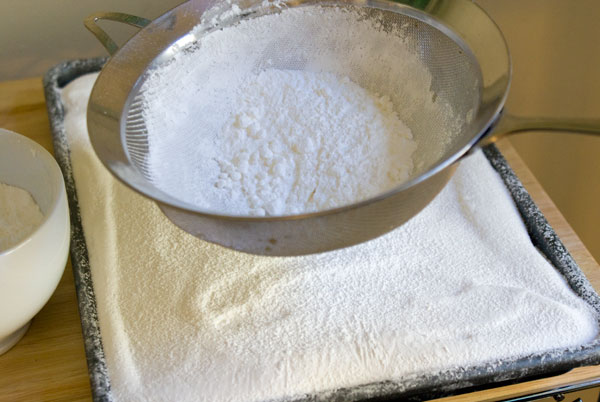
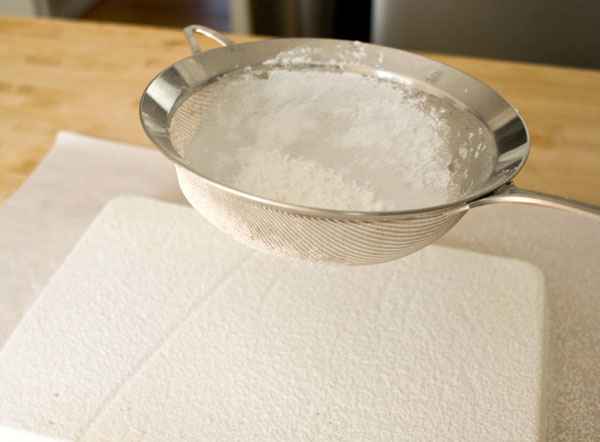
3. Sprinkle the mix over the marshmallow. A fine mesh sieve works best to avoid the clumps, but if you don’t have one, just sprinkle it on with your trusty hands.
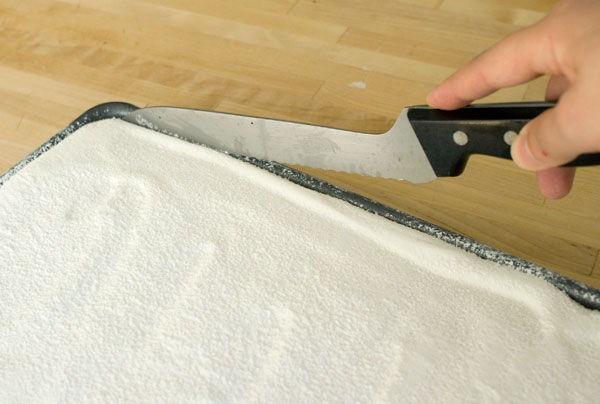
Run a knife around the edges to loosen…
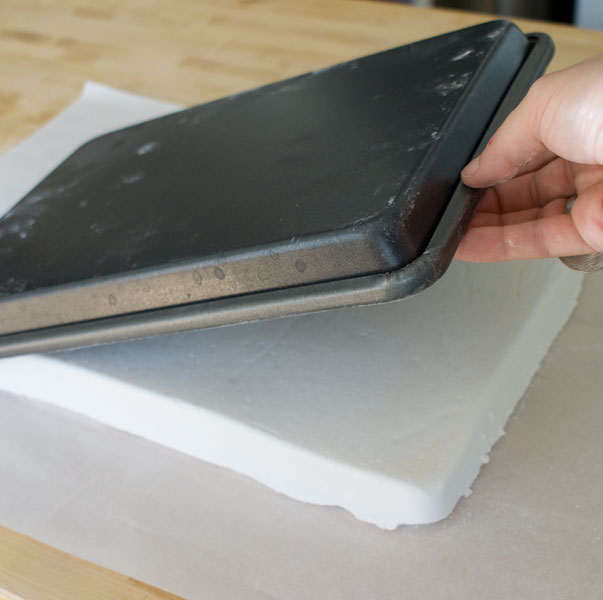
and invert onto a cutting board (or a piece of parchment.)
Peel off the parchment, and powder this side, too.
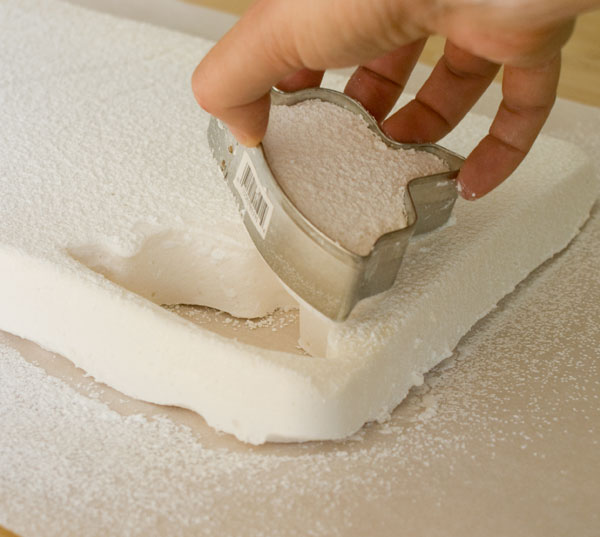
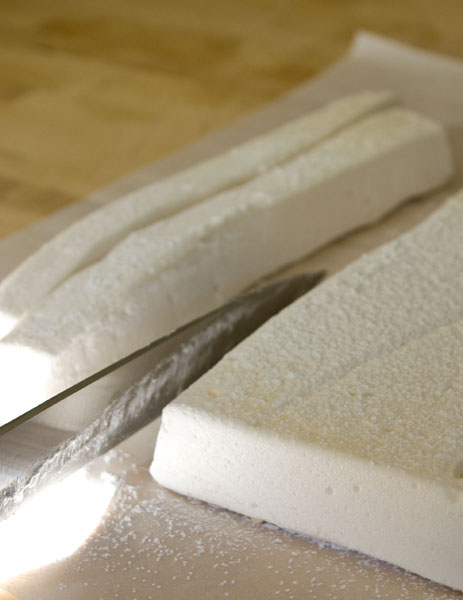
And cut shapes…
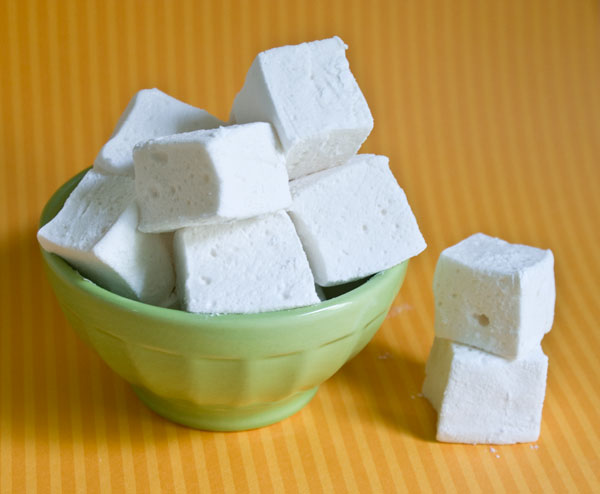
or cubes. Any size. With a sharp knife or a pizza wheel. Toss the cubes in more coating, so they don’t stick to each other.
Boooooooooooooooooooo.
Marshmallows!
You’ll need a Candy Thermometer for this, and if you want shapes, you’ll need Metal Ghost Cutters. If you want simple cubes, you can cut them with a knife.
The marshmallow batter can be spread out as thick or as thin as you’d like. For a ‘smore, I think thinner’s better, so the shapes fit between the crackers more comfortably. This batch will make about 15-20 ghosts, depending on your cutter size, or a few dozen big 1″ cubes (6 dozen? I lost count). They’ll keep for at least a week in an airtight, Tupperware-style container.
This ratio of ingredients comes from Gourmet but I changed the method to make it go a little faster.
For the marshmallows:
3 1/2 envelopes (2 tablespoons plus 2 1/2 teaspoons) (25 g) unflavored gelatin
1 cup (240 mL) cold water, divided
2 cups (425 g) granulated sugar
1/2 cup (120 mL) light corn syrup (I know people get worked up about the corn syrup, but it’s only a form of sugar, like any other, and helps the marshmallows keep their texture longer.)
1/4 teaspoon (1 g) salt
2 large egg whites
1 tablespoon vanilla extract (or play with other extract flavorings)
For the outer coating:
1/3 cup (40 g) confectioners’ sugar
3 tablespoons (25 g) corn starch
1. First, sprinkle the the gelatin over half a cup of the water
2. Let it rest for 5 minutes, and continue with the recipe. In 5 minutes it absorbs the water and looks solidified.
3. Meanwhile, grab a high-sided pan, about 13″ x 9″, and give it a spritz with some cooking spray, line it with parchment, and spritz again. The coating under the paper “glues” the parchment to the pan so it doesn’t slide around when the marshmallow goo gets spread. The second coating keeps the marshmallow from sticking to the parchment.
4. In a small pot go the sugar, corn syrup, salt and the remaining half a cup of the water. This goes over a high flame along with a candy thermometer. This is going to get cooked to 250 degrees F (121 degrees C.) and will take about 7 minutes. Don’t go far! Watch it!
5. While that’s cooking, the egg whites make their way to the KitchenAid bowl. Things happen fast here, so be ready for action. When the sugar is a few degrees away from the goal temperature (of 250 F), at around 245 degrees F, start whipping the egg whites on medium speed. They’ll hopefully be foamy and close to soft peak by the time they’re needed, without being fully whipped. Keep an eye on them.
6. The sugar will come to temperature of 250 degrees F quickly. Shut off the heat, and dump the gelatin blob into the hot, hot, sugar all at once, being careful not to let it splash back on your arms. The heat of the sugar will start to melt the gelatin immediately. Do not stir. Swirl the pan gently until it’s completely dissolved. It should take about 30 seconds.
7. Once it’s completely liquid, I change the whipping egg speed to high, and I slowly pour the sugar down the side of the mixing bowl WHILE the egg whites are whipping on high. A steady stream, if you will.
8. Add the vanilla extract.
Once everything’s in, it may look a little soupy at first. But then, as it whips and cools, the gelatin starts to set and fluff higher. It starts to get more body, and then gets light and fluffy. The streaks starts to hold their shape. This takes about 5-7 minutes.
The best time to stop is when the bowl is in the lukewarm range. Touch the side of the bowl. It should be slightly warmer than room temperature. No need to get worked up about this. It’s just a generality, and there’s plenty of room for error. The stuff shouldn’t get too cool in the bowl, because it starts to firm up, and becomes more difficult to pour out. (Then it will just be stickier and stringier to deal with, but all will not be lost.)
9. Quickly, pull out the whip, and shake off the excess batter (but resist the urge the scrape it clean with a spatula or it will look like you’ve been playing with silly string.) Quickly again, pour the batter into the prepared pan. With a few sure strokes of a rubber spatula, help it along by scraping the bottom. If any batter resists, just let it die its proper death.
10. Spread it around to even it out, and let it rest, UNCOVERED and UNREFRIGERATED for at least 3 hours or overnight.
(FYI —The dirty dishes clean up easily under hot water, which will dissolve all the stuck-on sugars.)
Later:
1. Make the coating powder by stirring together the powdered sugar and the cornstarch.
2. Using a fine mesh seive, sprinkle an even coating over the marshmallow pan.
3. Run a knife around the pan to loosen the marshmallow block, and invert onto a cutting board.
4. Remove the parchment if it’s still stuck to the marshmallow, and sprinkle this side with marshmallow coating.
5. Cut out shapes with a cookie cutter, or cut any-sized cubes with a sharp knife or pizza wheel.
6. Toss more coating on the cut marshmallows so they don’t stick to each other, and store in an airtight container for up to a week.
Tags: candy, confection, dessert, Halloween, marshmallows, recipe
22 Responses to “Fear the Marshmallows”
Post a Comment
Your E-Mail will be kept private. * = required fields.




Beautiful! Glad to see you’re back!
Very cute!
i’m taking this to the grand kids today. thanx
Jackie — Thanks! Good to see you back around these parts.
Deanna — That’s sweet, thank you.
Linda — Watch out for the sugar rush 🙂
What a fun treat! That would be the perfect entry for our Halloween Recipe Contest! You can read all about it here. I hope you decide to enter it!
Thanks for the awesome step-by-step. I’ve somehow been wary of making marshmallows! One question – to what stage do the egg whites need to be whipped before the sugar is added?
Hey Avanika — I agree. That first time making marshmallows, when the steps are new, can be a challenge to navigate, but by the second time, it’s smooth sailing. I think the scariest part about this recipe is not getting burned with the sugar, but it just requires a little care. The egg whites can be a soft peak, but if they’re a little looser or firmer than that, it’s ok, because they keep whipping up even after you pour in the sugar. And thanks for noticing, I fixed that step in the directions.
interesting, thanks
Kathryn—Intriguing. I’ll look into it. Thanks for the heads up.
I love them!! have you watch alton brown episode about marshmallows?
Marie
Marie — I haven’t seen Alton Brown do marshmallows but I can only imagine how well he covers the topic.
Thanks this is another fantastic tutorial. And the opening picture is beautiful! (Don’t feel you have to answer my comment. I don’t want you to burn out!)
Astrid — Chatting with you isn’t the part that causes burnout. I was just overdoing it with the baking and sifting through photos and writing. It’s fun, but it can easily take over my life. I am being more reasonable now. I love comments and knowing that you’re around and reading, always very much appreciated.
Thanks so much for this recipe! The pictures are beautiful and the instructions are easy to follow. It was great fun and a challenge to make these! In my country, it’s almost impossible to get a bottle of Corn Syrup.. so had to make a substitute for that, which failed the first time.
Also, the gelatine powder in the form you use is not available in supermarkets here, so I had to find out how much gelatine sheets I had to use for a good amount of gelatine.
Maybe nice to know for people who can’t get a hand on these ingredetients too, here’s what I did:
For the gelatine, I just used 25 gram of gelatine sheets. Of course weigh them when they are still dry. The amount of water doesn’t matter, just make sure they’re fully covered.
For the corn syrup I made the substitute sugarwater. Put 120 ml water and 120 grams of white sugar in a pan and cook this. When it cooks and all sugar is dissolved, it’s ready (note: it doesn’t get really thik.. don’t overcook cause you’ll get caramel).
This worked real good for me!
Again, thanks for this lovely recipe! When my boyfriend comes over today I will make him a nice cup of hot chocolate with the marshmallows in it 🙂
Hi K — These are some useful guidelines, and thank you for posting them. I didn’t know you can’t get powdered gelatin everywhere. I prefer gelatin sheets myself, but it’s hard for people to find them in regular markets around here. If anyone wants to use gelatin sheets, use the 25 g suggested by K, completely cover them with cold water, wait 5 minutes until they get very soft, like a jelly fish, pull them out of the water, squeeze out the excess water, as though squeezing a sponge, and drop them into the pan as directed by the recipe.
I’m also curious how long the marshmallows keep without corn syrup, so K, if you’re reading this, can you let us know how they held up? Thanks!
So, here I am back again to update you about my marshmallows ;). Friends and family enjoyed them, but today is the day I wouldn’t bring them to my friends anymore ;).
I made the dough saturday evening and let it dry overnight. Sunday I cut them and stored them in a cool dry place (after we ate some of course ;)…). Thursday they weren’t as tasty anymore, but not really bad or something, just not fresh anymore. They’re still very very nice in a cup of hot chocolate ;).
So anyway, they held up nicely for about 4 days.
Hi again, K, and thanks for the update. I love these little experiments and seeing how small variations effect the recipe.
[…] adapted from pastry pal […]
I made this last night/today, and they turned out great. I was pretty worried because I didn’t have any wax paper to put them on, so I just oiled the pan (they came out but it wasn’t the best for their flavor). I also dont have a stand-up mixer so I used a hand mixer and mixed it for an extra minute or two, it turned out great. I frozed them today and I am going to give them as christmas gifts with homemade hot chocolate mix.
Can you please tell me if I can substitute corn syrup with glucose in this recipe?
Thanks in advance!
Hi Eleni,
I came back to this page today after I watched a dutch tv-cook made these. (And because I didn’t remember if I updated about my own marshmallows but I see I actually did, haha). He actually used glucose instead of corn syrup… so it’s possible :).
Since glucose isn’t really easy to get here in the Netherlands (one should go to the confectioner and ask for it, but not all of them are really happy to give it to you) I keep to my own subtitute of sugarwater as I told about a few comments earlier…
I know this comment probably isn’t very useful for you anymore but maybe it is for other people who look it up :). I had a lovely time making these and feel like making them again right now, haha.
Thanks so much for this great recipe and easy to follow instructions! I just made this (with my 3 year old son) today as bunnies, for Easter tomorrow. It worked out so well despite being the first time we’ve ever made marshmallow! We covered the bunnies in coconut – yum! Thanks again.