Classic brioche and mixing it up, so to speak
November 15th, 2010 | 30 Comments
Lately, I’ve been in a bit of a rut. The daily routine has been getting to me. Everyday, the same old thing: get up early, take a sleepy shower, pick out something to wear, shove some hurried breakfast in, ride the commuter train, sit at the office, work on stuff that doesn’t interest me much, get told what to do, push the computer mouse around, get on the train back, try and fit in some exercise, make dinner, clean up and then it’s nearly bed time. Get up the next day and do it again.
Drudgery. Shouldn’t life be more exciting? Shouldn’t it be worth getting up for? I never imagined that I’d be dreading the every day.
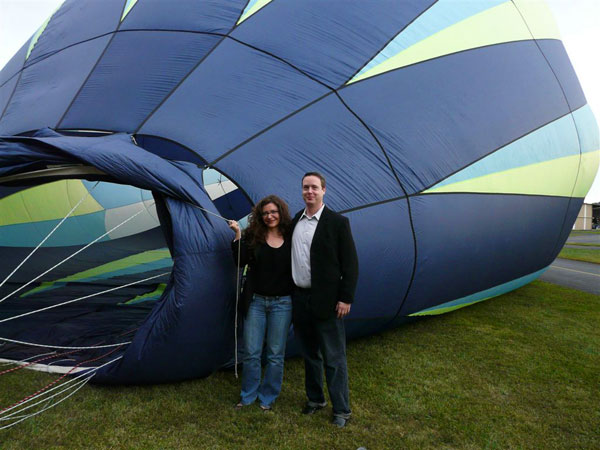
helping fill up the balloon with hot air
Sitting on the train, my mind starts wandering to visions of escape. Sometimes I’m in a secluded lodge with a crackling fireplace and big picture windows overlooking vast mountainscapes, where every breath smells of pine trees and feels like freedom. I imagine myself sunk in a plush arm chair, leisurely clacking away on a laptop, while sipping some hot spiced cider. Another fantasy has me at a beach house, reclined on a spacious deck, with a plateful of french toast and plump juicy strawberries in my lap. Nowhere to go and not a care in the world. All I can hear is the hum of the sea.
And we’re off!
After one particularly rough day, something occurred to me. Why couldn’t I live it, instead of just dream it? What I needed was to shake things up. I had to take control and create fun experiences for myself.
I whipped out some paper, and made a bucket list of sorts, things that I would sometimes come across in passing and offhandedly say “Oh, I’d like to try that some time”, though that sometime would never come.
’round the corner
Some things on the list were large, like spending a whole summer on the coast of Maine, or getting pampered in a top notch destination spa. These would require some planning and saving. Other things were small, like going for walks in my leafy neighborhood, or reading a great book without feeling like I should be doing something more “important.” Those things were easy to incorporate right away, I just had to make the time.
What I really craved right then was an out of the ordinary, transporting day that would make me forget about the routine for a while.
So I called up the hot air balloon guy.
Hot air balloons live in children’s books and scenic calendars. They don’t seem quite real. Yet the thought made me feel as elated as eating a hot fudge sundae. The friendly proprietor told me to come at dusk because that is when the wind conditions are best.
blowing’ in the wind
Admittedly, I was a little nervous during the drive over, but pleasantly so. Sure, I knew we’d be high up in the air with nothing to hold us in but a wicker basket that barely reached the waist, but when the pilot told me he’d taken over 17,000 people up without incident, I started to relax. Especially when, after we took off, he perched himself right on the edge of the basket, with legs dangling, like he was on a park bench. We began to slowly, gently, glide upward. There were no bumps, no turbulence, just a smooth ascent toward the sky.
can this be really real?
I could see everything in every direction. All the trees, and hills and ponds. All the houses, and cows, and roads. All the other balloons floating off in the distance. And I heard nothing. Just peace. And my stress started to fall away. I forgot I was me for a while and just concentrated on the horizon.
catch ya on the flip side
the competition
The magic of the day filled the car all the way home and I wanted to find some way to prolong it. I decided to put together a dreamy breakfast that would make me want to leap out of bed the next morning. This could only involve brioche. Not only does its French pedigree conjure up images of all sorts of countrysides, but it’s got the distinction of being one of the most extravagant breads in the baking bible. This bread is loaded with butter. And I mean loaded. You could almost say the dough is made from butter with a little flour thrown in. I mixed up the dough the night before and went to bed with a sense of anticipation.
let’s break her down
sitting on the packed up balloon
The next morning, I watched it come to its final rise and I baked it. It plumped up in the oven and intoxicated anyone that came near it with its buttery aroma. I couldn’t help but stand by the oven door, trying to talk it into baking faster, so I could have my slice. I let it cool till it was settled enough to cut into, dabbed on some jam, and bit in.
This bread was so rich, and so soft, the slice needed the support of my napkin, lest it would bend right over on itself. It had a subtle sweetness — perfectly bringing out my coffee’s bitter edge. It was like being on vacation in my own house.
I’d love to add to my bucket list of experiences. Have you done anything out of your ordinary lately that you can recommend? How do you break up your everyday routine?
Classic Brioche
makes one large loaf. Start this dough the day before, and make sure you have 2 hours the next day for a final rise and bake. Plenty of time to let the hunger set in.
1 3/4 sticks (7 oz, 196 g) unsalted butter
1/4 cup (60 mL) milk
2 1/4 tsp (9 g) dry yeast
2 cups (280 g) bread flour, divided
2 tbsp (21 g) granulated sugar
1/2 tsp (3 g) salt
3 eggs
For the eggwash:
1 egg
1 tbsp water
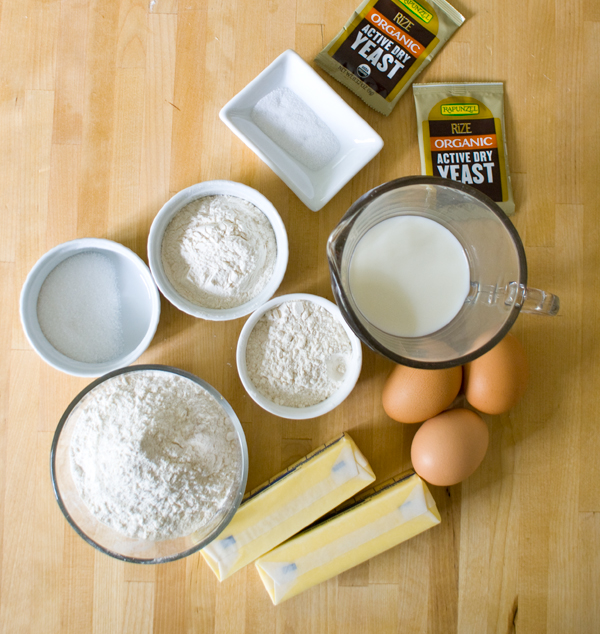
1. The stuff:
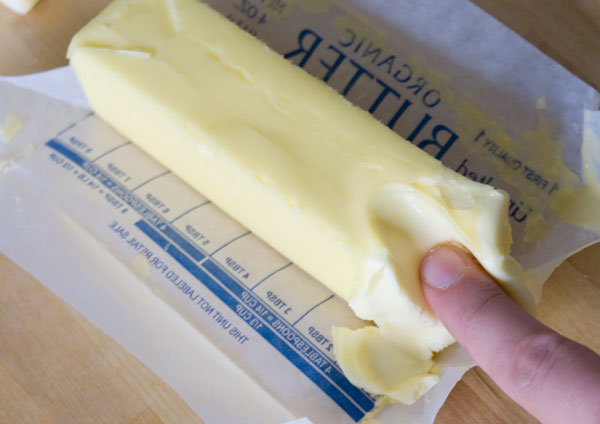
The butter needs to come to room temperature and be soft and yielding. I’m either demonstrating the yield of the butter or I just love poking butter. You decide.
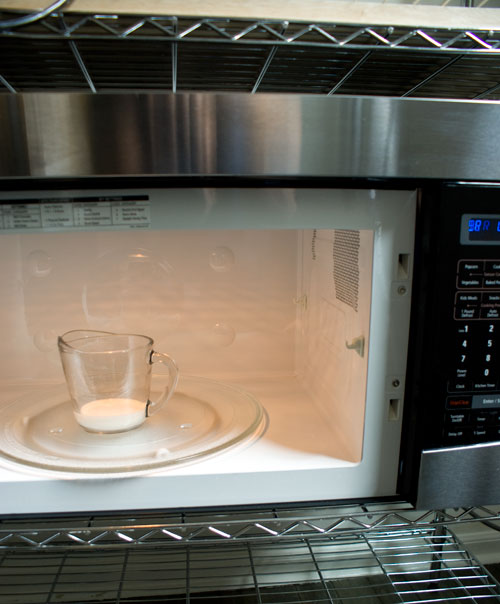
Meanwhile, we’ll start the recipe. Nuke the milk for 20 seconds.
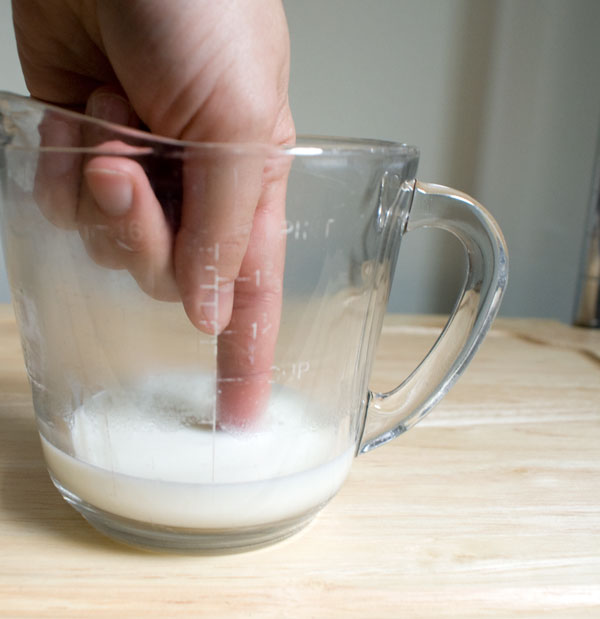
Yeast is alive. ALIIIIVE!!! And it wakes up in warm milk (it especially loves the sugars in the milk). You can certainly measure the temperature of the milk with a thermometer, which ideally should be 110-115 degrees F, but as you can see, I opt for the more scientific approach. I’m a firm believer in learning to gauge these things with your senses. I stick my finger in there (I know. Stop laughing.). It should feel like a warm bath. If I flinch after holding it in there for 5 seconds, it’s too hot and I wait a minute for it to cool down, otherwise it’s likely to kill the yeast. If it seems lukewarm, I warm it for 10 seconds more.
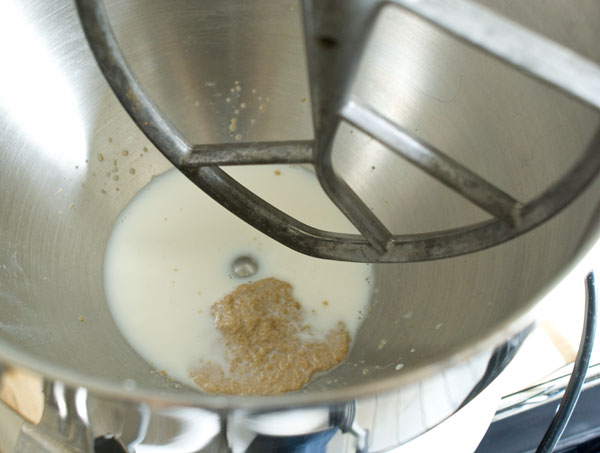
Once the temperature is good, I pour the milk in my standing mixer. The yeast gets sprinkled on top. I stir it up and let it dissolve for 5 minutes.
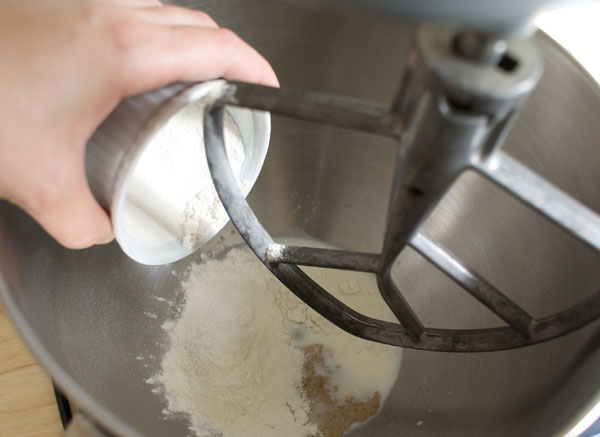
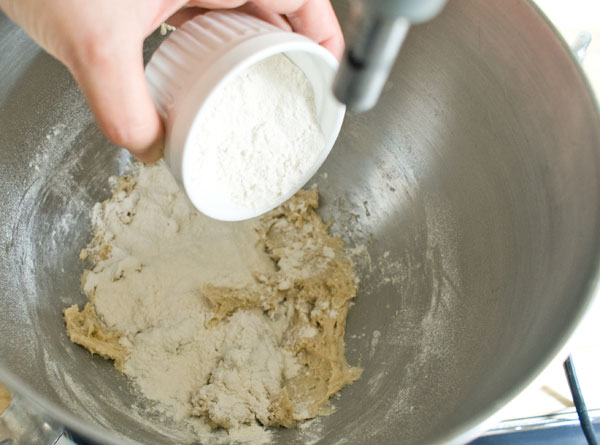
Then I add in about 1/2 cup of the flour (56 g)…
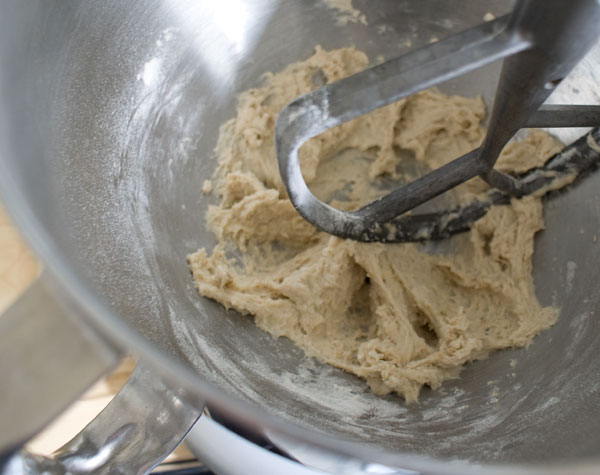
…and mix that up on medium speed. (You can also do these steps manually, in a bowl with a wooden spoon.) We now have our “sponge”, which basically means a mix of yeast, liquid, and flour that starts off a bread.
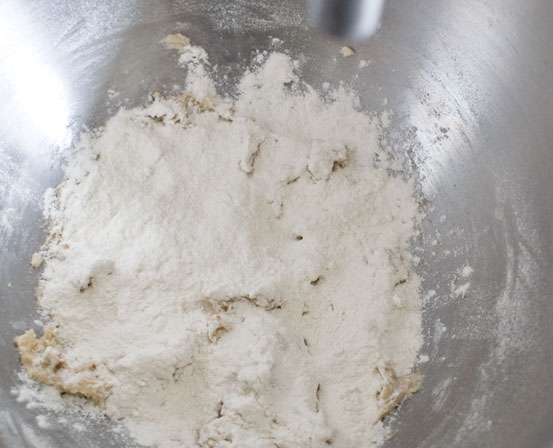
On top of this mix, sprinkle on another 1/2 cup (56 g) of flour.
Make sure it covers the sponge.
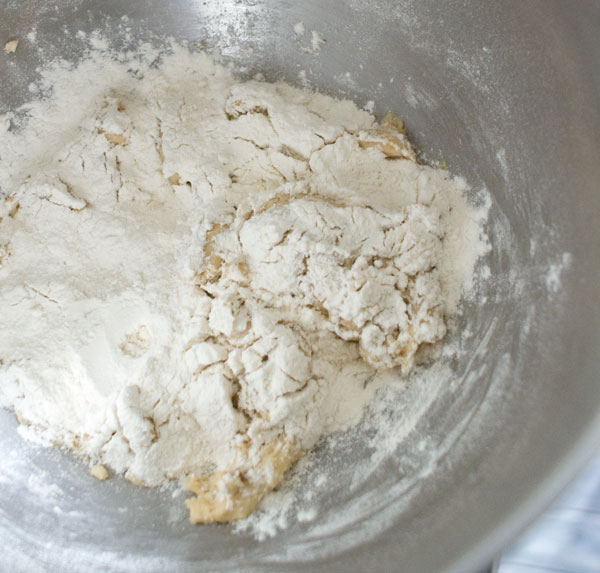
Leave it alone for about half an hour to 45 minutes, and you will see the telltale cracks form in the surface of the flour. This is a good indicator that the sponge is active and fermenting.
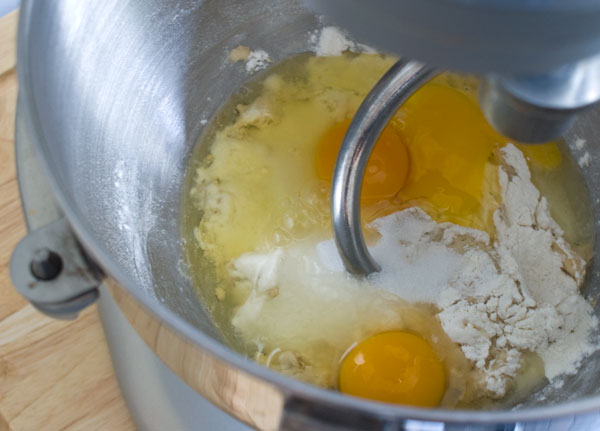
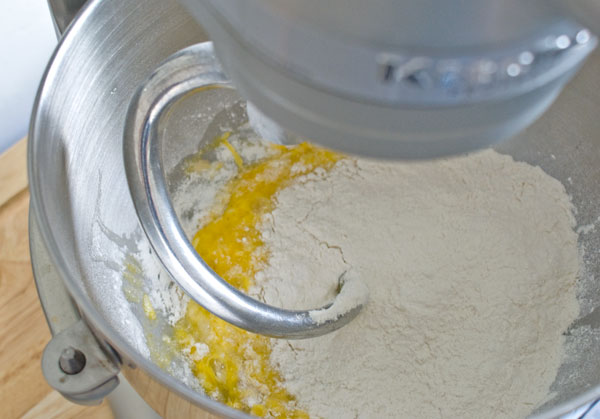
Next, add the eggs, and give those a quick stir.
In goes the rest of the flour, sugar and salt. Do not leave out the salt. It is critical to the flavor of this bread. I once forgot to add it in, and felt like I was eating cotton balls.
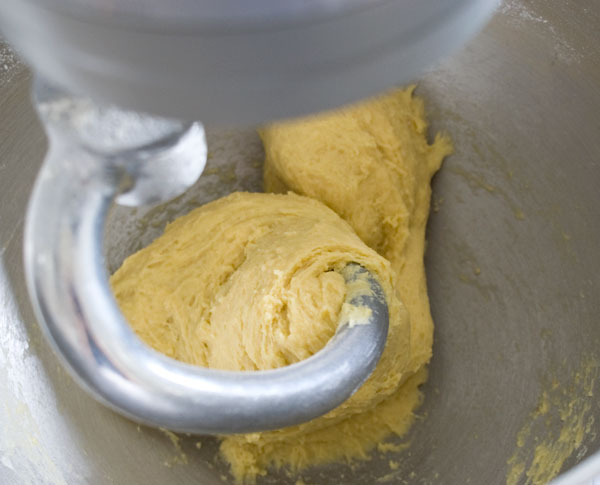
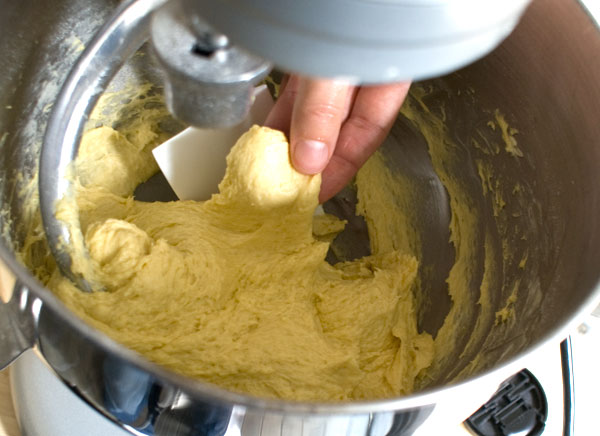
Switch to a dough hook attachment (or if making manually, stick with a wooden spoon), and let it mix on medium speed until it starts to form a ball. You know it’s good when it wraps itself around the hook attachment.
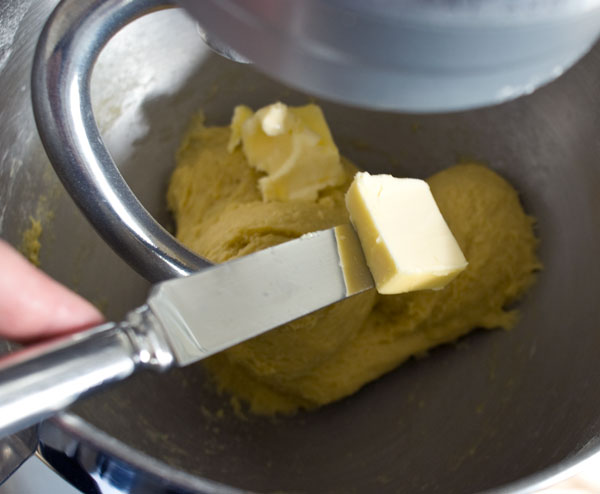
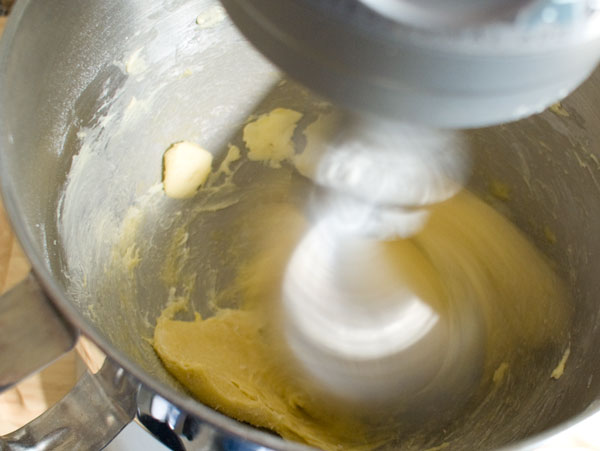
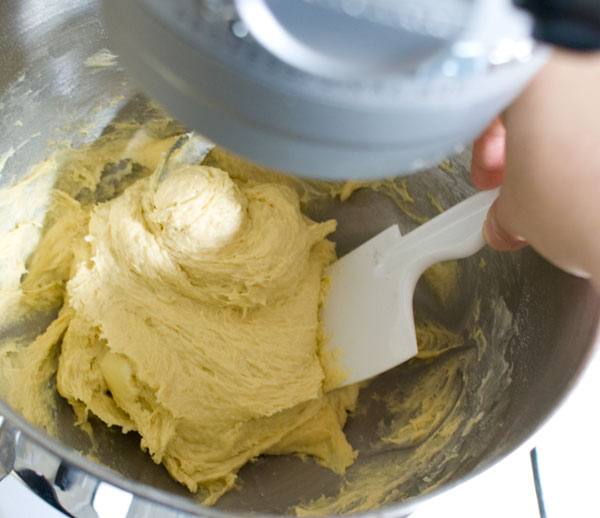
Add the butter a few pieces at a time, and let them incorporate on medium speed before adding more pieces. This will take about 5 minutes. If the dough looks like it’s separating at any point, don’t worry. Keep mixing and it will come together.
Incorporating butter.
Scrape down the sides as needed for even mixing.
Once all the butter is in, let it knead for a good 5 minutes. The dough ends up very soft, stretchy and supple.
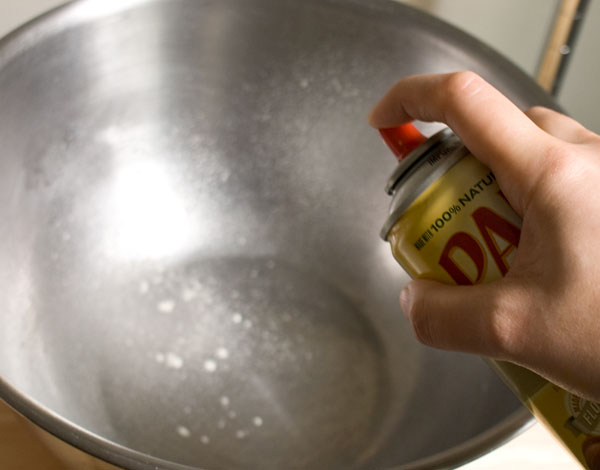
Grab a large bowl, at least twice the size of the dough, and give it a spritz with non-stick cooking spray (or grease the inside of the bowl with a small piece of butter)
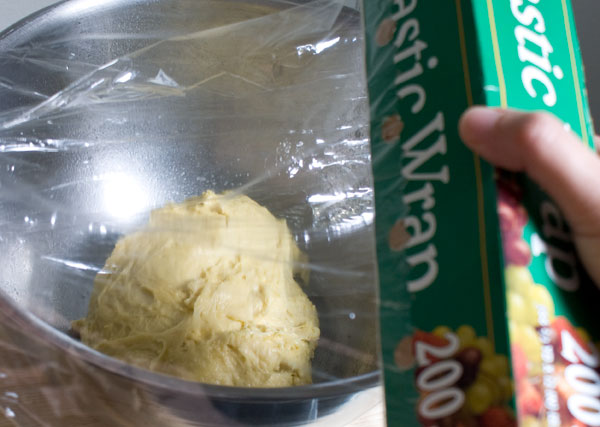
Scrape in the dough, and cover the bowl with plastic wrap.
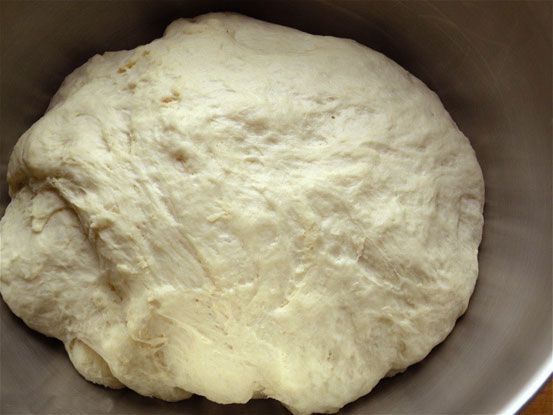
Let it hang out at room temperature for 1 and a half hours, until it’s about double the size.
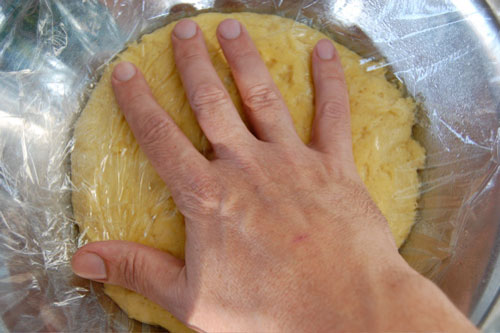
Press it down gently to deflate it and release the gasses.
Then wrap the bowl tightly and refrigerate the dough over night.
La dee dum dee da. Perhaps a balloon ride is on the roster?
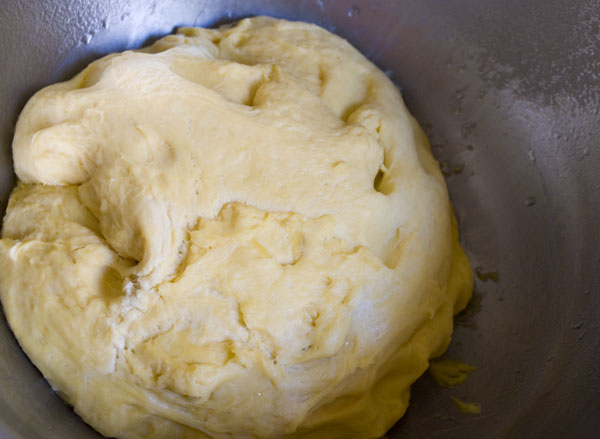
Ok, it the next day. Here’s the cold dough. It looks a little dried out, and that’s ok. It’s managed to grow again (Oh, they grow up so fast. Sniff.) and is now quite firm from the butter having resolidified.
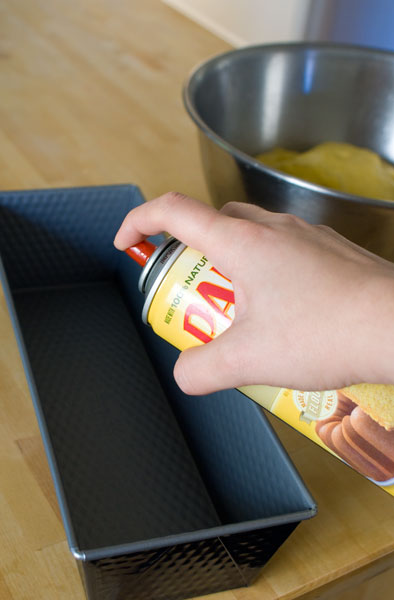
Get a loaf pan ready by giving it a little spritz with the handy-dandy nonstick cooking spray. This loaf pan is 4″ x 12″, but you can get away with a smaller loaf pan, 4 x 11. For even smaller loaf pans, you can divide this dough into a couple of pieces.
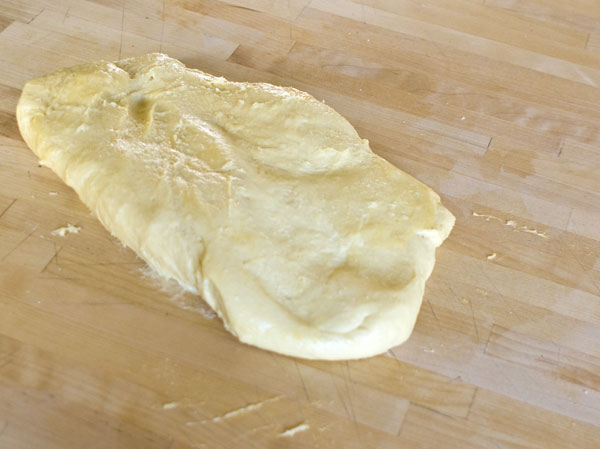
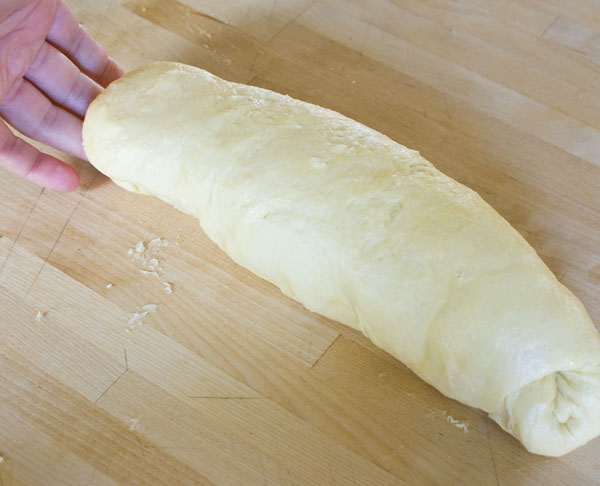
Now I’m going to shape the loaf. I want the crumb (interior texture) to have that swirly look to it. First, I flatten out the dough into a rectangular shape, a little shorter than my loaf pan. Excuse my amoeba shape here.
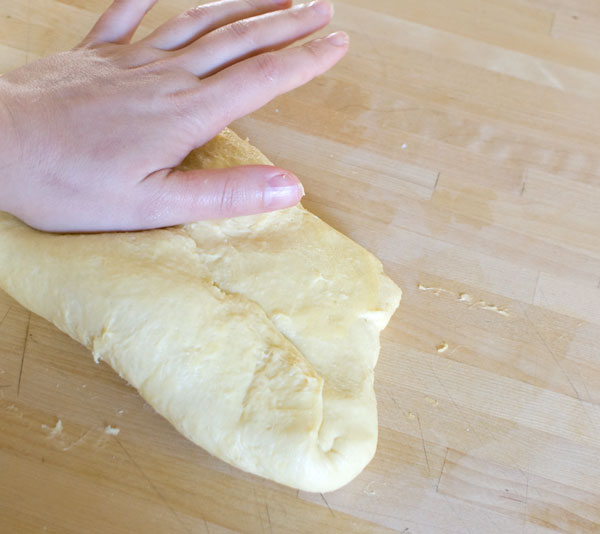
Then, I fold the edge over on itself, pressing it down along the whole length with the heel of my hand. The fold should be tight. I’m trying to avoid forming air pockets.
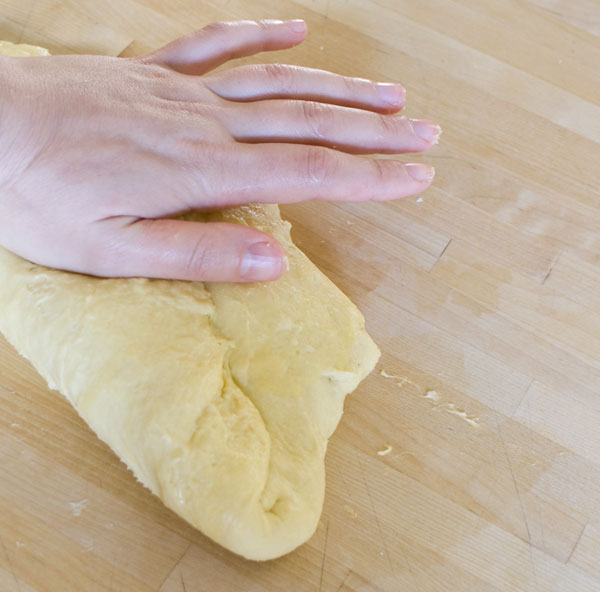
I do the same thing again, folding it over itself, again pressing with the heel of my hand.
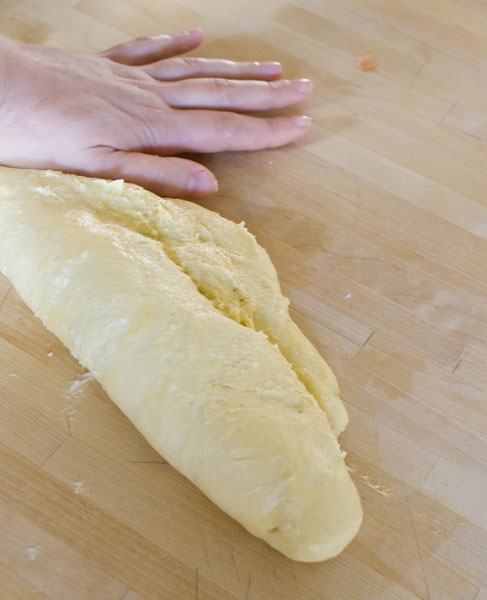
I do this as many times as I need to, until there is no more folding I can do. The seam of the loaf is on the underside.
Then, I tuck the ends under.
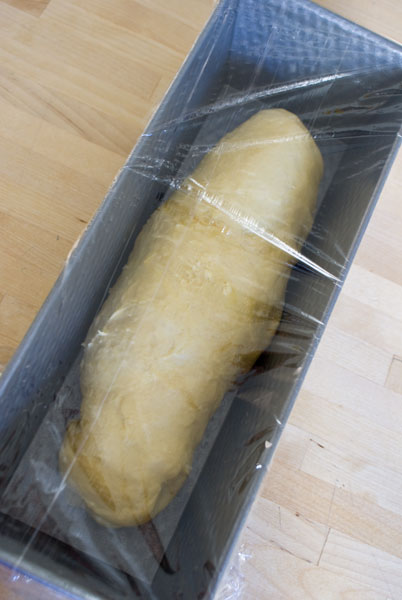
And transfer it to the loaf pan for the final rise. The plastic is loosely draping the pan to keep the loaf from drying out.
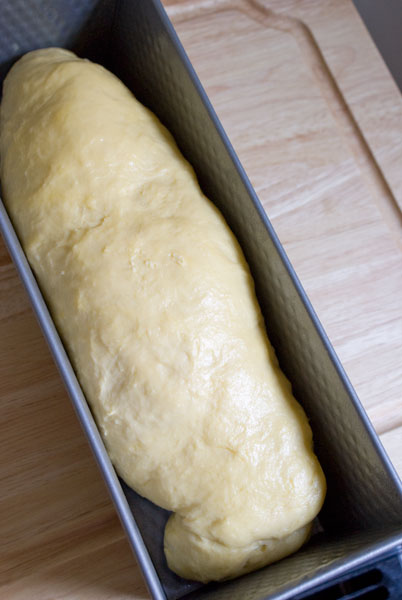
Let this bread rise for 2 hours at room temperature. Again, it will double in size. This time, we will not deflate it.
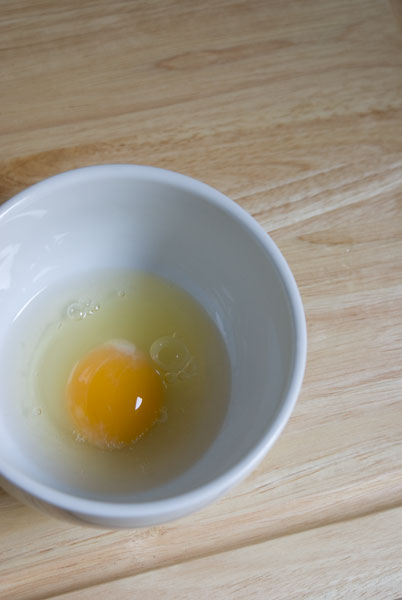
Preheat the oven to 400 degrees F. The bread will get an “egg wash” before baking, which gives the bread that coveted golden color. Here’s an egg, and 1 tablespoon water in a bowl.
A quick whisk.
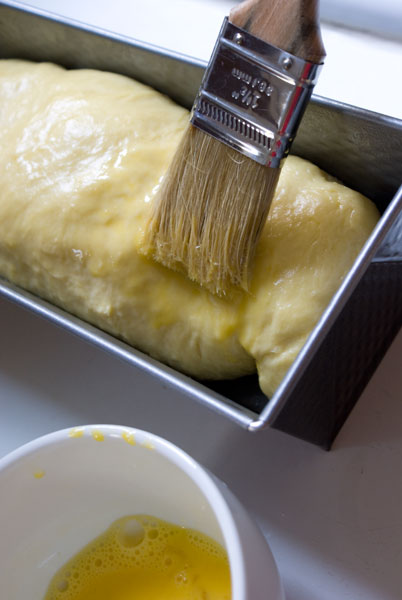
And gently brush the surface. Be careful not to get any on the sides of the pan. The egg may set up while baking and impede the bread from rising to its full potential.
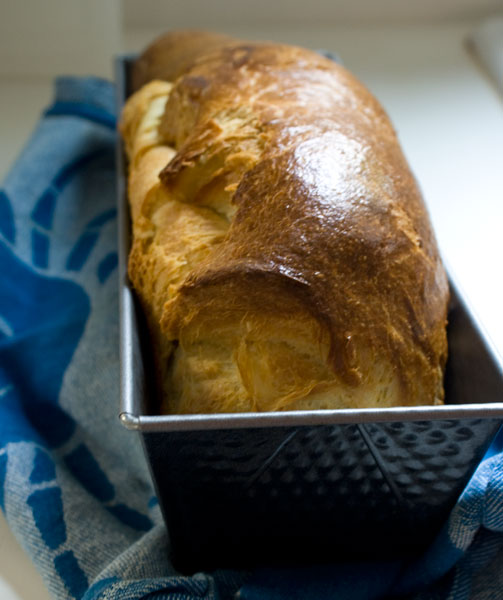
Mine took 30 minutes. Golden on top…
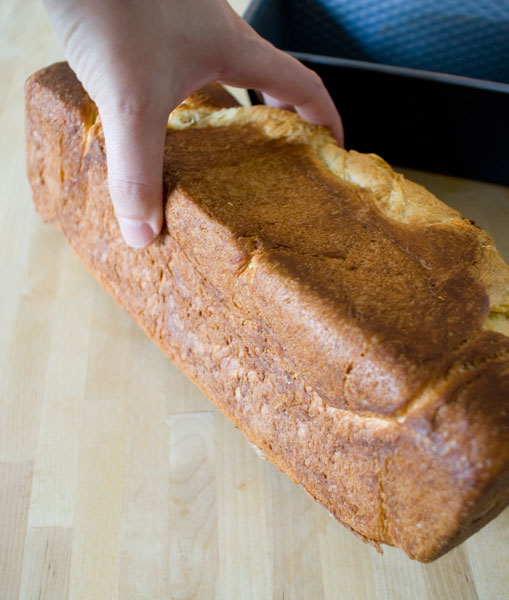
and golden on the bottom…
Bread needs a chance to set up . Let it cool for at least an hour before slicing.
Once cooled, this bread will keep wrapped in plastic for about 3 days. Also great toasted!
Classic Brioche
makes one large loaf. Start this dough the day before, and make sure you have 2 hours the next day for a final rise and bake. Plenty of time to let the hunger set in.
1 3/4 sticks (7 oz, 196 g) unsalted butter
1/4 cup (60 mL) milk
2 1/4 tsp (9 g) dry yeast
2 cups (280 g) bread flour, divided
2 tbsp (21 g) granulated sugar
1/2 tsp (3 g) salt
3 eggs
For the eggwash:
1 egg
1 tbsp water
1. Let the butter come to room temperature. It needs to be soft and yielding. Meanwhile, proceed with the recipe.
2. Microwave the milk for 20 seconds. Yeast is alive. ALIIIIVE!!! And it wakes up in warm milk (it especially loves the sugars in the milk). You can certainly measure the temperature of the milk with a thermometer, which ideally should be 110-115 degrees F, but I’m a firm believer in learning to gauge these things with your senses. I stick my finger in the cup (I know. Stop laughing.). It should feel like a warm bath. If I flinch after holding it in there for 5 seconds, it’s too hot and I wait a minute for it to cool down, otherwise it’s likely to kill the yeast. If it seems lukewarm, I warm it for 10 seconds more.
3. Once the temperature is good, I pour the milk in my standing mixer. The yeast gets sprinkled on top. I stir it up and let it dissolve for 5 minutes.
4. Then I add in about 1/2 cup of the flour (56 g) and mix that up on medium speed. (You can also do these steps manually, in a bowl with a wooden spoon.) We now have our “sponge”, which basically means: a mix of yeast, liquid, and flour, that starts off a bread.
5. On top of this mix, sprinkle on another 1/2 cup (56 g) of flour. Make sure it covers the sponge. Leave it alone for about half an hour to 45 minutes, and you will see the telltale cracks in form on the surface of the flour. This is a good indicator that the sponge is active and fermenting.
6. Next, add the eggs, and give it all a quick stir.
7. In goes the rest of the flour and salt. Do not leave out the salt. It is critical to the flavor of this bread. I once forgot to add it in, and felt like I was eating cotton balls.
8. Switch to a dough hook attachment (or if making manually, stick with a wooden spoon), and mix on medium speed until it starts to form a ball. You know it’s good when it wraps itself around the hook attachment.
9. Add the butter a few pieces at a time, and let them incorporate on medium speed before adding more pieces. This will take about 5 minutes. If the dough looks like it’s separating at any point, don’t worry. Keep mixing and it will come together. Scrape down the sides as needed for even mixing.
10. Once all the butter is in, let it knead for a good 5 minutes. The dough ends up very soft, stretchy and supple.
11. Grab a large bowl, at least twice the size of the dough, and give it a spritz with non-stick cooking spray (or grease the inside of the bowl with a small piece of butter.) Scrape in the dough, and cover the bowl with plastic wrap. Let it hang out at room temperature for one and a half hours, until it’s about double the size.
12. Press it down gently to deflate it and release the gasses. Then wrap the bowl tightly and refrigerate the dough over night.
13. Ok, it the next day. The cold dough may look a little dried out, and that’s ok. It’s managed to grow again and is now quite firm from the butter having resolidified.
13. Get a loaf pan ready by giving it a little spritz with the handy-dandy nonstick cooking spray. My loaf pan is 4″ x 12″, but you can get away with a smaller loaf pan, 4 x 11. If you have even smaller loaf pans, you can divide this dough into a couple of pieces.
14. Now I’m going to shape the loaf. I want the crumb (interior texture) to have that swirly look to it. First, flatten out the dough into a rectangular shape, a little shorter than the loaf pan. Then, fold the edge over on itself, pressing it down along the whole length with the heel of your hand. The fold should be tight, to avoid forming air pockets.
Do the same thing again, folding it over itself, again pressing with the heel of your hand.
Do this as many times as needed, until there is no more folding that can be done. The seam of the loaf is on the underside. Tuck the ends under.
12. Transfer it to the loaf pan for the final rise. Cover loosely with plastic wrap to keep the loaf from drying out.
13. Let this bread rise for 2 hours at room temperature. Again, it will double in size. This time, we will not deflate it.
14. Preheat the oven to 400 degrees F. The bread will get an “egg wash” before baking, which gives the bread that coveted golden color. Whisk together an egg, and 1 tablespoon water in a bowl.
15. Gently brush the surface. Be careful not to get any on the sides of the pan. The egg may set up while baking and impede the bread from rising to its full potential.
16. Bake. Mine took 30 minutes. It should be deeply golden on the surface and the underside. Let cool before slicing.
17. Once cooled, this bread will keep wrapped in plastic for about 3 days. Also great toasted.
30 Responses to “Classic brioche and mixing it up, so to speak”
Post a Comment
Your E-Mail will be kept private. * = required fields.










Congratulations for deciding to do something special for yourself! (Especially something as awesome as flying!) I’ve tried rappelling (abseiling) and after I got over my fear of falling, I loved it. If you have the chance, try it!
The brioche looks great and it’s very close in ingredients to what we call ‘cozonac’ in Romania. We add raisins (with rum!), nuts, pieces of Turkish delight, a mix of poppy seeds and sugar and sugar on top of the egg wash and it’s the traditional dessert for Christmas. We usually bake at least 3 of them (from 1.5kg of flour), each with its own filling 🙂
Hey Rox, I’ve never heard of rappelling before and I just looked it up. Honestly, it looks totally scary, and I have to hand it to you for trying it. I’d have to get over my fear of heights! (I know I’m contradicting myself because of the very high balloon ride, but that somehow seems different). Thanks for bringing up this totally new (to me) activity.
And those are great additions to make brioche “special”. Rum raisins. Ahhh. Boozy bread, yes, please.
I’m scared of heights, too 🙂 There’s a special harness and one of the instructors is keeping a second line at all times, so there’s no danger of falling. I’ve done it three times (on team building trips from work) and it gets better each time 🙂 There’s also zip-line (where you don’t have to do anything) which might be easier to do (they’re sometimes done together).
I’m sure you’re right that it’s perfectly safe. My fear, like all fears, is totally psychological and I just have to get over it. This is why I won’t go bungee jumping or jump out of airplanes. The zip-line thing is another story. It looks really exciting, but also kind of scary. You’re just dangling there with nothing below you but thousands of feet (or meters :))! One of these days…
I talk to my bread too!! Wonderful post, as always.
This past week, I learned how to make brioche in pastry class. This bread is so good. Now time to practice.
I’ve not gone hot air ballooning. So, that is still on my bucket list. If you want an idea, how about sky-diving. I did that about 10 years ago. SCARY & FUN…all at once.
Carmen
Hi Carmen — I love hearing about what you guys are doing in FCI. Um, skydiving. Even scarier than rapelling. Seems like everyone loves heights for the adrenaline rush. I might have to get dragged kicking and screaming. Maybe I need something along the lines of a culinary tour through wine country 🙂
So glad to find your blog! The brioche looks amazing 🙂
This looks very tasty. You share your recipes over at http://www.dishfolio.com I am always impressed by bread making it seems so difficult.
Gorgeous looking brioche! Love the step by step photos!!
Lovely read and delicious Brioche. Nice to have dropped here, lovely site. Best wishes.
Life’s been way too boring in my corner of the world lately. It helps to have something to look forward to though. Thanks to my husband’s job, we’re going to Istanbul in the Spring. I haven’t travelled overseas since I was in college (a long time ago!) and I can hardly wait! I need a little more adventure in my life!
I think making brioche can be considered an adventure for some. Yours looks beautiful!
Sanjeeka — I’m so glad you found me!
Deanna — A trip to Istanbul is HUGE! That will be an adventure and a half! I hope we can live vicariously a little.
This is the best food blog ever! Awesome recipes! gonna try them all…
cheers from Brazil!
Aw the air balloon looks fun and you guys are too cute together :). Gorgeous loaf. I’ve been dying to try brioche forever because of all the great things I’ve heard of it.
Lari — Well, thank you! And greetings all the way to Brazil!
Xiaolu — Please, please try brioche. You will not be sorry, I swear.
Believe it or not, sometimes I crave the drudgery of sitting on a train commuting to work. A chance to zone out and not think about anything. Well, anything not baby related! Life is so different from the professional work I was doing before. But one thing is constant in my life. Baking. Not so much of it now, though. Glad you’re back blogging. Am enjoying catching up on your wonderful posts.
Ooo, that first picture has got me hooked! I’ve made the brioche from artisan bread in 5, but it’s always quite cakey, and I want that tear-aparty-type loaf so I think it’s time that I get some bread flour and make this. You make it seems so simple too!
Treating-myself-wise, I went the opposite way and decided to take on some work that I didn’t have to, and I can see it overshadowing my first long holiday in 4 years. Sigh. Anyway, my cheap way to relax is to feed the ducks (using my bread failures, haha, and end crusts sometimes) with my man. Especially awesome in Spring with all the ducklings floatin around! That and baking (eating the baking especially!!).
That bread looks perfect!! Hot-air ballooning looks like fun!! My ultimate dream is to go sky-diving 🙂 <3
Hey Julia — The grass is always greener, huh? Yes, now that you have a baby, I’m sure life is MUCH different. I can imagine that baking time is cut a little short, but ah well, what can you do? Life gets in the way sometimes.
Zo — There IS something so satisfying about feeding ducks, isn’t there? I don’t know if I could sacrifice any brioche, though 🙂
Avanika — Wow, you too with the skydiving? You must have nerves of steel!
My husband took me to Napa Valley a few years ago. He suggested to go on a hot air balloon adventure but I got really nervous and chickened out. What can I say, I’m a wuss! But eating a delicious homemade, toasted brioche, that, I can do! 🙂
Hi Jackie — Just the trip to Napa sans balloon ride would be more than enough excitement for me. Sigh, that would be so nice…
Your brioche turned out beautifully. I’ve tried baking it once and once only, because it was a bit of a disaster.
How awesome to get the opportunity to go up in a hot air balloon!!
Thank you for the recipe! Have to stock up the freezer with bread for my hubby when I will be away next week for 8 days! Great recipe for me to start off with!
Hi Irina, I have made these and I love them made into french toast cuz the soft crumb soaks up all the egg! Yummy!! I have a question though. If I wanna make a double batch, do I double the sponge too? Thanks in advance!
Hey Pei Lin! Mmmm, french toast.
To make a double batch, just double everything. I’ve done it before and it works well.
[…] adapted from Pastry Pal […]
[…] Artisan Bread in 5 (where I get most of my bread recipes, including past brioche recipes) and tried Ina’s delicious looking brioche, as well as the brioche from The Ottolenghi Cookbook. Surprisingly, the latter was a bit of a […]
Oh my giddy aunt, best brioche I’ve ever made! So soft and fluffy. Made by hand yet it was pretty easy compared to most other brioche recipes I’ve come across. Thank you thank you thank you!
Thanks for the wonderful step by step instructions. I would like to try this recipe but using a cone-shaped (or witch’s hat shaped) mould and wonder if it would retain its shape after it’s been baked? 🙂
Chopin — It would retain it’s shape, yes, but it would bake unevenly. The point of the hat would become a charred crisp before the base got a chance to bake through.