Patê a choux (bless you!) for eclairs
March 8th, 2012 | 32 Comments
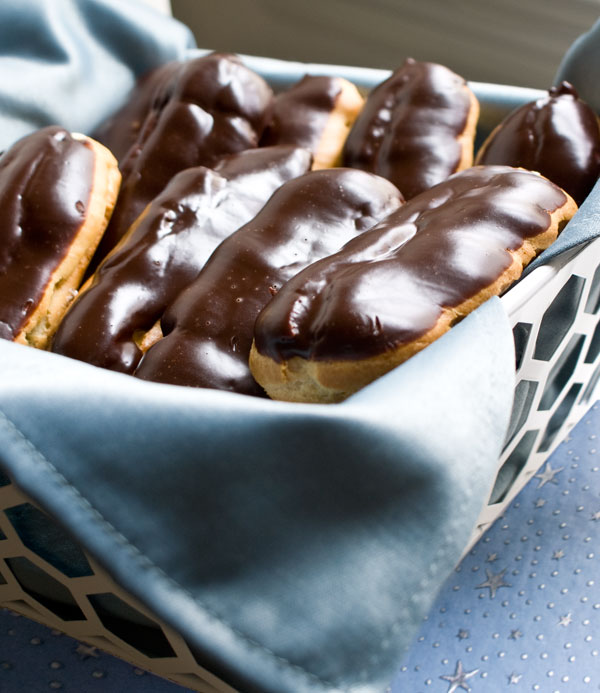
How about this: I’ve never made eclairs before. That’s right, the bomb has been dropped.
The gall of me, then, to show YOU, dear reader, how to make them. Well, let me put your mind at ease by saying that I’ve made pate a choux, which is the base pastry dough for those that might be lost in the French, hundreds of times. Been knee-deep in pastry cream more days than I care to remember. And made this glaze so often, it courses through my veins.
All that’s required is a merging of the three, and presto-change-o, we have a bucket of eclairs.
Again, this just reinforces the point I’ve been harping on: If you have a great list of basic recipes in your repertoir, you can mix and match to create just about any dessert that’s out there. Most of them really are made up of the same components, just rearranged, like Tex-Mex dinners.
For example, other than eclairs, the pate a choux can be used for profiteroles, gougeres, croquembouche, crullers, French-style doughnuts, and other hoity-toity pastry that I can’t think of right now.
The pastry cream can be slathered between cake layers, poured into tart shells and topped with fruit, piped into doughnuts, and other fun stuff that escapes me.
And the chocolate glaze? Where do I begin? I’ve used it here, here and here, for starters. This stuff seems to live perpetually in my fridge.
At first, I tried to lighten the pastry cream by folding in some whipped cream, but the texture really didn’t stand up well against the hardiness of the shell, nor the bitter notes in the chocolate. It just got lost in the shuffle. I really think it’s best to use the pastry cream alone.
Eclairs seem like such a special treat to me. When I was younger, I thought of them as exotic, and would treat them like a treasured pearl when I happened upon one. I’d sit there and take the tiniest of nibbles, trying to make it last longer, savoring the burst of pastry cream that sprang out with every delicate bite. I hope you like them as much as I do.
Eclairs!
In this recipe, I use several sizes of plain pastry tips. At that point, you might as well just get a set, so you can have a bunch of options for future endeavors. Also, the pate a choux is such a chore to clean out of a reusable pastry bag, that in this case I really wished I had disposables. I leave that one up to you. You’ve been warned.
The pastry cream can be made the day before assembly, if you want to break up the labor. The pate a choux is really best the day it’s made, but you can obviously assemble the eclairs well before serving. They’ll still keep pretty well in your fridge for a couple of days.
makes about 16
Pastry cream:
2 cups (480 ml) milk
4 egg yolks
1/3 cup (75 g) sugar
1 teaspoon vanilla extract
1/4 cup (40 g) corn starch
2 tablespoons (30 g) butter
Pate a choux (pastry dough):
1 stick (112 g) butter
1/2 cup (120 ml) milk
1/2 cup (120 ml) water
1/4 cup (50 g) sugar
1 cup (150 g) oz all-purpose flour
5 large eggs
Chocolate glaze:
4 oz (112 g) dark chocolate, finely chopped
1/2 cup (80 g) heavy cream
3 tablespoons (35 g) sugar
1 tablespoon vegetable oil
First, let’s make the pastry cream:
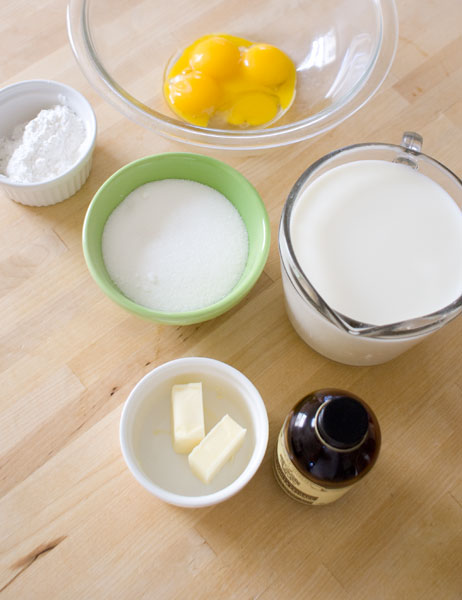
Here we have the loot.
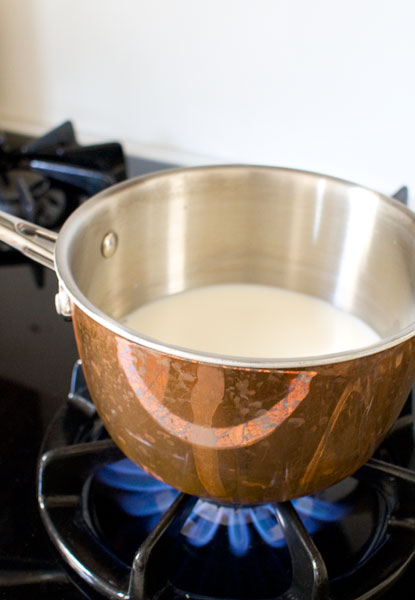
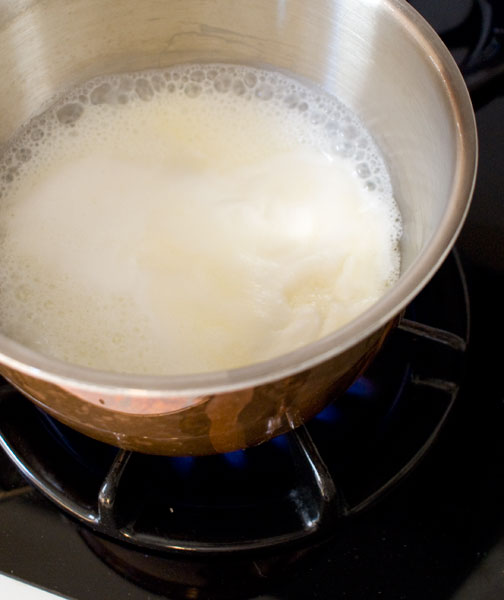
Get that milk heating on high heat in a medium sized pot. (You’ll need the room later when we dump everything back in.)
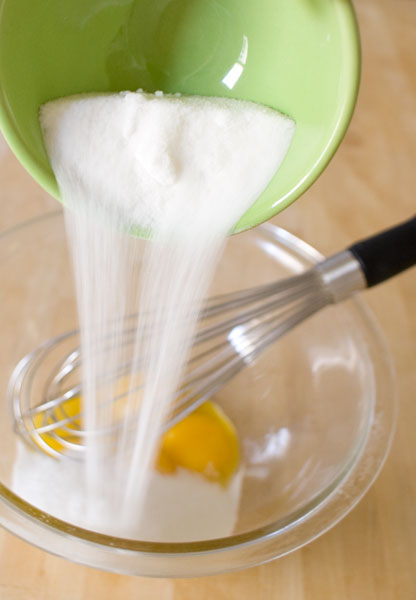
While waiting for it to come to a boil, pour the sugar into the egg yolks, which happen to be all cracked and ready in a large bowl.
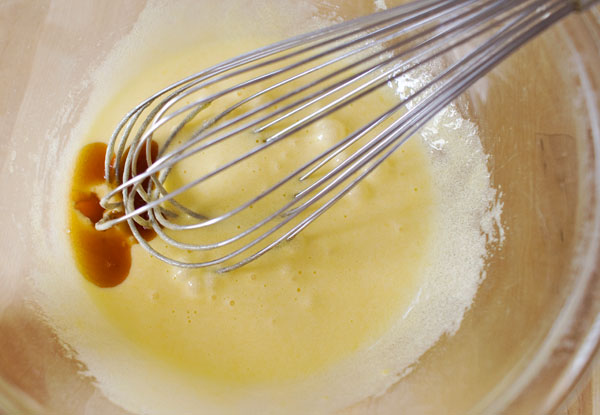
Whisk it all up, and add the vanilla. (Still keeping an eye on that milk?)
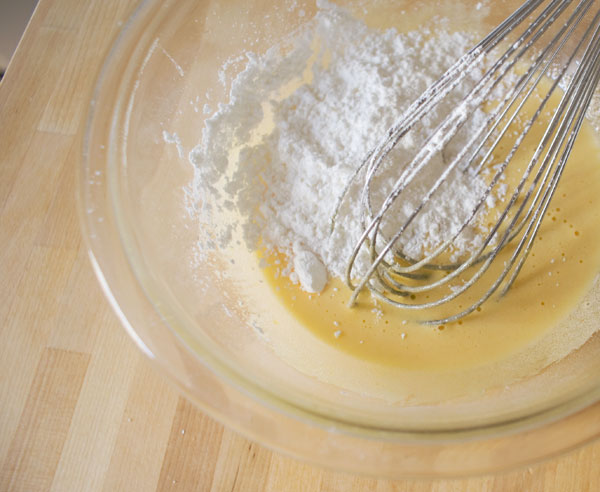
Whisk that in, and sprinkle in the corn starch.
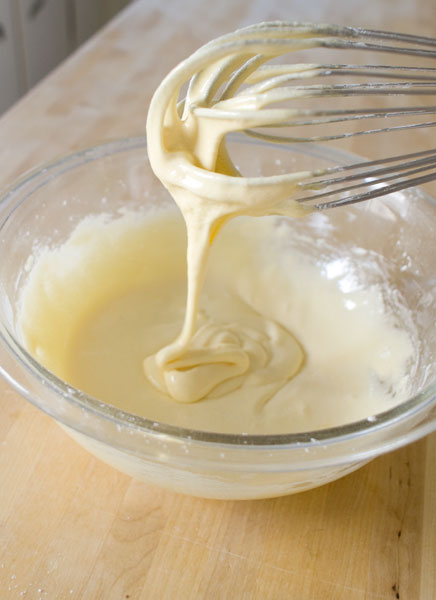
Get that all smooth. It will look thick and ribbony.
Let’s hope that milk is now boiling. If it is, grab the pot…
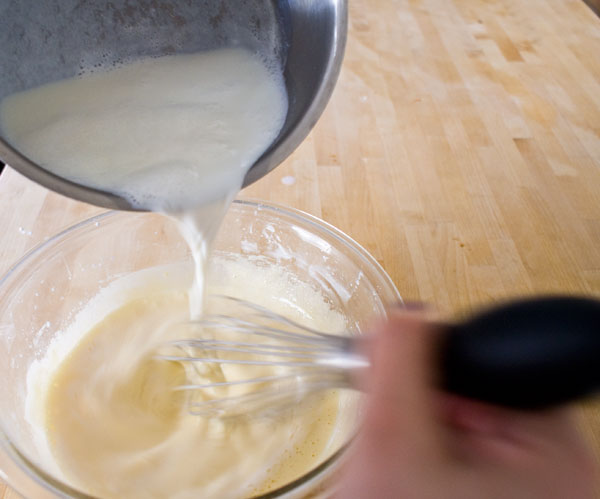
…and slowly, in a steady stream, pour it over the egg yolk mixture, all while whisking. This “tempering” process will keep our yolks from cooking too fast and scrambling.
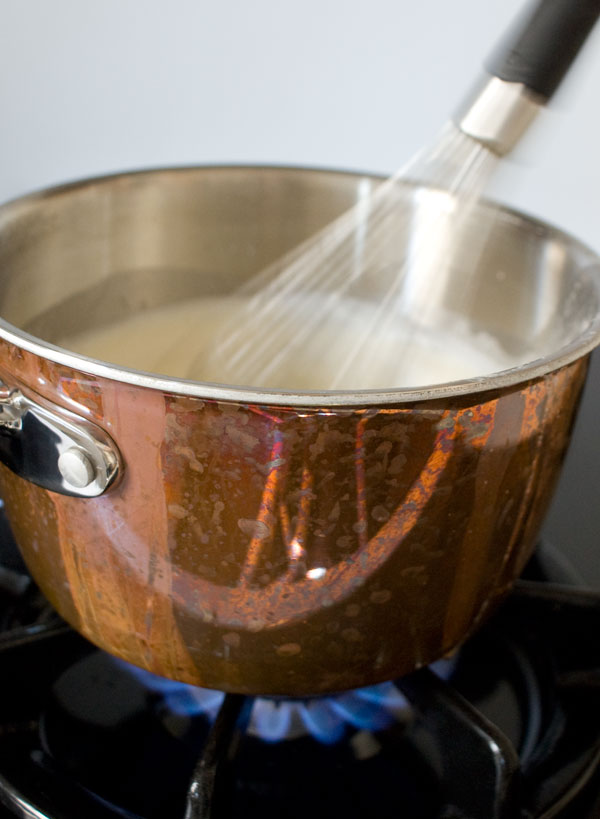
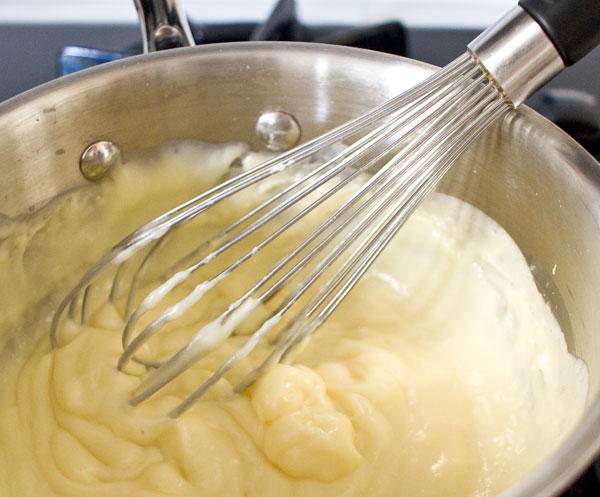
Pour everything back into the pot and get it back over medium high-heat. Whisk the whole time, and be lively about it. Whisk, whisk, especially scraping the bottom and the corners of the pot, so nothing gets a chance to stick and burn.
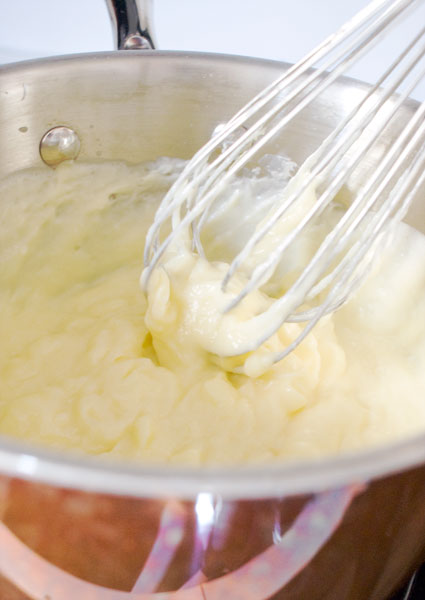
In about 3 minutes, you’ll see a magical thickening transformation. All the cornstarch granules will swell from the combo of heat and liquid and we’ll have a nice, creamy texture. Once you’re here…
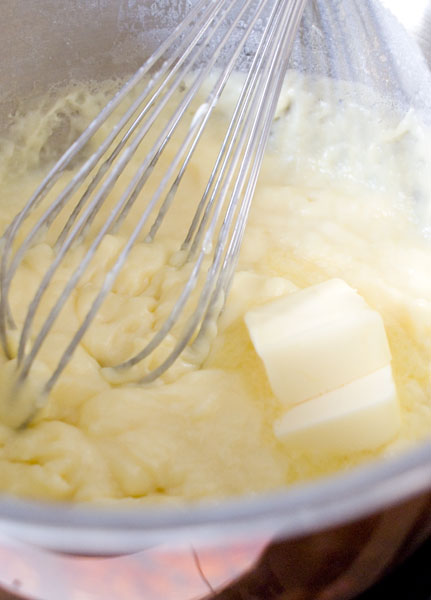
…take that puppy off the heat, and add the butter lumps.
Whisk those in, and you’re left with pastry cream!
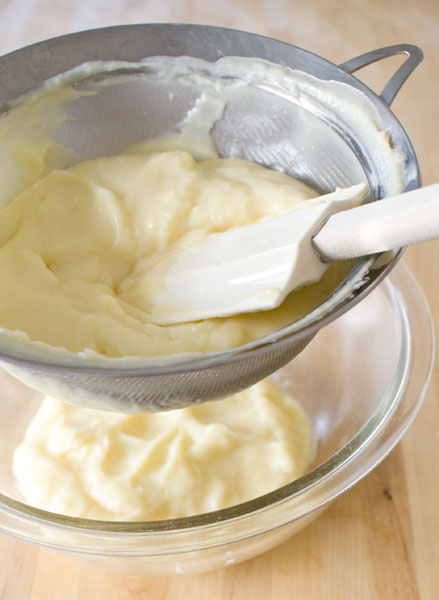
This next step I like to do just in case any stray bits of scrambled egg ended up in my mix. It’s a good refining step, but you can skip it if you don’t have a fine mesh seive. Or you just don’t want refined results! It seems a little too thick to push through at first, but a little pressing and elbow grease gets it through just fine.
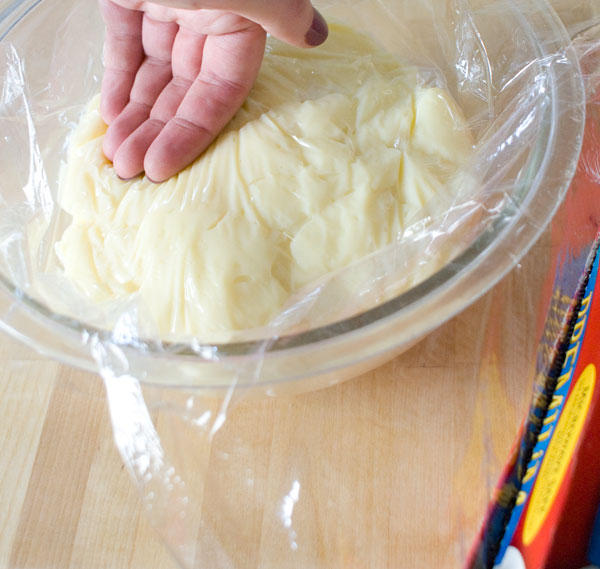
Lastly, put a piece of plastic directly on the surface of the cream. This will keep it from forming a skin that it’s dying to do. Refrigerate the cream for at least 2 hours, or overnight.
Let’s make pate a choux!
Preheat the oven to 400 degrees F.
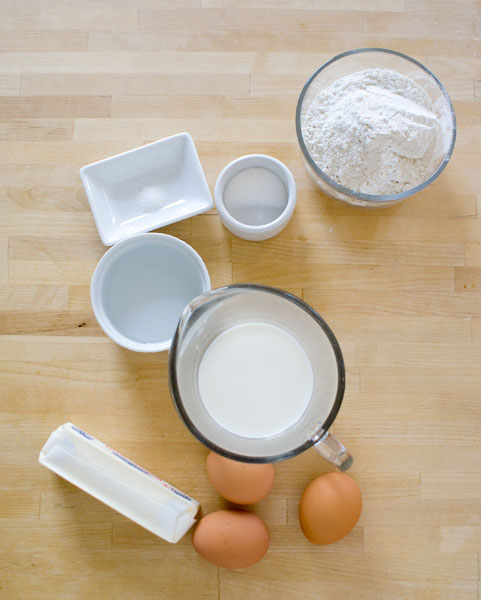
Our monochromatic ingredients:
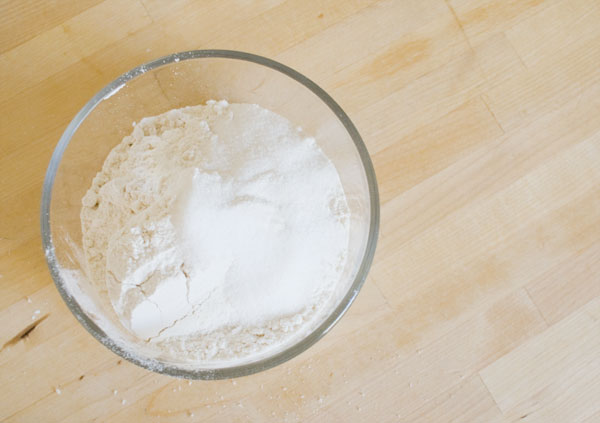
Throw that salt and sugar into the flour bowl, and stir it up with a fork.
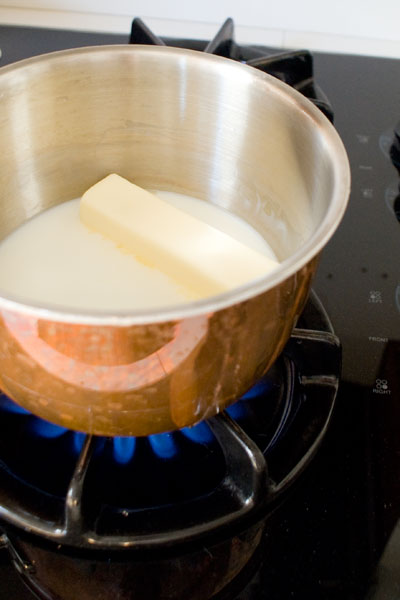
Bring the milk, water and butter to a boil.
Here it is boiling, in case you couldn’t imagine what that looked like.
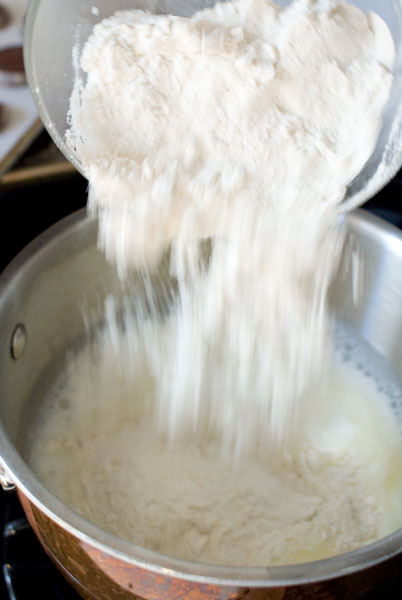
All at once and quickly, dump the flour right into the milk, and start stirring immediately. A sturdy wooden or metal spoon works best, since this is about to get pretty stiff.
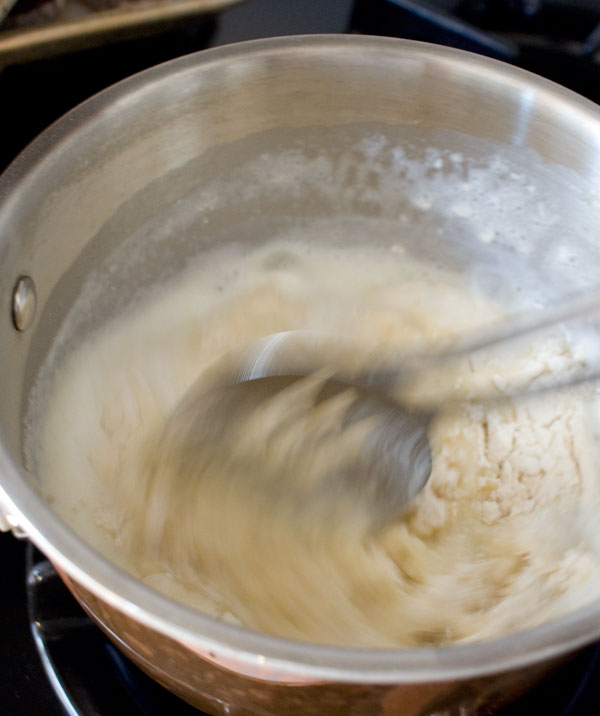
Stir quickly and with muscle, pressing the mix against the sides of the pot to work out the floury pockets.
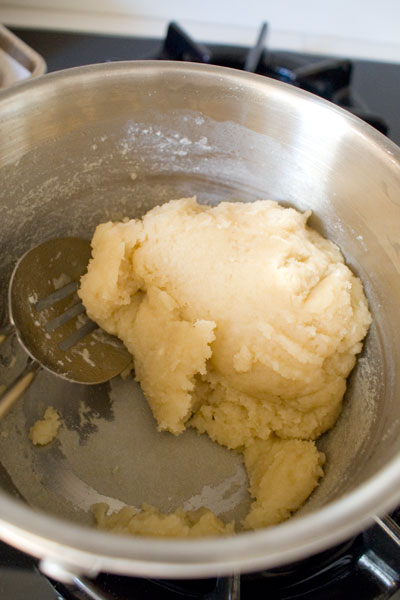
In about a minute, (yes it all goes very quick), it will look like a mass of a ball. I stir and mash for another 15 seconds to make sure there are no more flour bits caught inside, and then…
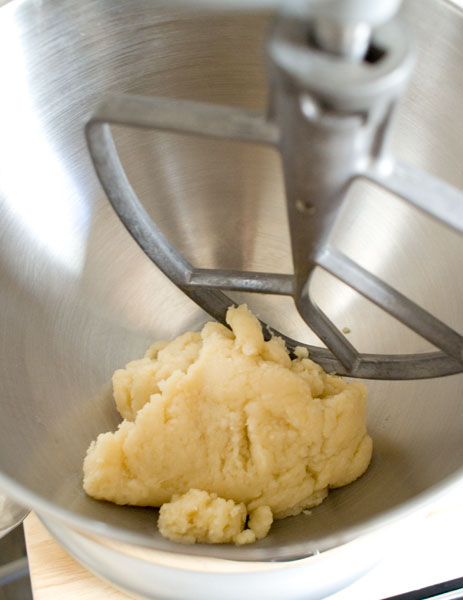
…dump it right into the mixer’s bowl. (If you don’t have a stand mixer, you can do it with a hand mixer, or manually with your wooden spoon. Just dump it into a large bowl, and follow along using elbow grease.)
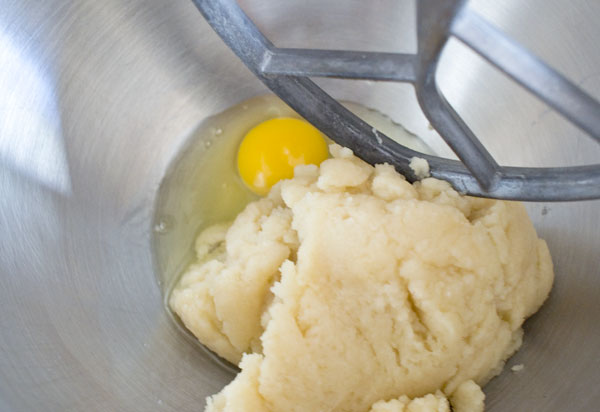
Now, ONE AT A TIME, add the eggs. Do not add another egg until the first egg is fully incorporated. You can mix it in on medium high speed. You really can’t overmix this dough, so don’t worry about how long it’s mixing, or speed.
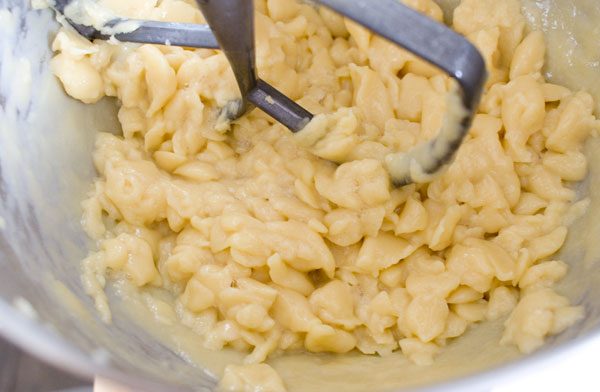
As each egg is added, the mixture will look like dumplings. But in a few seconds the eggs will work themselves in…
…and you’ll have a smoother result. That’s when it’s time to add another egg. The whole addition of the eggs should take about 2 minutes.
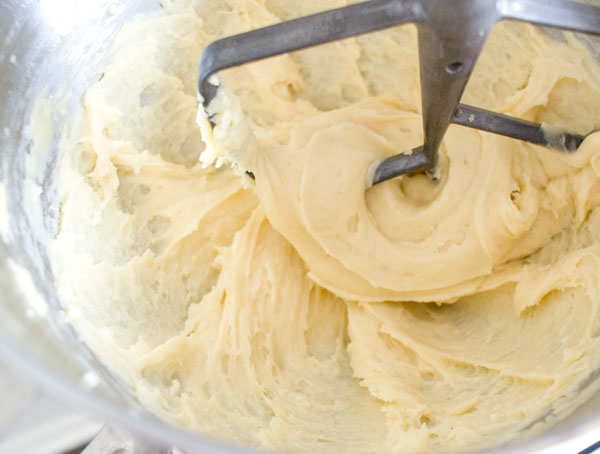
Once all the eggs are added you’ll have a gluey, stretchy batter. It holds it’s shape, but is pretty loose and pasty.
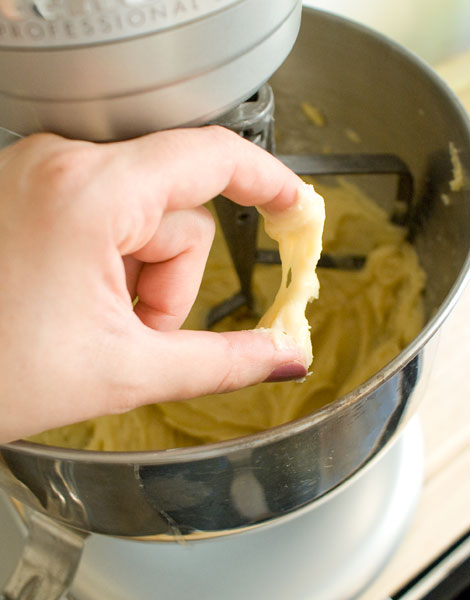
One way I know it’s the texture I want is to grab some and pull it between my fingers. If it stretches like gum, I know I’m in the right zone. If it seems too dry to stretch, you’ll need to add another egg.
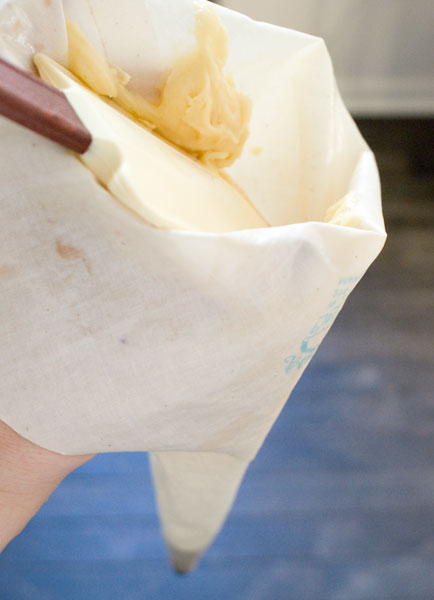
Scoop that stuff into a pastry bag. I apologize in advance about having to clean this pastry bag. It’s a task.
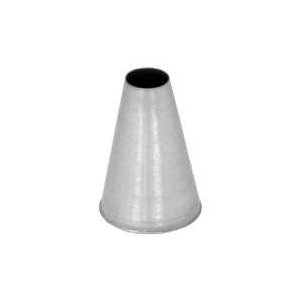
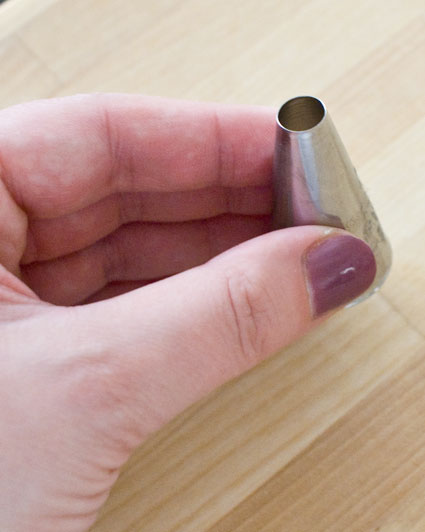
By the way, I used a large, plain pastry tip, something like a PLAIN SIZE # 9.
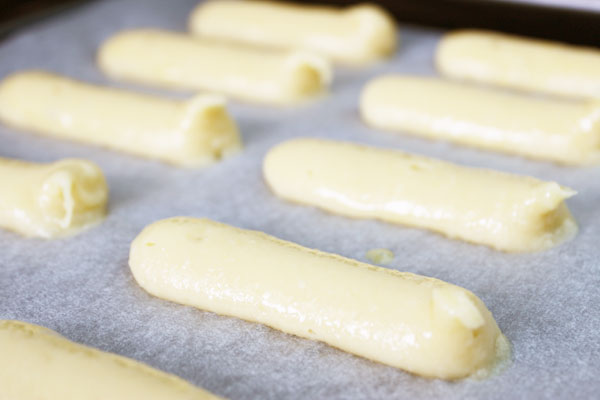
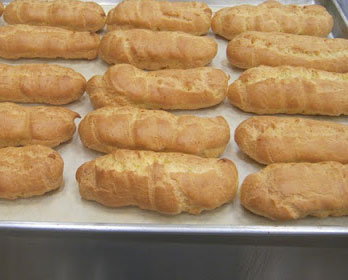
Pipe out jumbo hot dog-sized logs. Be as neat as you can but they don’t have to be perfect. The dough will puff up to twice the size in the oven, and end up having a mind of it’s own anyway. Bake in the preheated 400 degree F oven for about 30 minutes, until the shells are well browned.
Baked! Here they are cooling.
While we wait for them to cool, let’s do the chocolate glaze:
Here’s the stuff.
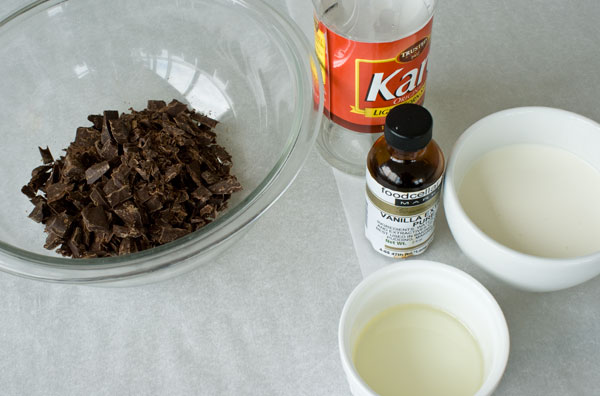
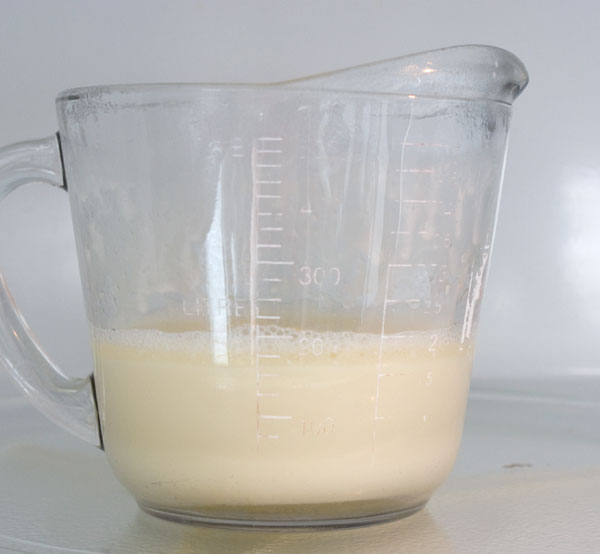
Pour the heavy cream, sugar and oil into a microwave-proof cup and nuke until almost boiling (you might be able to see it gurgling in the cup), about 45 seconds. It will look curdled but pay it no mind. Stir it up to blend.
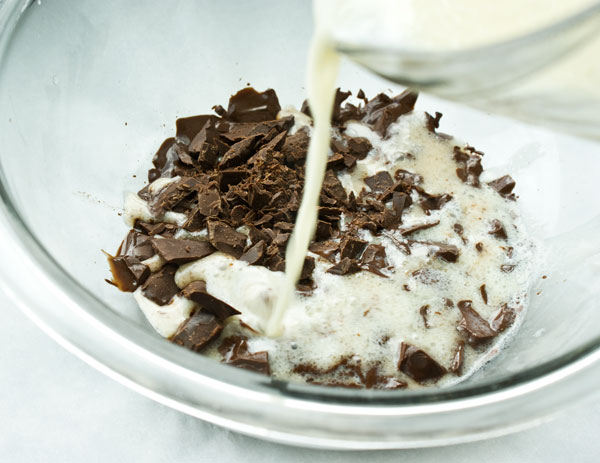
Pour over the chocolate and allow to sit undisturbed for a minute for it to melt through the shards.
Then whisk everything until completely smooth.
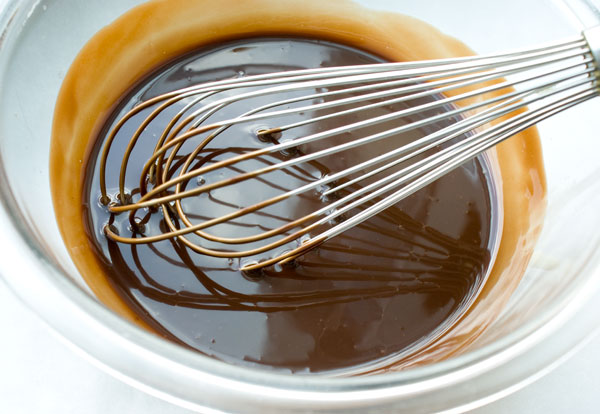
Here’s your chocolate glaze. Yup, it’s that easy. When it’s cold, it’s firm yet soft. When it’s warm, it’s liquid. Very versatile. (You can store this in the fridge for up to a week, but it will firm up. To bring it back to its liquid splendor, microwave it in 30-second intervals and stir between each nuking until it’s saucy.)
The best part: assembly:
Using a plain pastry tip, something like a #7 size…
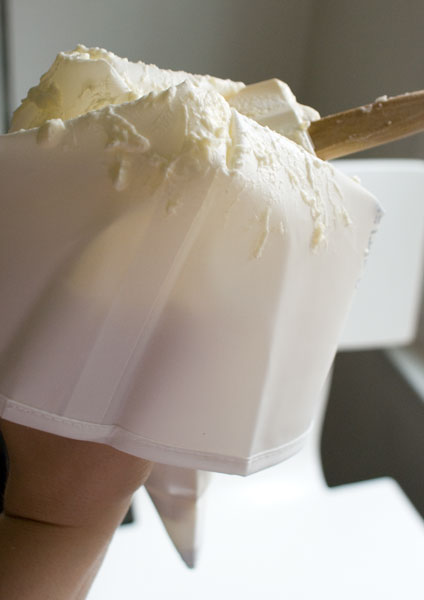
…load up a clean pastry bag with pastry cream. (If it’s too stiff and cold from sitting in the fridge, give it a good stir first.) Try to do a neater job than I did.
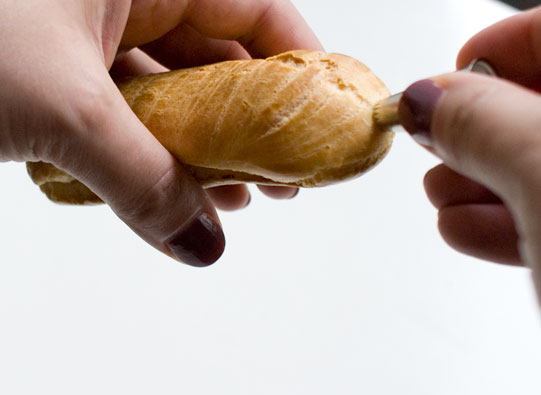
Take a smallish pastry tip, with teeth or without, and poke a hole through the butt of the eclair shell. Avoid pressing too deep or the end might crack apart.
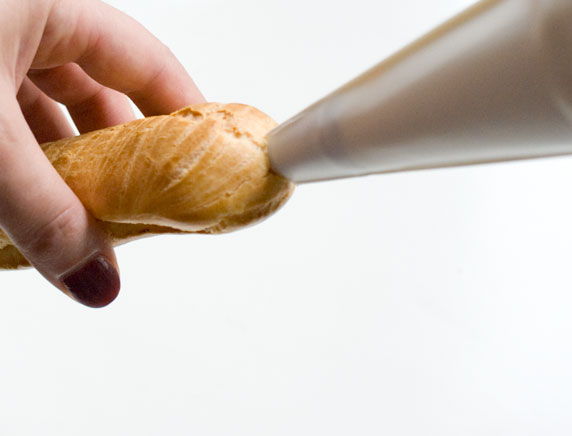
Stick that pastry cream bag in there and pipe until you feel resistance. If it seems like it’s not allowing you to fill the shell all the way through, you’ll want to poke a hole in the other side and fill it from that end too.
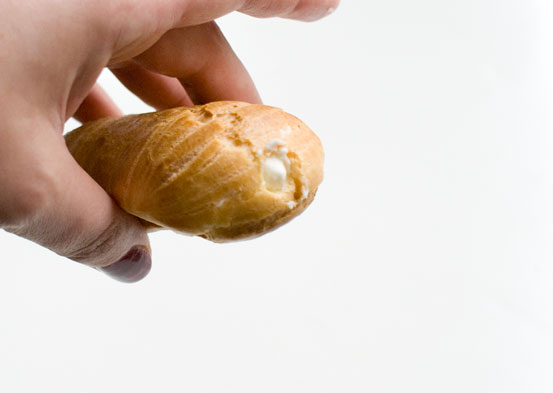
Here we are, all filled up. If the cream gets away from you ends up dribbled on the outer shell, just wipe it off.
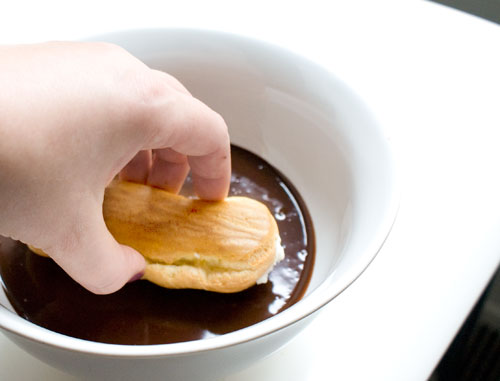
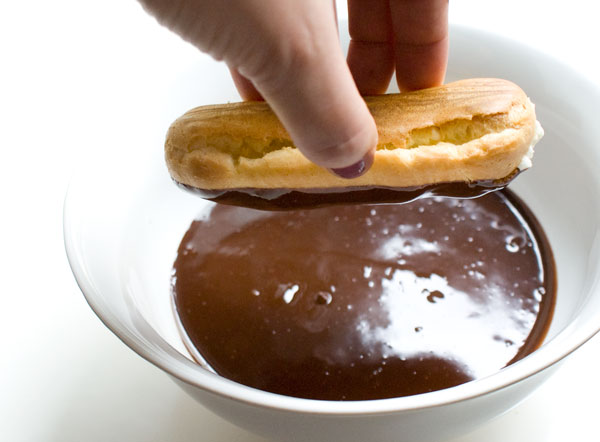
Dip the tops into the chocolate glaze, about 1/3 of the way.
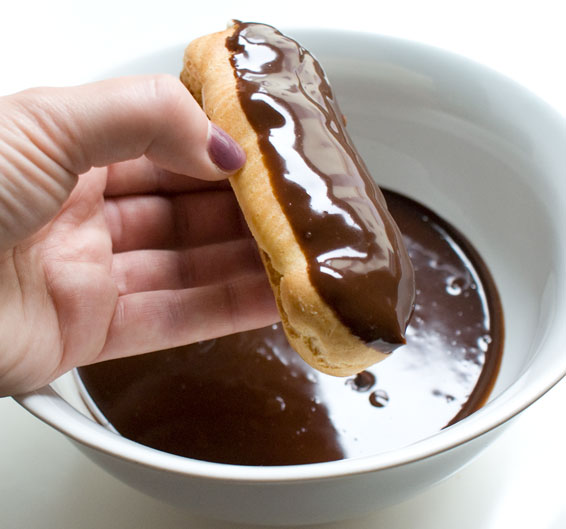
Wait for the excess to drip off…
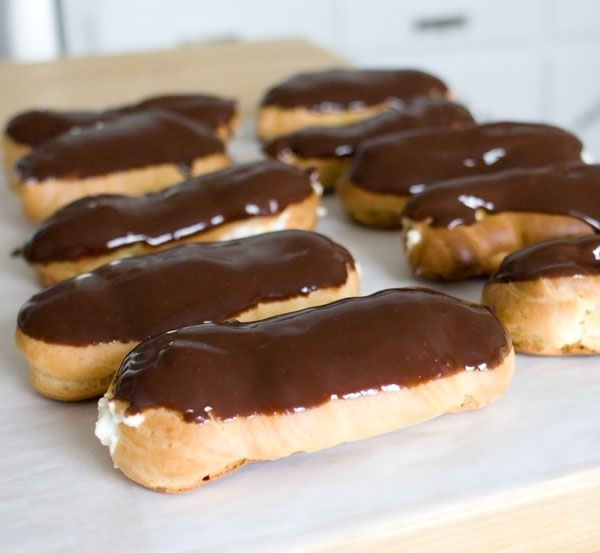
and there you have it.
Let them rest for about 45 minutes to set up. Gobble.
Have another.
Eclairs!
In this recipe, I use several sizes of plain pastry tips. At that point, you might as well just get a set, so you can have a bunch of options for future endeavors. Also, the pate a choux is such a chore to clean out of a reusable pastry bag, that in this case I really wished I had disposables. I leave that one up to you. You’ve been warned.
The pastry cream can be made the day before assembly, if you want to break up the labor. The pate a choux is really best the day it’s made, but you can obviously assemble the eclairs well before serving. They’ll still keep pretty well in your fridge for a couple of days.
makes about 16
Pastry cream:
2 cups (480 ml) milk
4 egg yolks
1/3 cup (75 g) sugar
1 teaspoon vanilla extract
1/4 cup (40 g) corn starch
2 tablespoons (30 g) butter
Pate a choux (pastry dough):
1 stick (112 g) butter
1/2 cup (120 ml) milk
1/2 cup (120 ml) water
1/4 cup (50 g) sugar
1 cup (150 g) oz all-purpose flour
5 large eggs
Chocolate glaze:
4 oz (112 g) dark chocolate, finely chopped
1/2 cup (80 g) heavy cream
3 tablespoons (35 g) sugar
1 tablespoon vegetable oil
First let’s make the pastry cream:
1. Get that milk heating on high heat in a medium sized pot. (You’ll need the room later when we dump everything back in.)
2. While waiting for it to come to a boil, pour the sugar into the egg yolks, which happen to be all cracked and ready in a large bowl. Whisk it all up, and add the vanilla. (Still keeping an eye on that milk?) Whisk that in, and sprinkle in the corn starch. Get that all smooth. It will look thick and ribbony.
3. Grab the pot with the boiled milk, and slowly, in a steady stream, pour it over the egg yolk mixture, all while whisking. This “tempering” process will keep our yolks from cooking too fast and scrambling.
4. Pour everything back into the pot and get it back over medium high-heat. Whisk the whole time, and be lively about it. Whisk, whisk, especially scraping the bottom and the corners of the pot, so nothing gets a chance to stick and burn.
5. In about 3 minutes, you’ll see a magical thickening transformation. All the cornstarch granules will swell from the combo of heat and liquid and we’ll have a nice, creamy texture. Take the pot off the heat, and whisk in the butter lumps.
6. This next step I like to do just in case any stray bits of scrambled egg ended up in my mix. It’s a good refining step, but you can skip it if you don’t have a fine mesh seive. Or you just don’t want refined results! It seems a little too thick to push through at first, but a little pressing and elbow grease gets it through just fine.
7. Lastly, put a piece of plastic directly on the surface of the cream. This will keep it from forming a skin that it’s dying to do. Refrigerate the cream for at least 2 hours, or overnight.
Let’s make the pate a choux:
1. Preheat the oven to 400 degrees F. Throw the salt, sugar and flour into a bowl, and stir it up with a fork.
2. Bring the milk, water and butter to a boil.
3. All at once and quickly, dump the flour right into the milk, and start stirring immediately. A sturdy wooden or metal spoon works best, since this is about to get pretty stiff. Stir quickly and with muscle, pressing the mix against the sides of the pot to work out the floury pockets. In about a minute, (yes it all goes very quick), it will look like a mass of a ball. I stir and mash for another 15 seconds to make sure there are no more flour bits caught inside, and then dump it right into the mixer’s bowl. (If you don’t have a stand mixer, you can do it with a hand mixer, or manually with your wooden spoon. Just dump it into a large bowl, and follow along using elbow grease.)
4. Now, ONE AT A TIME, add the eggs. Do not add another egg until the first egg is fully incorporated. You can mix it in on medium high speed. You really can’t overmix this dough, so don’t worry about how long it’s mixing, or speed. As each egg is added, the mixture will look like dumplings. But in a few seconds the eggs will work themselves in and you’ll have a smoother result. That’s when it’s time to add another egg. The whole addition of the eggs should take about 2 minutes. Once all the eggs are added you’ll have a gluey, stretchy batter. It holds it’s shape, but is pretty loose and pasty.
5. One way I know it’s the texture I want is to grab some and pull it between my fingers. If it stretches like gum, I know I’m in the right zone. If it seems too dry to stretch, you’ll need to add another egg.
6. Scoop that stuff into a pastry bag. I apologize in advance about having to clean this pastry bag. It’s a task. By the way, I used a large, plain pastry tip, something like a PLAIN SIZE # 9.
7. Pipe out jumbo hot dog-sized logs. Be as neat as you can but they don’t have to be perfect. The dough will puff up to twice the size in the oven, and end up having a mind of it’s own anyway. Bake in the preheated 400 degree F oven for about 30 minutes, until the shells are well browned. Let them cool to room temperature.
While we wait for them to cool, let’s do the chocolate glaze:
1. Pour the heavy cream, sugar and oil into a microwave-proof cup and nuke until almost boiling (you might be able to see it gurgling in the cup), about 45 seconds. It will look curdled but pay it no mind. Stir it up to blend.
2. Pour over the chocolate and allow to sit undisturbed for a minute for it to melt through the shards.
3. Then whisk everything until completely smooth. Yup, it’s that easy. When it’s cold, it’s firm yet soft. When it’s warm, it’s liquid. Very versatile. (You can store this in the fridge for up to a week, but it will firm up. To bring it back to its liquid splendor, microwave it in 30-second intervals and stir between each nuking until it’s saucy.)
The best part: assembly:
1. Using a plain pastry tip, something like a #7 size, load up a clean pastry bag with pastry cream. (If it’s too stiff and cold from sitting in the fridge, give it a good stir first.)
2. Take a smallish pastry tip, with teeth or without, and poke a hole through the butt of the eclair shell. Avoid pressing too deep or the end might crack apart. Stick that pastry cream bag in there and pipe until you feel resistance. If it seems like it’s not allowing you to fill the shell all the way through, you’ll want to poke a hole in the other side and fill it from that end too. If the cream gets away from you ends up dribbled on the outer shell, just wipe it off.
3. Dip the tops into the chocolate glaze, about 1/3 of the way. Wait for the excess to drip off, then place on a rack or sheet pan to set up. This will take about 45 minutes.
Gobble one, then have another.
Tags: dessert, eclairs, pastry cream, pastry technique, pate a choux
32 Responses to “Patê a choux (bless you!) for eclairs”
Post a Comment
Your E-Mail will be kept private. * = required fields.




Thanks for the recipe Irina, your eclair looks tasty
Kris, Thanks for reading 🙂
Wow! I never thought about how they were made! While I am not a baker and have NO plans whatsoever to ever make these or anything else, I really enjoyed reading about, and SEEING, how these come together!! Thanks!!! Now I REALLY want to eat some! 🙂
Oh MY, these look good. I was allergic to wheat and eggs when I was very little and I remember looking at eclairs and thinking I wanted one more than anything else in the world. Then when I finally had one, I was so disappointed. My expectation was SO much higher than that commercial and not-very-good example. I’ll bet this one would live up even to my childhood expectations.
Plus you’ve made it look entirely doable.
Perfect timing! The object of my desire happens to love cream puffs and eclairs hehehe seduce and destroy.
Do you bake them at the same temperature all the time? ’cause I’ve seen that this dough must be cooked first at a high temp. (for them to puff) and then lower to finish the cooking…
Thanks and keep posting! I love your step by step photos!
Yes, I cook them at the same temperature all the time. I’ve seen those recipes you’re talking about, where they start at 450 and reduce, but it works just as well to keep them at an even temp. 400 is high enough for them to puff quickly. If you end up experimenting, please report back :).
I have only made eclairs once while I was still a daring baker. Not looking at these until I clear out more egg whites from my freezer.
In the recipe for the pate a choux, you list 5 eggs, but in the pictured ingredients you only show 3 eggs. I made the dough with 5, which the recipe called for, and it seemed way too watery. Also, on the step-by-step direction you say to mix the sugar and salt into the flour, but there is no salt listed in the recipe. One more question: Am I supposed to cool the dough before adding the eggs? I have seen this in other recipes, but you don’t mention it so I just went ahead and mixed the eggs in. My dough is cooking now; if it isn’t right (and I’m pretty sure it’s not) I want to try another batch. Thank you for your time and patience 🙂
I just made eclairs for the first time and taught my daughter and friend how to make them. I also have made pate a choux countless times but never eclairs. I enjoyed reading your post and just about to download your Master the Macron. You can see our eclairs and my site at http://www.noshingwiththenolands.com Cheers, Tara
I hardly find sharing like this; everything is clear with visual presentation. Anyone can develop it though he is not good in cooking with the help for your post. Thank you for making things so simple and easy.
hello, i tried making the dough and once cooked it came out very soft but i followed all the steps and it looked exactly like yours did. In the past 3 weeks i’ve made the eclair dough probably about 5 times and yours was the 6th time lol it doesnt seem like its working. I dont know what to do or I dont even know what im doing wrong. Any advice????????
Tammy — Sounds like your oven temperature may be too low, so your not getting enough rise or crispness. And maybe you need to bake them longer. Try increasing the oven by 25 degrees F.
Pastry pal
Thank you very much for the reply i will try raising the temperature thanks again!!
Hi, thanks for the recipe!
I followed your written recipe and have to report that my eclairs puffed really nice but soon deflated while they cooled to room temp. I followed all your steps and measures precisely and set the oven to 400F.
The eclairs were more browned on top and bottom than in your pics, so I pulled them out at 25 mins.
Do you think that my oven was too hot? Did I pull them out too soon?
Any help much appreciated!
I really enjoy the way you describe everything so thoroughly. I may try making these with my homemade gluten free all purpose flour mixture – I’ll let you know.
Roberto — Try lowering the oven by 25 degrees, and baking for 5 more minutes… Sounds like the outside set very quickly but the inside didn’t get a chance to cook through. And let us know!
I enjoyed reading this you have some great talent!
I am a beginner and I made these today!! What a success!! Thank you! My only regret is I didn’t have a #9 tip for the dough so I had to experiment with a smaller tip. Not the end of the world but the eclairs didn’t come out of the oven very even. It still worked though and tasted great!
Tanvi — Glad you enjoyed them!
I don’t see the amount of salt in the ingredients ?! And it says 5 eggs and in your picture you only have 3?! Please help ! I’m wanting to make these they look amazing !! Thank you 🙂
Hi Michelle,
It’s about a half teaspoon of salt, and do use 5 eggs. There are 5 eggs in the photo, but some of the yolks broke, so it looks like 3 :). Good luck!
what a pity you are not blogging…I really REALLY liked your posts, photos and clear instructions!! =(
I LOVE eclairs! There goes my diet.
Hi
I tried these at 400F and they were very brown on the bottom and very light on top. Deflated almost instantly when taken out of the oven after 30 mins. As to your recipe above, I appreciate the great pictures. I know in the comments you said 1/4 t of salt and you show it in the ingredients picture, but it would be helpful to edit this to actually put it in the ingredients list – I left it out of my mix. Also, about the eggs, in the ingredients picture where you show the butter, salt, sugar, flour, eggs – you only have 3 eggs there (still as whole eggs). Mine too came out more “liquidy” and less gummy than yours did.
I appreciate any guidance.
Hi there!
I’ve been experimenting with eclairs and so far they’ve come out great! I was just wondering about how the inside should be? Mine aren’t crispy in the inside, they are slightly soft and I dont know if they’re raw or if they’re supposed to be like that? Although they still taste good 🙂
Wow,
Got to make these too!
Really nice…Thanx for the recipe
This blog…is absolutely stunning. Just went through the whole thing. Wow…tantalizing. Thank you!!!
Hi, i made these eclairs but the dough didn’t cook properly. I had them on the right temperature and they cooked for around 30-45 minutes. The outside cooked perfectly but inside there was a small layer of raw pastry, how do i fix this? Do i need to allow the pastry to dry? Thanks for the help.
Hi, i made these eclairs but the dough didn’t cook properly. I had them on the right temperature and they cooked for around 30-45 minutes. The outside cooked perfectly but inside there was a small layer of raw pastry, how do i fix this? Do i need to allow the pastry to dry? Thanks for the help.
Hi Lily — Thanks for giving these a try. If they were truly raw, I’d say try baking for another 5-10 minutes. You can “sacrifice” one while they are in the oven by tearing into it before you take out the whole sheet pan, and seeing if the interior looks to your liking. Though I will also say that the inside is quite soft once cooled, and that is normal.