Quadruple Chocolate Cake
November 19th, 2009 | 84 Comments
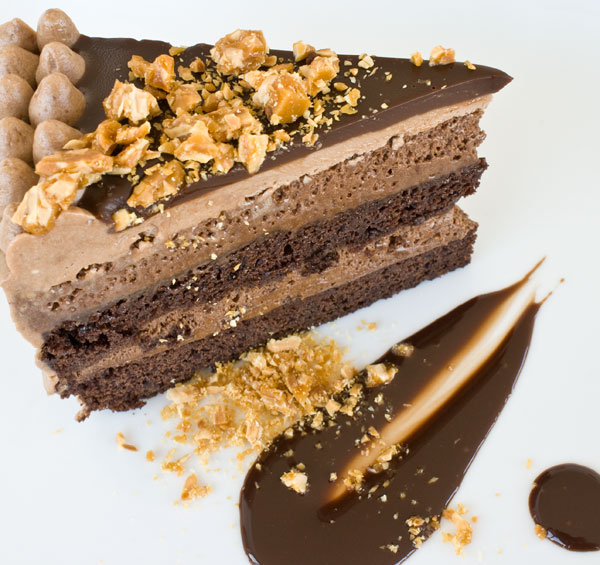
If you promise them chocolate cake, you better make sure they get it. Or there will be bedlam. I learned first hand. We ran out during one busy dinner service and there was so much uproar, the kitchen transformed into an urban Lord of the Flies. These cakes were more than just popular. People traveled to have them. Faced with no cake, they threatened to write letters to the mayor, or worse.
The waiters’ eyes were black with fury for being forced to break it to the guests. Some diners were so filled with denial, they sent their waiter back to the kitchen “to make sure we were really out”, as though we were peddling capri pants, and we simply had another size available in the back. All night, we argued, bargained, offered substitutions, freebies, savings bonds, to no avail. The people weren’t pleased. It was a dark day in history that I never wanted to repeat.
A few months later, when our restaurant’s mixing bowl groaned its last breath, we went into a panic not seen since the Barney’s sample sale. Mind you, this was not a KitchenAid-sized mixing bowl. It was an industrial model that occupied a vast corner of the restaurant floor and was, prior to that day, able to mash up a hundred pounds of dough at a time. Our daily agenda included mixing dozens of these “signature” chocolate cakes, most of which would sell out over the course of the night.
Making small batches was out of the question. We’d have needed to bend the laws of physics to coax more hours out of the day. Someone had to think quick. Without hesitation, one of the more accomplished pastry assistants jumped to his feet, ran over to the sink and started scrubbing up like a surgeon. I watched him wash his entire arms from wrist to shoulder. He grabbed the bowl, which stood waist-high next to his rather short stature, and dumped beast-bags of flour, sugar, and the usual cakey what-nots into it. Before I could protest, he plunged his tatooed limbs into the batter and started swirling his whole self around. I could see through the kicked-up cloud of flour dust that it was like working through quicksand, so heavy and resistant. But he did it. And even though he looked like he delivered a calf by the end, there were cake pans filled with batter all ready for baking. I sure hope for your sake you didn’t go to that restaurant that day.
Certain desserts can make such an impression, that they keep worming into your thoughts, day in, day out. This is what happened to Angelynn, a dear reader of this blog. A few weeks ago she dropped me a note describing her love for this cake, and asked me to try to recreate it. Now, I don’t know about you, but my fists are too tight to part with $44 plus shipping for a 7″ cake, so I decided to use it for inspiration only, rather than dupe the flavors. Mine would be good in its own right, and after a few tries, it became a cross between the “signature” cake I once served, and the cake Angelynn was dreaming of.
Admittedly, this project is a time-sucking doozy, since it’s based on a cake that has four separate components. We’ve got the the chocolate cake layers, the mousse layers, the milk chocolate frosting, and whew, finally, the ganache glaze. If you’re feeling ambitious, the whole bundle would indeed be a show-stopper, but allow me to suggest the following combinations for a much easier, though still tantalizing result:
— just the chocolate cake with a sprinkling of powdered sugar then served with a mound of whipped cream or ice cream
— the chocolate cake with just the mousse layers
— the chocolate cake with just the milk chocolate frosting
— the chocolate cake with just the chocolate glaze (which can be used as a chocolate sauce when warmed)
— or throw the cake idea overboard and enjoy just the mousse
Then, when you’re done, you can lick your elbows clean.
By the way, I scattered a little chopped peanut brittle from this entry over the top for some crunch.
Chocolate Cake
1 stick (112g) butter
1 1/3 cups (257g) sugar
1/2 cup + 2 tablespoons (56g) cocoa powder
2 large eggs
2 oz (56g) dark chocolate, melted
1 3/4 cups (210g) all-purpose flour
1 teaspoon (4 g) baking powder
3/4 teaspoon (3 g) baking soda
1/4 teaspoon (1 gram) salt
1/2 cup (118 ml) water
1/2 cup (118 ml) milk
1. Gettin’ ready. You can see how sweaty my eggs are in the photo. All cold ingredients should be at room temperature for better incorporation. Preheat oven to 325 degrees F.
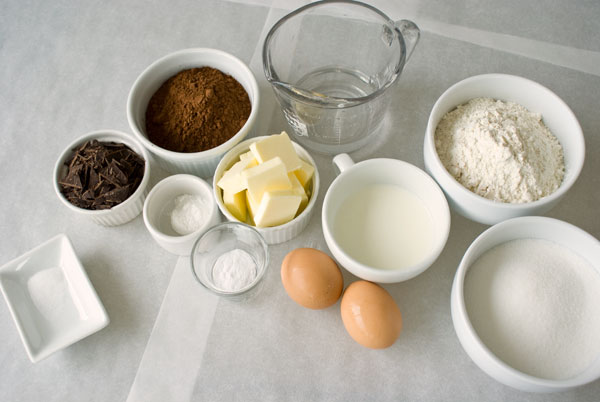
2. Melt the chocolate. I like to chop it up fine like in the “ingredients” photo above, and melt it in the microwave in 30-second intervals. Chocolate burns easily, so stir between every zap. Mine took about 60-90 seconds to melt. Keep on the side.
3. Using a tabletop or handheld electric mixer, beat the butter, sugar, and cocoa powder together on medium high speed…
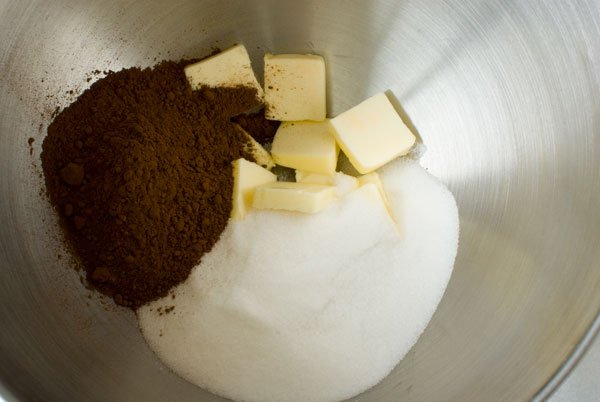
…until smooth, creamy and fluffy, about 3 minutes. Hard to see with the cocoa in the bowl, but it went for about 3 minutes.
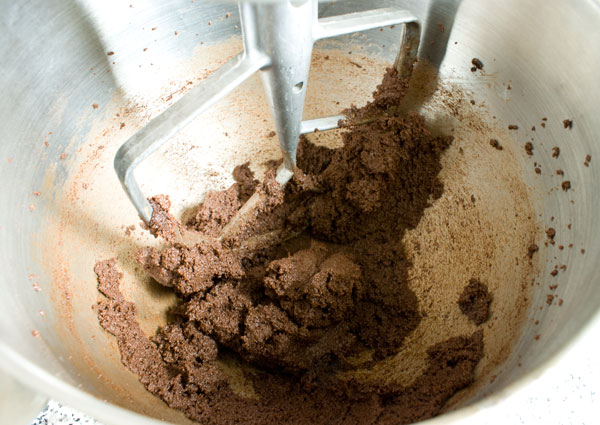
4. Add the eggs, one at a time, until each one disappears into the mix. Be sure to scrape down the sides and bottom of the bowl. Looks like a rising sun, no?
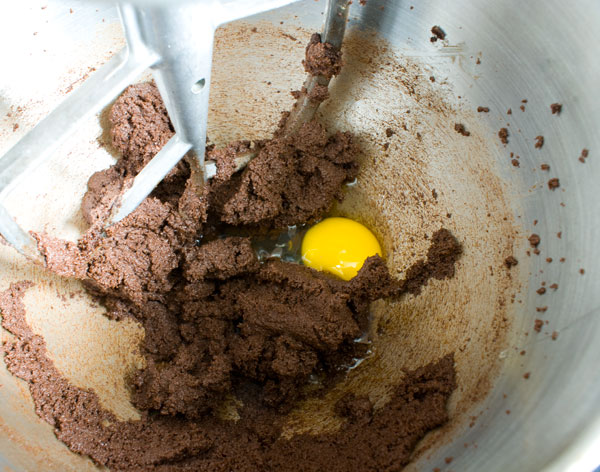
Getting liquidy here. Scrape. The dry, gritty stuff wants to collect at the bottom. Don’t let it win.
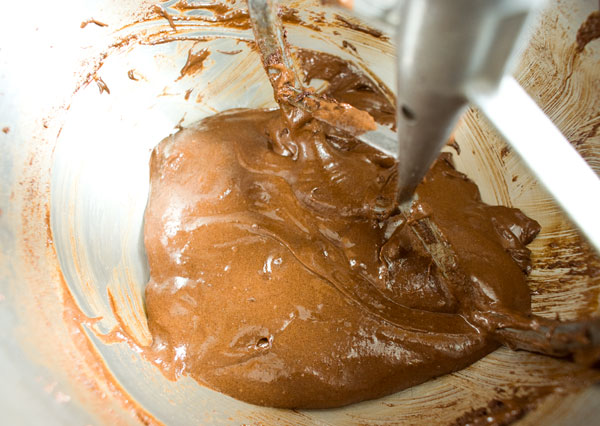
5. Pour in the melted chocolate. Hopefully, by now your chocolate came down in temperature a little. It should feel like a warm bath. If it’s too hot, it might melt the butter, and that’s no good. If it’s too cold, it might re-solidify into little bits when it hits the cold bowl. So, warm. We want it warm.
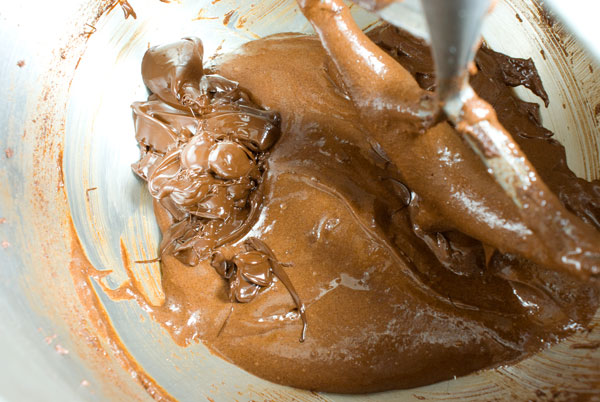
So far so good. Chocolate added.
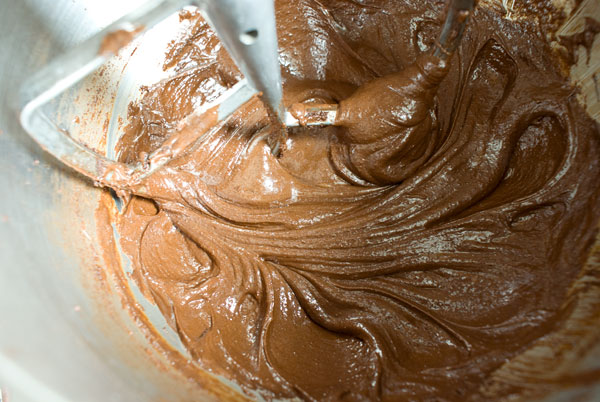
6. In a medium bowl, stir together the dry ingredients, which include flour, baking powder, baking soda and salt. Stir ’em up good.
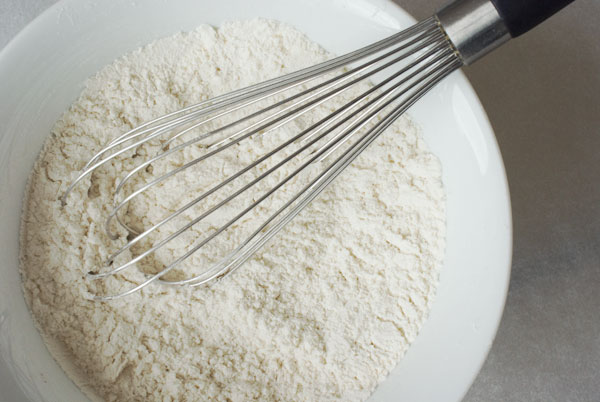
7. Combine the milk and the water and microwave them until hot, about 45 seconds. Like a “too hot” bath.
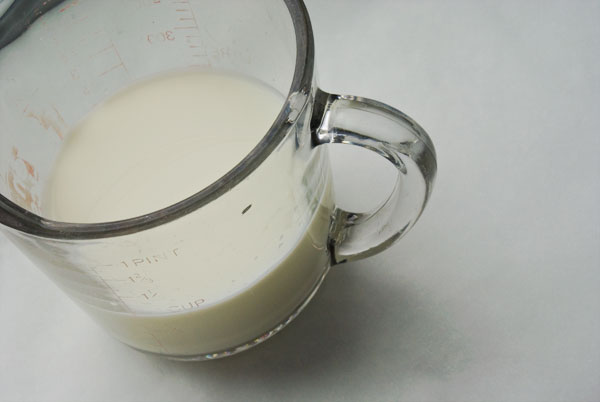
8. Drop the dry ingredients into the mixing bowl…
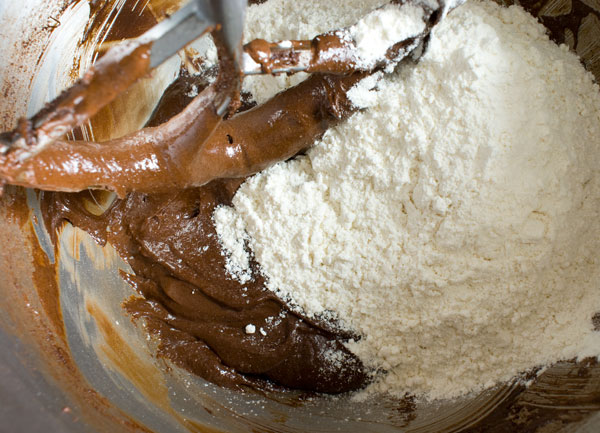
…and mix on low speed…
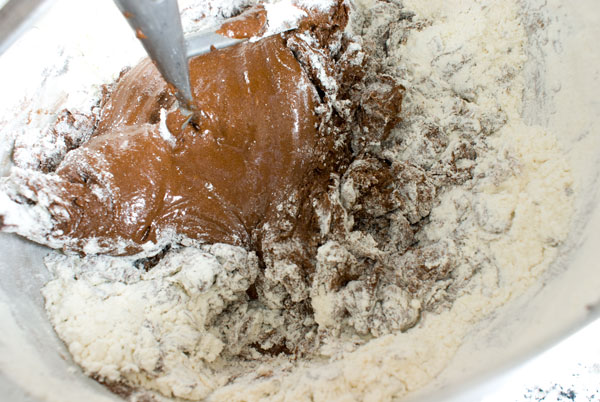
…until MOSTLY combined, and then, with the machine still running, pour in the hot water/milk mixture.
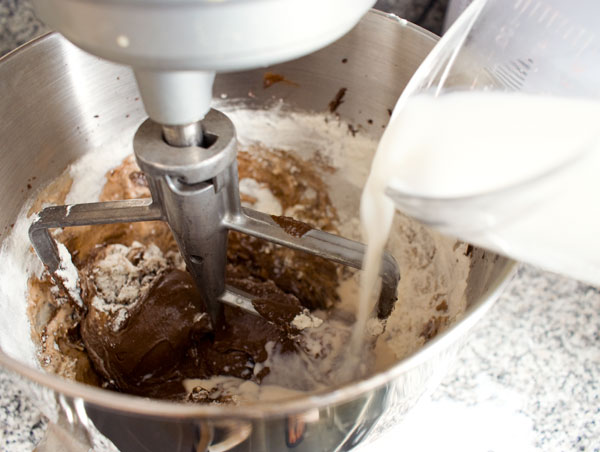
9. Be sure to scrape the bottom of the bowl again. The dry ingredients tend to hide there. Here’s the finished batter.
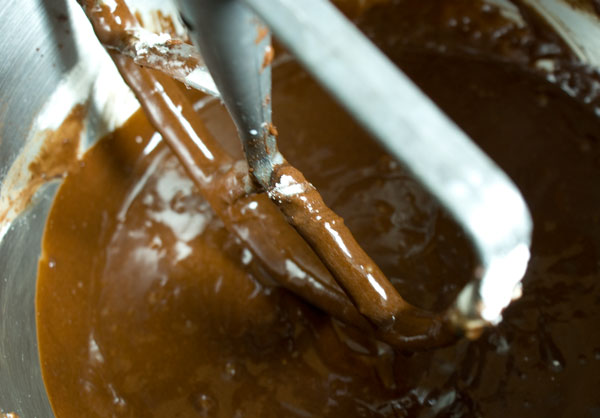
10. Pour the batter into a parchment-lined, 9″ round baking pan. (If you need a refresher on lining a round baking pan, see the carrot cake post.)
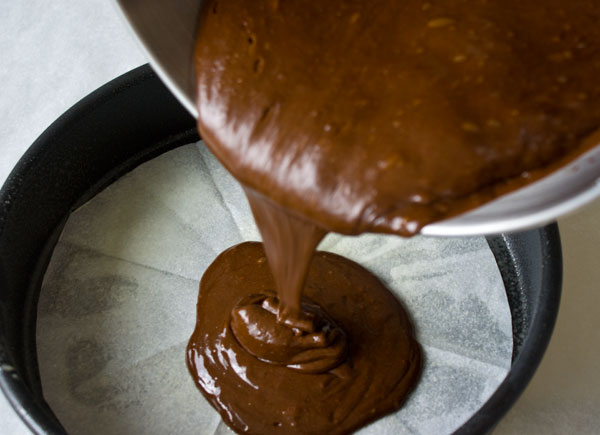
Then bake in the preheated oven…
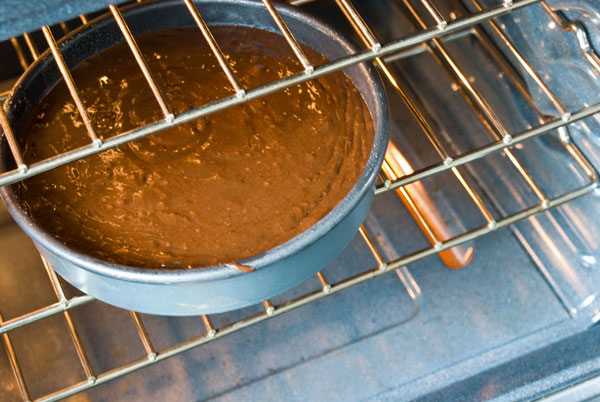
…until a toothpick inserted into the center comes out clean, or almost clean, about 40 minutes. Let the cake cool completely, even for several hours, to let the crumb firm up and be less delicate when slicing. I like to chill the cake in the fridge for a couple of hours, so that slicing goes more smoothly.
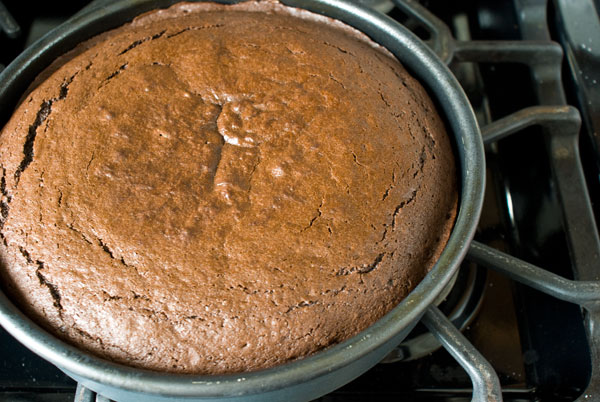
Next, make the Chocolate Mousse
8 oz (224g) dark chocolate (I used 61% El Rey brand)
1 stick (112g) unsalted butter
4 large eggs
6 (45g) tablespoons sugar
2 tablespoons water
2/3 cup (158 ml) heavy cream
1. The bits and pieces required. Can you spot where I blotted out the mascarpone that I didn’t end up using?
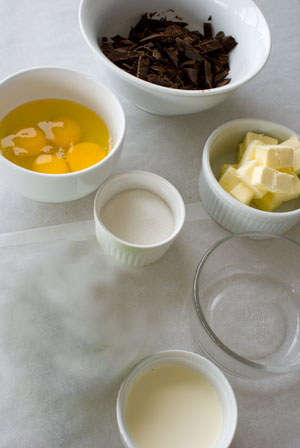
2. Working with a large bowl, melt the chocolate and butter in the microwave. Again, use 30-second intervals and stir every time between zaps to make sure the chocolate doesn’t burn.
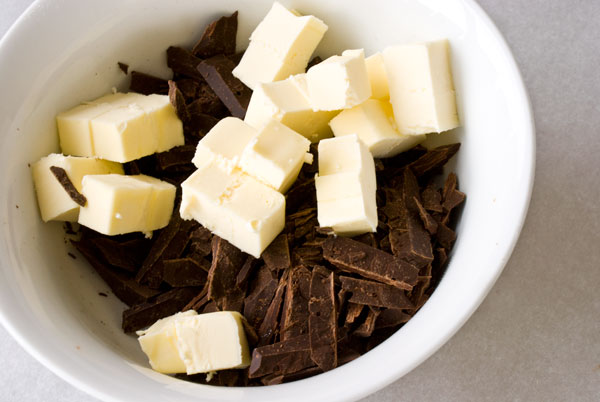
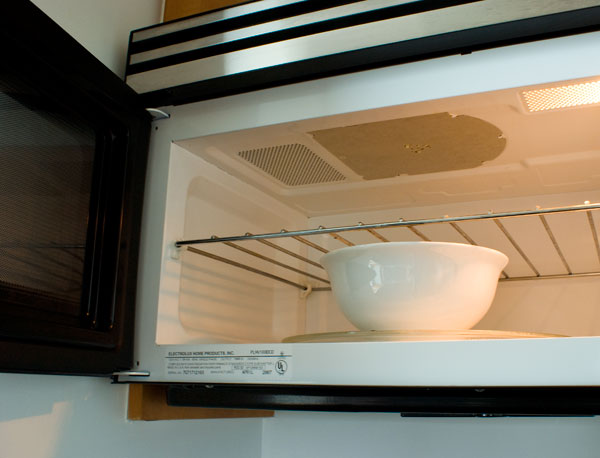
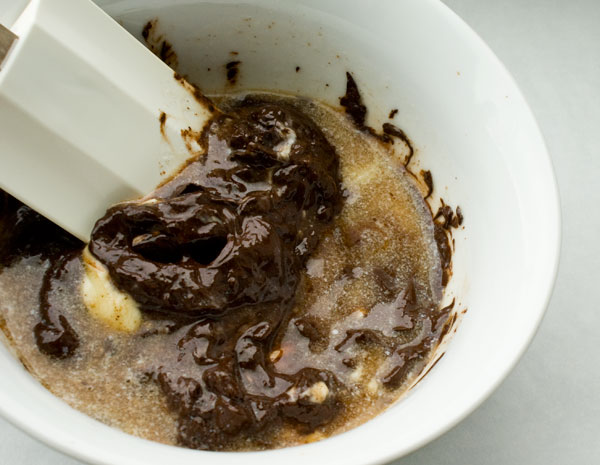
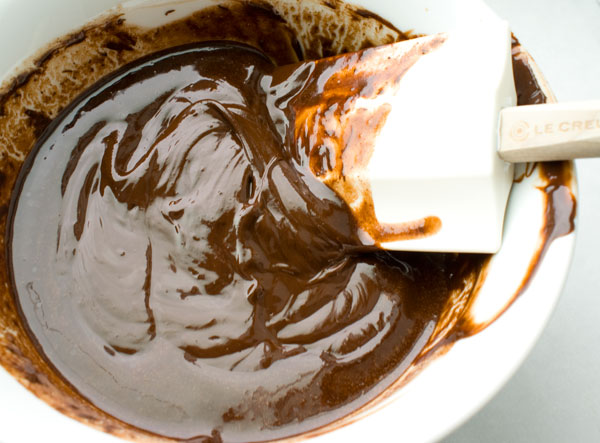
Set aside.
3. Whip cream to a loose peak consistency. You can do this with a mixer or by hand.
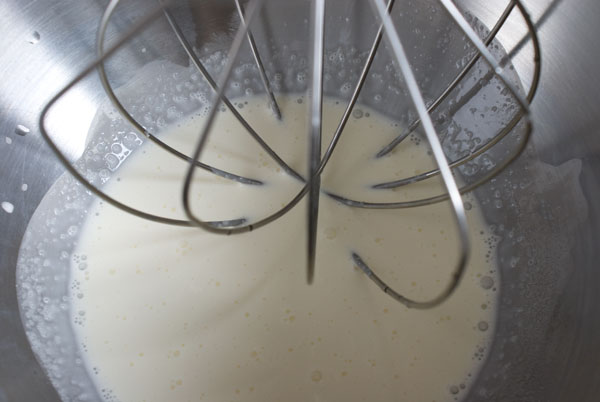
It’s not exactly liquid anymore, but it’s not stiff, either. It should just barely hold streaks.
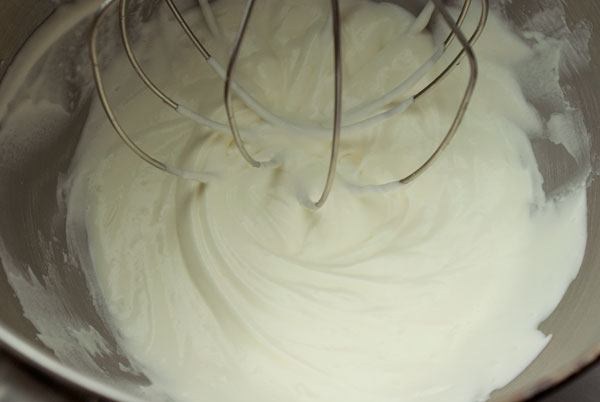
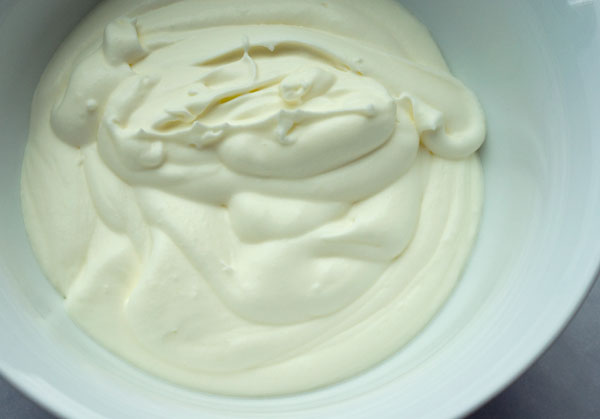
I scraped this into another bowl, so I could free up my Kitchenaid bowl for the rest of the mousse recipe. Refrigerate the cream until we’re ready for it.
4. Set up a double boiler: Fill a pot with water and bring it to a boil. Grab a bowl that’s big enough to fit over the pot without touching the boiling water and crack in the eggs, then pour in the sugar and water. Whisk it up and set it over the boiling water.
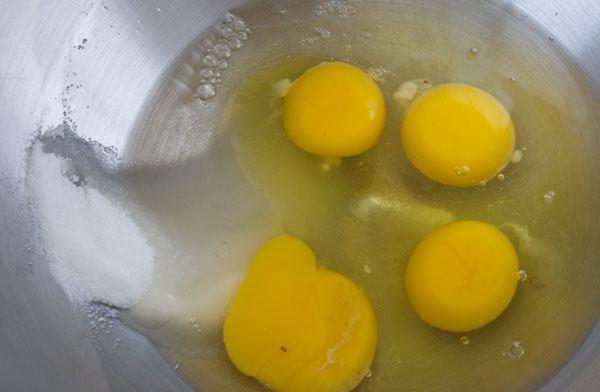
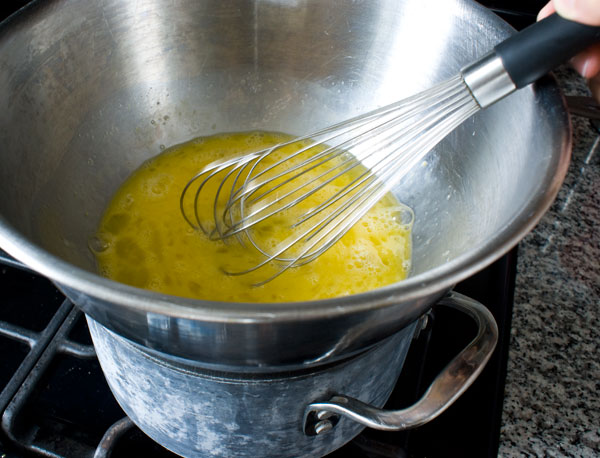
Our only goal here is to warm dem eggs. Whisk the whole time. They’ll start to get frothy. After a few minutes (about 3), move the bowl off the heat and stick your finger in it. Yes, you heard right. This is to gauge the temperature. Don’t feel like you’re after some exact degree of heat. It should feel like a very warm bath. We are about to whip the crap out of them and warm eggs whip well.
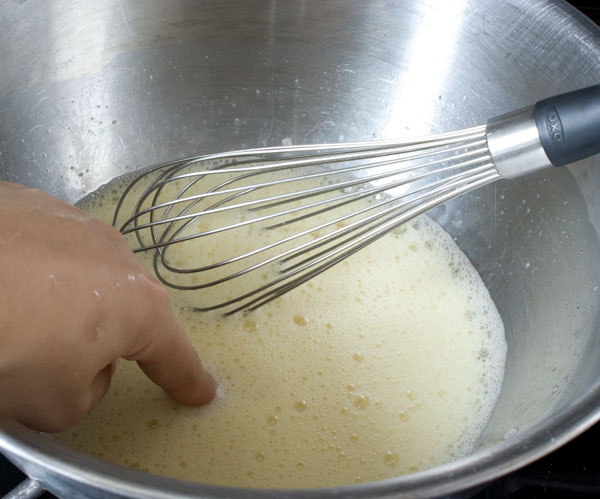
If they’re still cool, return to top of pot.
If they’re nice and warm, pour into the KitchenAid bowl, and whip on high for about 3 minutes. (If you have a hand mixer or you’re whipping by hand, go ahead and do it in the bowl you warmed them in.) The eggs will get very thick, pale and creamy looking, like so:
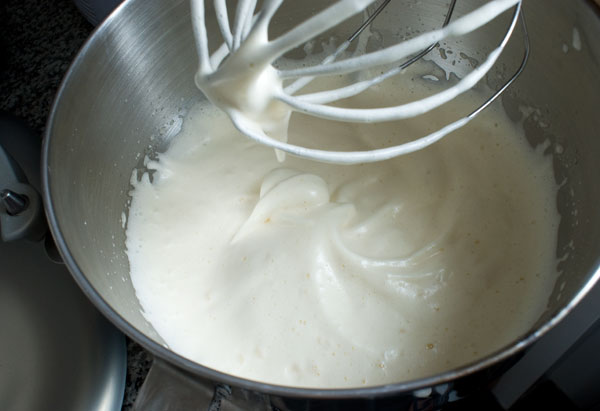
We’ll start by pouring about 1/3 of this fluffy egg mixture into the melted chocolate bowl. Carefully fold it in, scraping from the bottom of the bowl, over to the top. This will help lighten the very dense chocolate mixture, so when we fold in the rest, it won’t deflate.
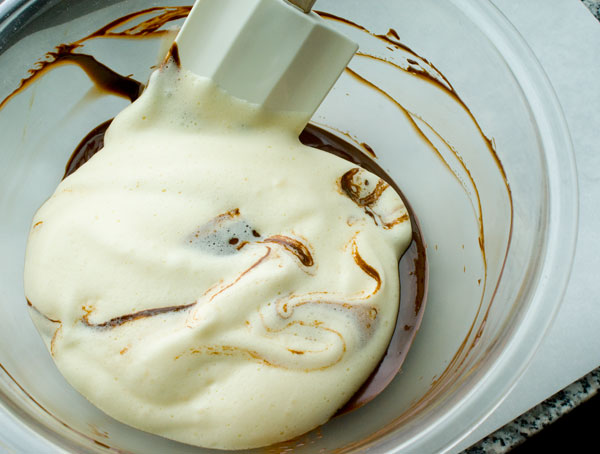
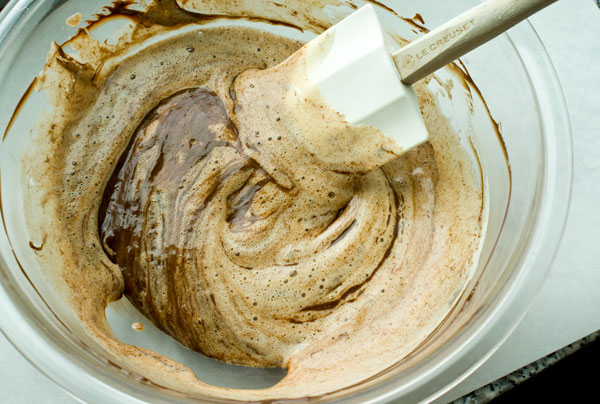
Pour in the rest of the egg mix…
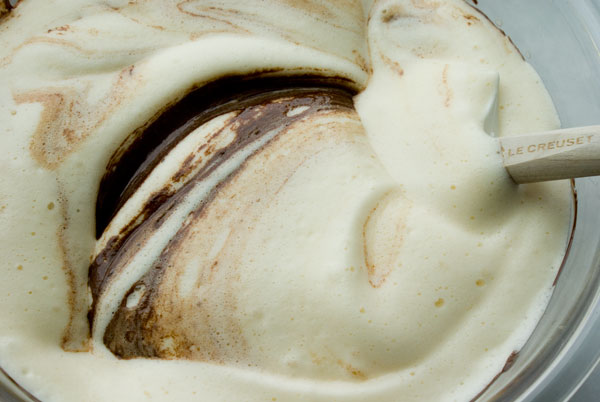
…and fold that in.
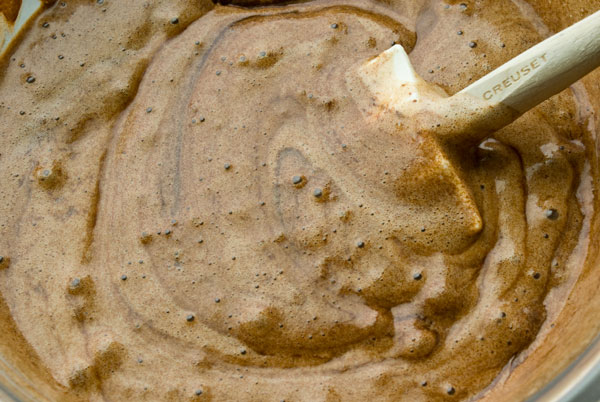
Then add the almost forgotten whipped cream.
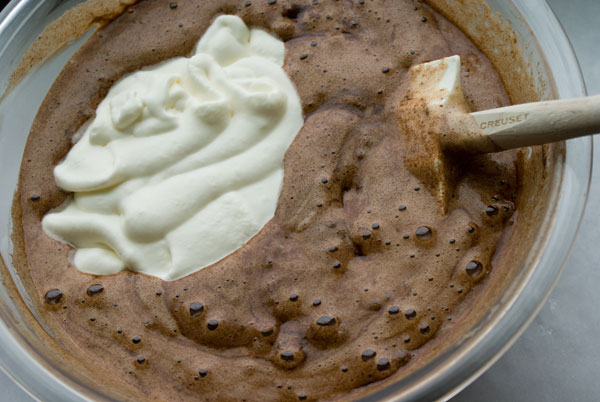
Fold again. So much folding, it’s like laundry day. Here’s the all folded, ready mousse.
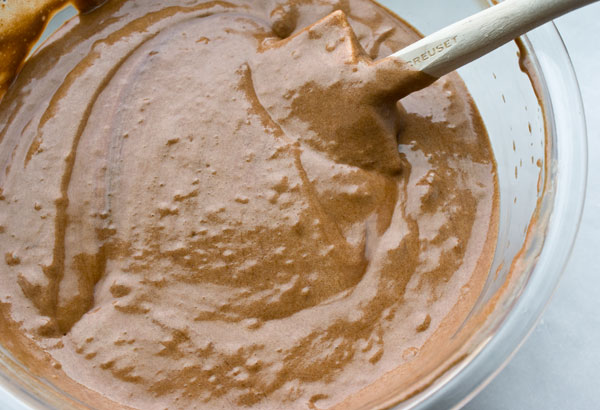
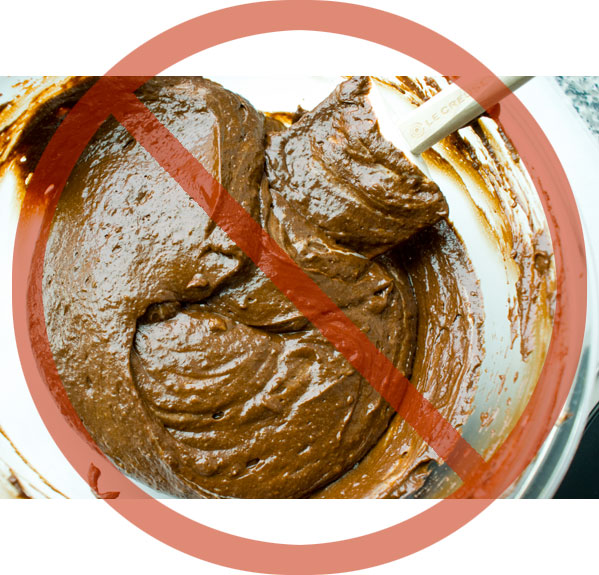
As an aside, here’s my earlier screw up — my first attempt at the mousse. You can see all the bits of scrambled eggs floating around. Gross, indeed. I must have let them get away from me when I was busy photographing and trying to whisk at the same time. I actually thought it wasn’t that bad until I folded in my chocolate and saw the truth magnified before my very eyes.
Now we can start the assembly:
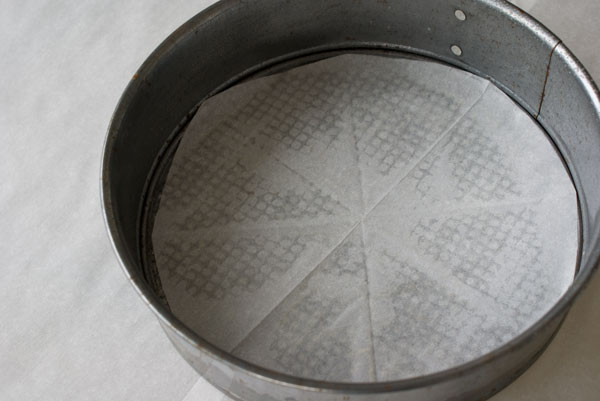
1. Line a 9″ springform pan with parchment.
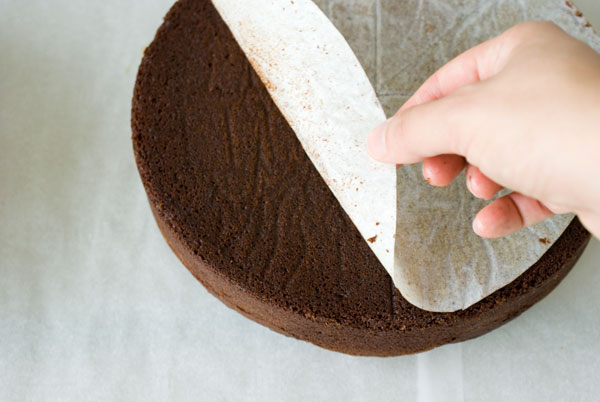
2. Peel off the paper that ended up on your cake.
3. Slice off the dome by holding a serrated knife parallel to the table and slowly sawing away.
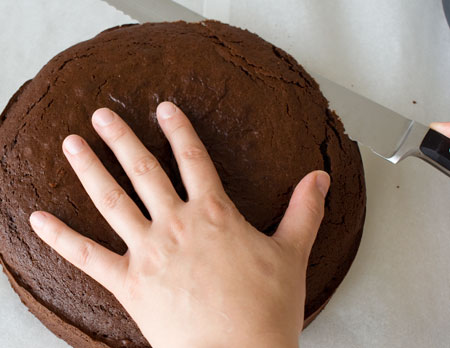
Dome sliced off. Snack on the rejected dome.
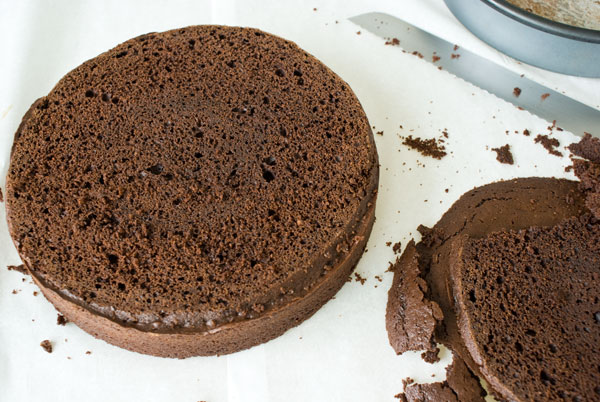
3. Now, we need to slice the rest of the cake in half, horizontally. I think it’s best to eyeball this, and you will get better with practice. What I like to do is find the center of the cake (from top to bottom, where my knife is) and mentally note the distance from the top edge of the cake as shown by the arrow. Run the knife around the edge, spinning the cake. Don’t force the knife, it will do it’s job slowly.
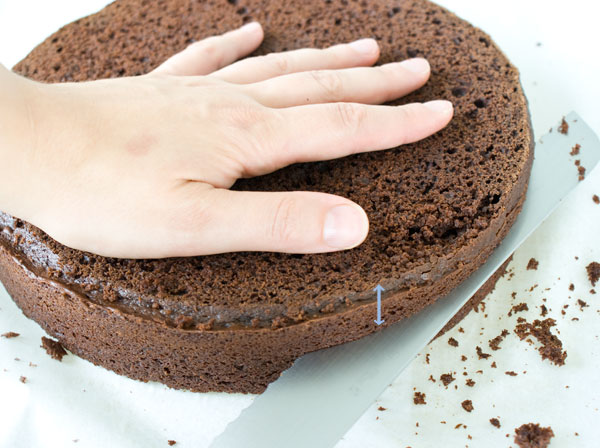
As you run the knife around the cake, it will cut deeper and deeper, until it slices through the center. As you can see by the arrow, I’m always looking at that halfway point to help guide the knife.
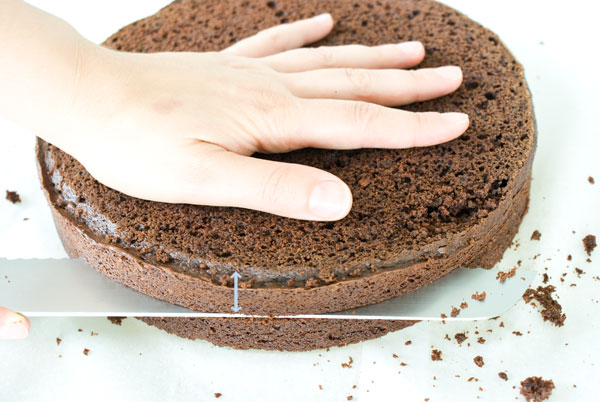
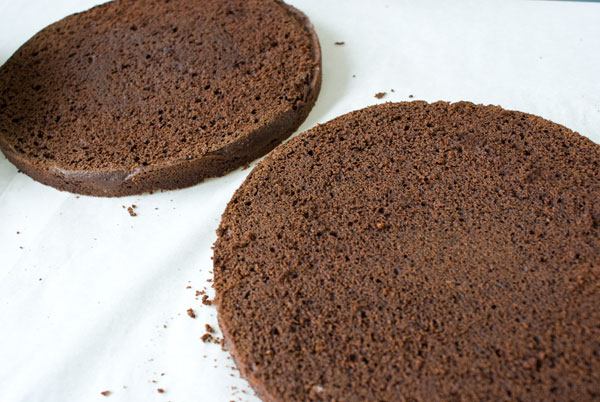
Two (mostly) even slices. If your slices aren’t perfectly even, no biggie. They’ll be hidden once the cake is together.
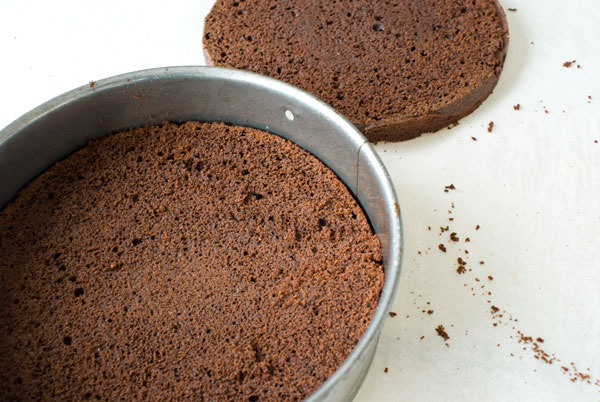
Set one slice into the prepped springform pan.
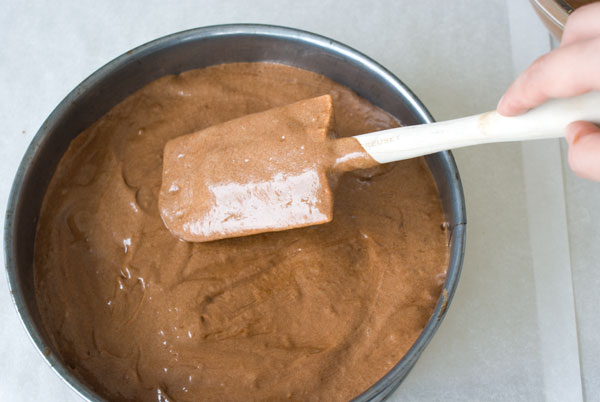
Pour in half the mousse and smooth it out to the edges.
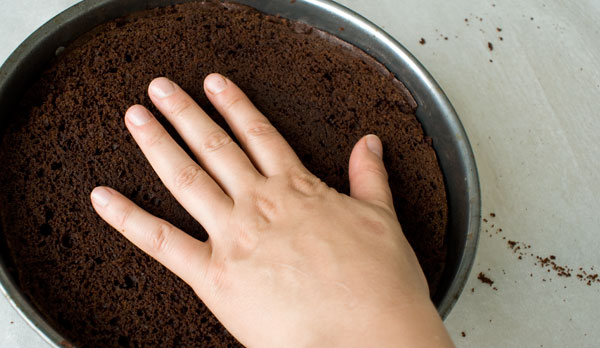
Carefully place the other cake layer on top and press it down gently.
Pour the rest of the mousse on…
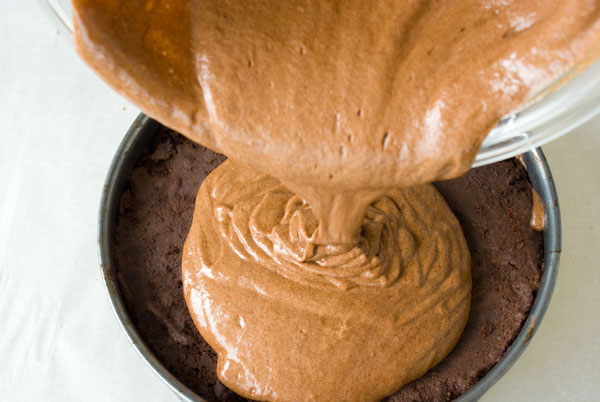
…and smooth that out over the top as uniformly as possible.
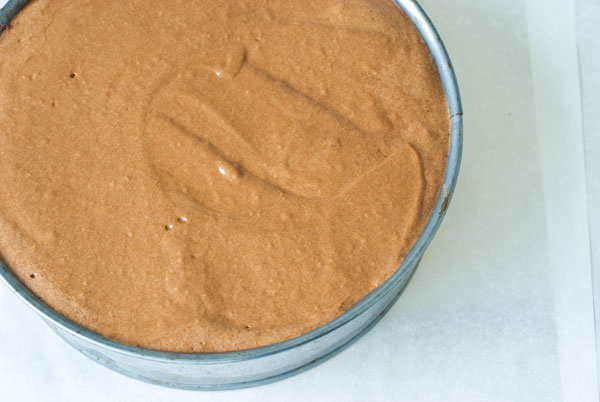
Freeze this on a flat shelf for at least 4 hours. Or overnight.
Make the milk chocolate frosting:
Take note that you have to start the frosting a few hours before you plan to frost the cake. Right when the cake goes into the freezer is a good time.
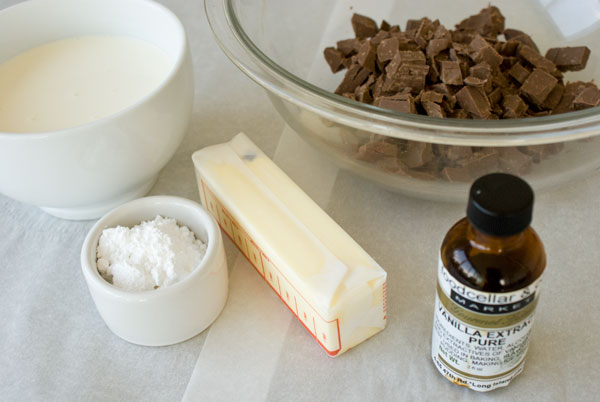
1 1/4 cup (300 ml) heavy cream
8 oz (224 g) milk chocolate, chopped into peas-sized bits
1 stick (112 g) butter
1/2 tsp (3 g) vanilla extract
1/4 cup (30 g) powdered sugar
1. Things we need:
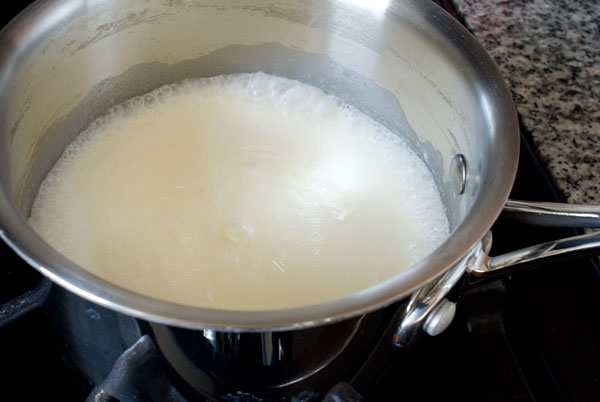
2. Bring the heavy cream to a boil…
…and pour over the chocolate. Allow it to rest for a minute or two to let the heat melt the chocolate.
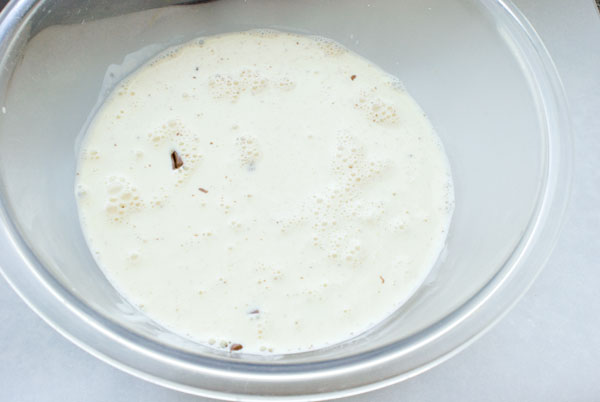
Then whisk it up into a sort of loose ganache.
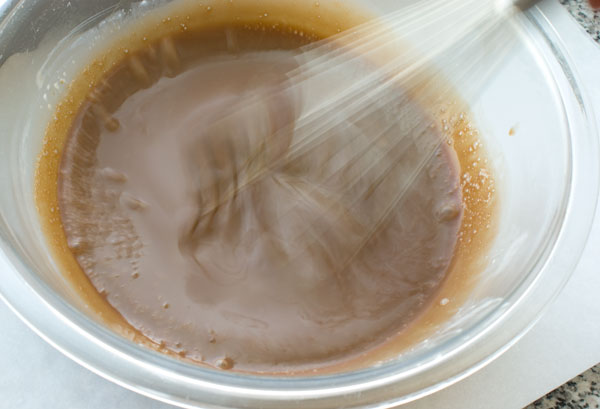
Refrigerate it until it sets to a soft solid, at least 3 hours (overnight’s ok, too.)
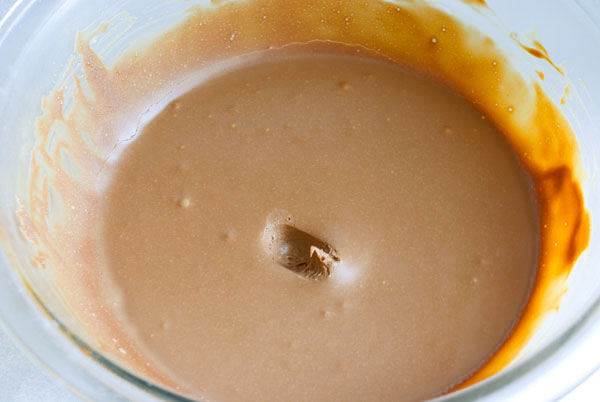
3. When you’re ready to frost the cake, whip your butter (which should be softened to room temperature) and vanilla until they’re very smooth and creamy, 3-4 minutes.
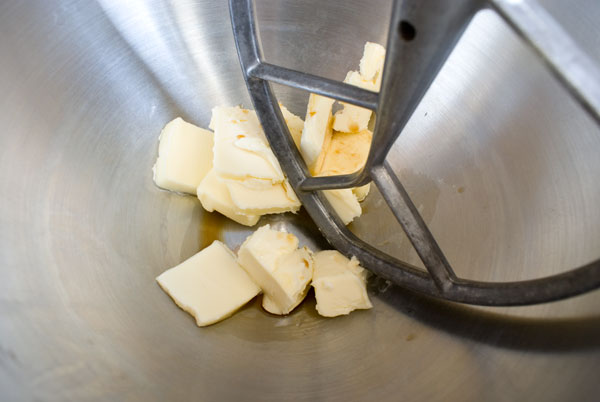
Scrape down the bowl.
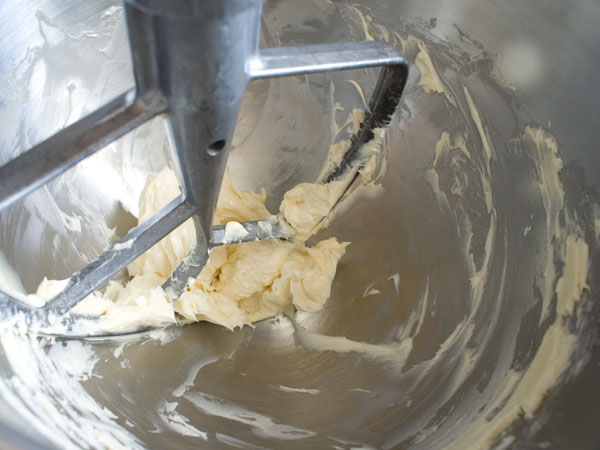
4. Add in the set up milk chocolate ganache and powdered sugar and whip until light and fluffy, 3-4 minutes. (I changed to a whip attachment ’cause it whips better. Who knew?)
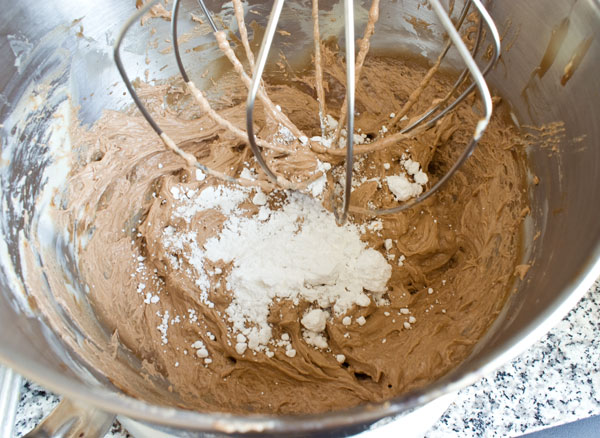
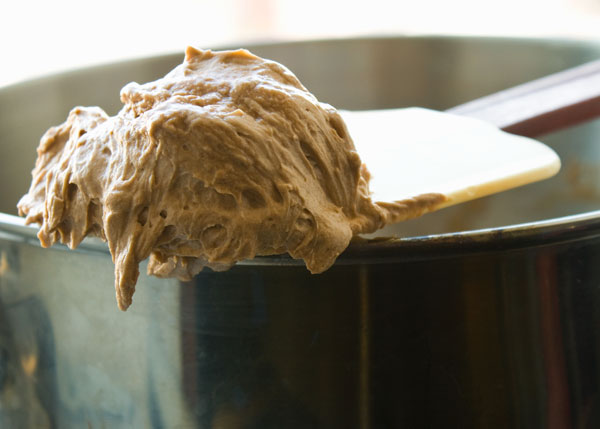
Finished frosting.
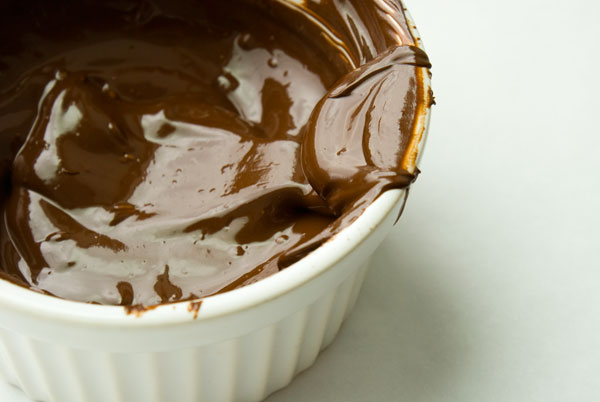
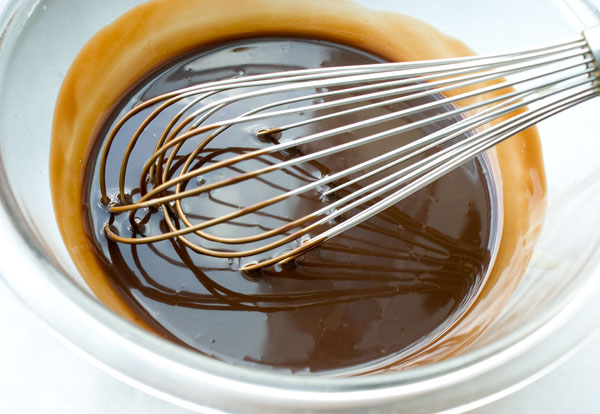
Now make the chocolate sauce as described in this post. This sauce is firm when cold and liquid when warm, so it can be used in lots of ways. This cake sports it as a glaze for the top, and a sauce on the plate. You can make it ahead and rewarm it in the microwave at 30-second intervals, stirring until you get the consistency you need.
Finish the assembly:
1. Grab the cake from the freezer and run a knife around the edge to release it.
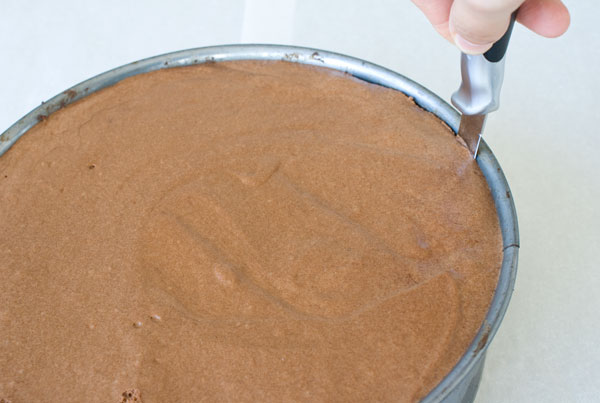
2. Carefully release the springform mechanism to free the cake.
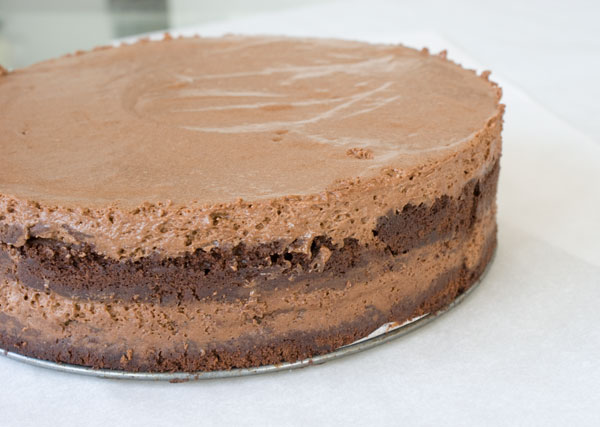
3. Frost. A large offset spatula makes the job easier. I have my cake set on some parchment sheets to control the mess.
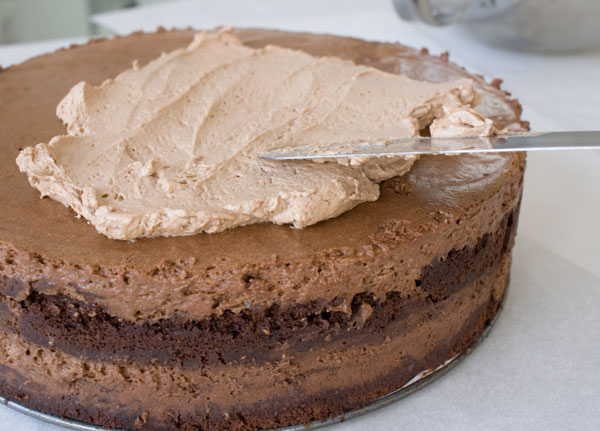
Good enough.
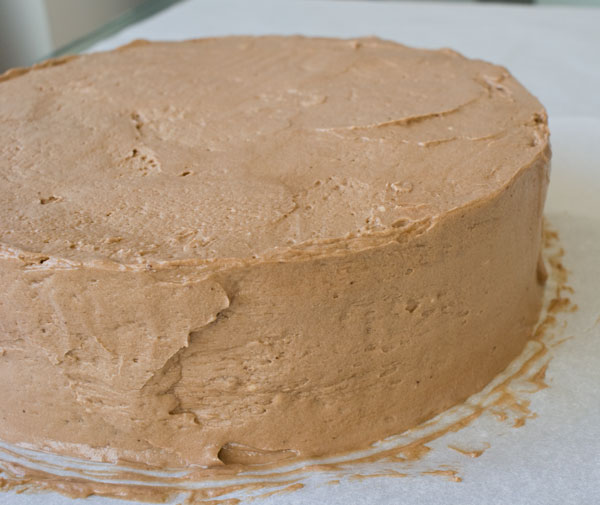
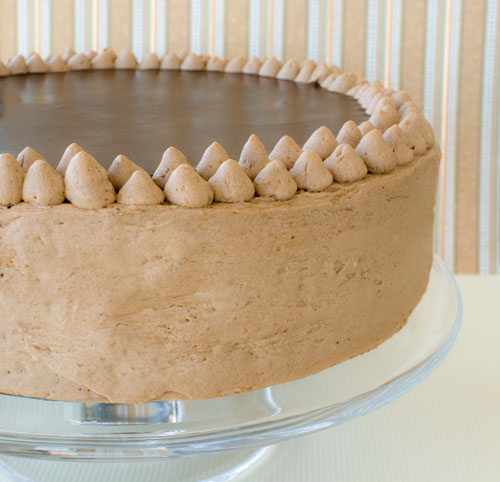
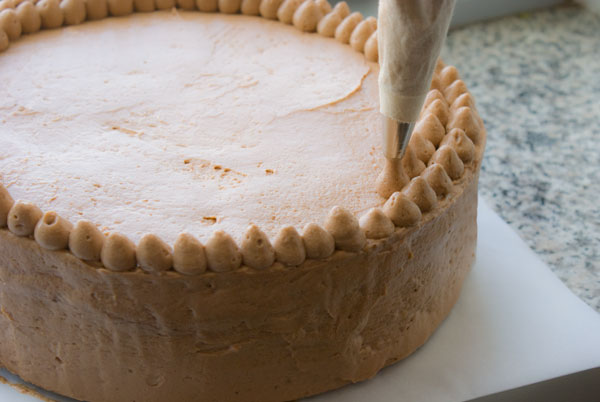
4. You can decorate in any way. Or leave the cake simply frosted. I scooped the rest of the frosting into a pastry bag fitted with a plain tip, and piped two rows of “kisses”. If you need a refresher on filling a pastry bag, see here.
5. When the chocolate sauce is lukewarm, and ONLY when it’s lukewarm, stir it up and pour it over the cake to glaze the top. If the sauce is too hot when you pour, it will melt the frosting underneath, making the top look muddled. It will probably set quickly because your cake is still giving off frozeness from within, so hop to it.
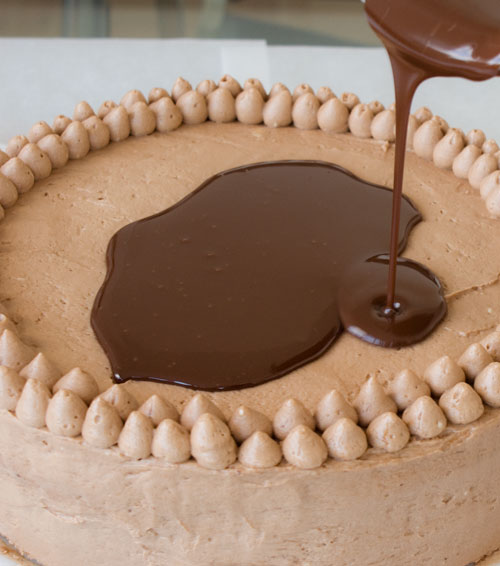
Viola! Refrigerate this until ready to serve, up to a day ahead. Make sure it’s fully defrosted before serving!
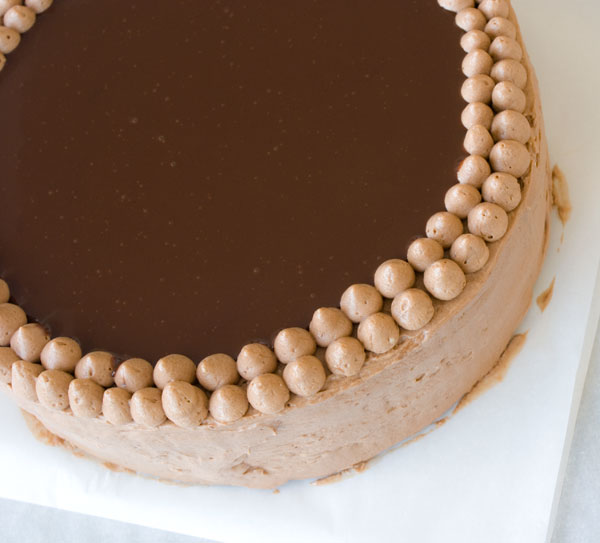
Happy Thursday to me.

Chocolate Cake
1 stick (112g) butter
1 1/3 cups (257g) sugar
1/2 cup + 2 tablespoons (56g) cocoa powder
2 large eggs
2 oz (56g) dark chocolate, melted
1 3/4 cups (210g) all-purpose flour
1 teaspoon (4 g) baking powder
3/4 teaspoon (3 g) baking soda
1/4 teaspoon (1 gram) salt
1/2 cup (118 ml) water
1/2 cup (118 ml) milk
1. All cold ingredients should be at room temperature for better incorporation. Preheat oven to 325 degrees F.
2. Melt the chocolate. I like to chop it up fine like in the “ingredients” photo above, and melt it in the microwave in 30-second intervals. Chocolate burns easily, so stir between every zap. Mine took about 60-90 seconds to melt. Keep on the side.
3. Using a tabletop or handheld electric mixer, beat the butter, sugar, and cocoa powder together on medium high speed until smooth, creamy and fluffy, about 3 minutes. Hard to see with the cocoa in the bowl, but it went for about 3 minutes.
4. Add the eggs, one at a time, until each one disappears into the mix. Be sure to scrape down the sides and bottom of the bowl. The dry, gritty stuff wants to collect at the bottom. Don’t let it win.
5. Pour in the melted chocolate. Hopefully, by now your chocolate came down in temperature a little. It should feel like a warm bath. If it’s too hot, it might melt the butter, and that’s no good. If it’s too cold, it might re-solidify into little bits when it hits the cold bowl. So, warm. We want it warm.
6. In a medium bowl, stir together the dry ingredients, which include flour, baking powder, baking soda and salt. Stir ‘em up good.
7. Combine the milk and the water in a microwave-safe cup and microwave them until hot, about 45 seconds. Like a “too hot” bath.
8. Drop the dry ingredients into the mixing bowl and mix on low speed until MOSTLY combined, and then, with the machine still running, pour in the hot water/milk mixture. Be sure to scrape the bottom of the bowl again. The dry ingredients tend to hide there.
9. Pour the batter into a parchment-lined, 9″ round baking pan. Then bake in the preheated oven until a toothpick inserted into the center comes out clean, or almost clean, about 40 minutes. Let the cake cool completely, even for several hours, to let the crumb firm up and be less delicate when slicing. I like to chill the cake in the fridge for a couple of hours, so that slicing goes more smoothly.
Next, make the Chocolate Mousse
8 oz (224g) dark chocolate (I used 61% El Rey brand)
1 stick (112g) unsalted butter
4 large eggs
6 (45g) tablespoons sugar
2 tablespoons water
2/3 cup (158 ml) heavy cream
1. Working with a large bowl, melt the chocolate and butter in the microwave. Again, use 30-second intervals and stir every time between zaps to make sure the chocolate doesn’t burn. Set aside.
2. Whip cream to a loose peak consistency. You can do this with a mixer or by hand. It’s not exactly liquid anymore, but it’s not stiff, either. It should just barely hold streaks. I scraped this into another bowl, so I could free up my Kitchenaid bowl for the rest of the mousse recipe. Refrigerate the cream until we’re ready for it.
3. Set up a double boiler: Fill a pot with water and bring it to a boil. Grab a bowl that’s big enough to fit over the pot without touching the boiling water and crack in the eggs, then pour in the sugar and water. Whisk it up and set it over the boiling water. Our only goal here is to warm dem eggs. Whisk the whole time. They’ll start to get frothy. After a few minutes (about 3), move the bowl off the heat and stick your finger in it. Yes, you heard right. This is to gauge the temperature. Don’t feel like you’re after some exact degree of heat. It should feel like a very warm bath. We are about to whip the crap out of them and warm eggs whip well. If they’re still cool, return to top of pot.
4. If they’re nice and warm, pour into the KitchenAid bowl, and whip on high for about 3 minutes. (If you have a hand mixer or you’re whipping by hand, go ahead and do it in the bowl you warmed them in.) The eggs will get very thick, pale and creamy looking.
5. We’ll start by pouring about 1/3 of this fluffy egg mixture into the melted chocolate bowl. Carefully fold it in, scraping from the bottom of the bowl, over to the top. This will help lighten the very dense chocolate mixture, so when we fold in the rest, it won’t deflate.
6. Pour in the rest of the egg mix and fold that in. Then fold in the whipped cream.
Now we can start the assembly:
1. Line a 9″ springform pan with parchment.
2. Peel off the paper that ended up on your cake.
3. Slice off the dome by holding a serrated knife parallel to the table and slowly sawing away.
4. Now slice the rest of the cake in half, horizontally into two even rounds.
5. Set one slice into the prepped springform pan.
6. Pour in half the mousse and smooth it out to the edges.
7. Carefully place the other cake layer on top and press it down gently.
8. Pour the rest of the mousse on and smooth that out over the top as uniformly as possible.
9. Freeze this on a flat shelf for at least 4 hours. Or overnight.
Make the milk chocolate frosting:
Take note that you have to start the frosting a few hours before you plan to frost the cake. Right when the cake goes into the freezer is a good time.
1 1/4 cup (300 ml) heavy cream
8 oz (224 g) milk chocolate, chopped into peas-sized bits
1 stick (112 g) butter
1/2 tsp (3 g) vanilla extract
1/4 cup (30 g) powdered sugar
1. Bring the heavy cream to a boil and pour over the chocolate. Allow it to rest for a minute or two to let the heat melt the chocolate. Then whisk it up into a sort of loose ganache. Refrigerate it until it sets to a soft solid, at least 3 hours (overnight’s ok, too.)
2. When you’re ready to frost the cake, whip your butter (which should be softened to room temperature) and vanilla until they’re very smooth and creamy, 3-4 minutes. Scrape down the bowl.
3. Add in the set up milk chocolate ganache and powdered sugar and whip until light and fluffy, 3-4 minutes.
Finish the assembly:
1. Grab the cake from the freezer and run a knife around the edge to release it. Carefully release the springform mechanism to free the cake.
2. Frost the cake on top and sides.
3. You can decorate in any way. Or leave the cake simply frosted. I scooped the rest of the frosting into a pastry bag fitted with a plain tip, and piped two rows of “kisses”. Refrigerate until you’re ready for the glazing step.
Make the chocolate glaze
4 oz (112g) dark chocolate, finely chopped
1/2 cup (80g) heavy cream
3 tablespoons light corn syrup
1 tablespoon vegetable oil
1/2 teaspoon vanilla extract
1. Pour the heavy cream, corn syrup and oil into a microwave-proof cup and nuke until almost boiling (you might be able to see it gurgling in the cup), about 45 seconds. It will look curdled but pay it no mind. Stir it up to blend.
2. Pour over the chocolate and allow to sit for a minute to melt it all. Whisk everything until completely smooth.
3. When the chocolate sauce is lukewarm, and ONLY when it’s lukewarm, stir it up and pour it over the cake to glaze the top. If the sauce is too hot when you pour, it will melt the frosting underneath, making the top look muddled. It will probably set quickly because your cake is still giving off frozeness from within, so hop to it.
4. Viola! Refrigerate this until ready to serve, up to a day ahead. Make sure it’s fully defrosted before serving!
84 Responses to “Quadruple Chocolate Cake”
Post a Comment
Your E-Mail will be kept private. * = required fields.


Hi Ira — Thank you for making the recipe. You’re right, even though it is a big project, it is much easier to deal with when you break it up into parts.
Oh goodness me, do I wish I had this cake. Even though I just polished off two of my own, the thought of all that delicious mousse has me drooling! Great job Irina, I may have to make this for an upcoming birthday *ahem*mine*ahem*….
this will be my husband Birthday cake!!! I have a question, you mentioned that you freeze the cake..really? as in ut it in the freezer and not not the fridge? will this affect the taste of the cake?
Nadine — Great! I hope he’ll love it! Yes, I do freeze it. This allows the layers to stay put and remain neat when unmolding and dressing it up with frosting. It makes a HUGE difference and it’s a really common restaurant practice. This cake has no ingredients that suffer in the freezer, so the flavor is not effected, so long as it’s only in there for a day or two. Like with anything, keeping it in the freezer too long may mean freezer burn.
thank you for your reply..I am so excited about this cake! Do you have christmas tree log or swiss roll on your radar screen? Also, Do you think you can tell us how do you stabilize whipped cream? (I hope I am not bothering you with my questions, but it is so refreshing and exciting to have someone with your experience and is willing to answer questions.)many thanks and happy caking!
Sure Nadine, no bother. Unfortunately, I’m not planning any rolls or Christmas logs in the near future. I’ve got a calendar of requests lined up in the next few months, but maybe next Christmas time would be a good time to tackle that.
With whipped cream, we tried products that are actually called Whipped Cream Stabilizer (there are many brands), but I don’t find that they help well enough to justify weird chemically additives or the cost. Some people add a little milk powder, but still, it won’t hold more than a day. I’d just whip it when you plan to use it. In this recipe, it’s not an issue because you’re folding it into other ingredients, and those ingredients will stabilize it.
THIS CAKE IS AWESOME!!!!!!!!! I just made it yesterday for my husbands 30th Bday and it was DELICIOUS!!!! Thanks so much for the detailed recipe and instructions…. It was a huge it and I’m sure that for many years to come I’ll be asked to make “that chocolate cake”. It was a time muncher as you had previously posted but totally worth it.
Congratulations on your great site!!!
LOL, Carolyn, that’s how we feel about it too. I’m so glad you enjoyed it! And you know, after the first time, it gets easier to make, because you’re kind of used to the steps.
I made this cake for my birthday last week and brought it to the office. It was such a huge success, everyone kept telling me that this is THE BEST CHOCOLATE CAKE they`ve ever eaten!! I am a hobby baker and have tried countless recipes for chocolate cake, but yours is by far the most amazing one I`ve tried! Thank you so much Irina, your recipes are amazing and so well explained!
Anyone who is hesitating, please give this cake a try, it is not hard to make, and the result is outstanding!!!
Hi Irina,
I wanted to know if I can use cool whip instead of whipping the heavy cream?
Thanks for your awesome website and detailed instructions….
New-to-baking—I’m sorry to say, but cool whip wont make a good substitution. According to the ingredients, it’s not even a dairy product and won’t give you the same outcome.
I love this recipe and the photo-by-photo tutorial is great i just want to know for how many people is this cake?
Aleja — I’d say it can serve around 12 people.
I know this might sound a silly question, but did you leave the cake on the base of the spring form tin along with the parchment ? or remove it from all before icing and serving ??
many thanks and i look forward to making this tomorrow
xx
Alex-james — I did not, since it will slide right off the cake stand :). I frosted it directly on the cake stand. Hope you enjoy!
I love your blog and thanks for great step-by-step instructions! Can I strain the chocolate mousse to remove the scrambled eggs? If so, during what stage of the process can I do that? Also, can I spread the glaze over the top mousse layer and skip the frosting entirely?
Hi Inessa — Unfortunately, if the eggs become scrambled for the chocolate mousse, it’s a goner. The only thing to do is to make it again. As far as the glaze, you can definitely skip the frosting and use nothing but the glaze. Hope you enjoy!
if i make the chocolate cake using any cake mix,(for ex, devil food cake) instead of making the chocolate cake on this recipe from scratch, will it still turn out like yours?
Crystal — Well, I’d say it will still be pretty good, nut won’t be EXACTLY like this one. The cake will be a different flavor, different crumb density, etc. My cake is denser for easier slicing. I recommend that once you bake your cake mix, refrigerate it before you slice it to help keep the layers neat.
Do you really meant freezing ? I mean like , won’t the cake got frozen and have ice all over ? :/ .
Laz, Yes, I do mean freezing it. It makes it easy to unmold and frost, but then you can let it defrost in the fridge. It won’t get icy bits unless you keep it in there for months. It’s a common restaurant practice.
That cake looks amazing that will be the next recipe I try. You are amazingly talented and passionate it shows in your work :)… just wondering any suggestions I”m extremely passionate about baking and looking to see if you recommend any books to read or get? looking to self teach myself and wondering if you had any advice.
Thank you,
Randa
Let me start off by saying that I absolutely love your blog! Your recipes are all easy to follow and I love the humor you add. I attempted to make this cake over the weekend. Each step went well (I even managed not to scramble the eggs) except for the frosting. I didn’t think it would be the frosting that I would mess up on! Everything went fine with the frosting until I added all the components together. The first time I attempted to make it I used my hand mixer and I thought I had over mixed it because the heavy cream started forming some butter. The second time I made sure not to over mix and did it by hand so that I wouldn’t make the same mistake … It turned out the same way. I don’t know what I’m doing wrong! By this step I was so frustrated I just put that darn icing on although there was buttery chunks in it that were clearly visible. I wish I hadn’t put it on but I was just so frustrated by this point!! My cakes now in the fridge still frozen. Hopefully it will work out better next time. I put so much time and effort into this cake .. I can’t believe I screwed it up right at the end!
Hi Randa,
I always suggest reading some food science books. I loved Bakewise by Shirley O Corriher. You’ll be able to make sense of most recipes after reading this. There are also lots of recipes to play with. Otherwise, just pick a baking book that you think looks great and bake your way through it. I did that with Jacques Torres books and learned a great deal. Sure, I messed up often, but boy, did I get a lot out of it.
This is difficult to make!!
Hi!
I completely love this cake! it’s the most lovely thing i have ever made, and the guest they were amazed, it was a splendid and complete success. Although i did add an extra layer off nougat topping, and over all it took me about four days to complete the cake, ( mostly since i had school and other things to attend during the days.) Still it soon become a legend amongst my friends and their friends and so on. I was very happy whit the result of the cake, and since it quite saturating you can gladly be allot of people when digging in to this masterpiece of chocolate cake <3 i wish to thank you allot for this recipe and i will gladly use it again to make more people happy 😀
Manny happy thanks from Frida~
My favourite part of this cake is the chocolate mousse. THIS IS THE BEST MOUSSE RECIPE EVER!!!!!! I could eat the whole batch on my own. Thank you for sharing the recipe 🙂
Hi, I’ve made your chocolate cake but just with the chocolate frosting and it was really delicious! Thanks for the recipe. I was wondering if the cake is strong enough to have it covered in fondant. Am thinking of doing a birthday cake for my son and would like to use this cake rather than the typical much heavier mud cakes. Your advice would be much appreciated.
Hi, what height should the 9 in cake pan be, I think I only have ones that are just over an inch tall.
ps. Excited to try this amazing looking cake
Hello Irina!!!!, The chocolate mousse has 35% whipping cream in it. So, freezing the cake n after thawing won’t the whipping cream split?
The reason why I am asking is because, previously I have made chocolate mousse with heavy cream following a different recipe (not your recipe, but both of the recipes has heavy cream in the mousse as an ingredient) and left it in the freezer to freeze. After I thaw the chocolate mousse I find the the cream has split. I have also had the same disaster with ganache. For ganache i don’t freeze it anymore i refrigerate it n that solved the problem. But for mousse, I love the light taste of heavy cream, and I hate the taste of whipped topping (not cool whip) in chocolate mousse. Mousses can be very finicky, especially chocolate mousse.
I am not trying to find any faults with the recipes here. Its just that I have had problems before and if there is a technique involved I would love to learn. You are a pastry chef and who better to ask about techniques involved in baking but yourself. Thanks!!! Kelp
Not sure why it separated on you, but anytime I make a mousse with cream in it, it freezes perfectly well. I’ve seen plenty of other pastry chefs do the same, so I know its not just me getting lucky. Perhaps it was one of the other ingredients that caused it to separate? I’d have to see your whole recipe to try and understand what’s happening. All I can think of is that maybe there was too much whipping and the whey started to seep out.
Hello Irina!! thank you for replying, I will give this mousse a try. Chocolate mousse always freaks me out it is either chocolate seizing or cream separating. I did try your triple chocolate mousse, it tasted good and also everyone asked how i made three chocolate layers, I added a milk chocolate layer 🙂 Thank you!!!! Kelp
Hi Irina! I am a HUGE fan of you…. and I am so happy that you are back!!! If there´s something I can trust with my eyes closed is your recipes! they are just so incredibly amazingly explained in a way I always find it easy to follow and I have learned so much with you… So thank you for that 🙂
I wanted to let you know that I got my first job as a Systems Egineer thanks to my anecdote of the four times I tried to make the macarons until they were finally done perfectly!!! (in Costa Rica it is too difficult to find almond flour so I think that it was the element that made it harder for me) so thanks to you I proved in my interview that giving up wasn´t an option for me, I kept trying until they came out perfectly (the interviewers were drooling 🙂 )
Today I tried this recipe, and it came out so perfectly and beautifully!! thank you sooo much! I did everything step by step (cake- had to do it twice, the first time it broke because the paper in the bottom got into the batter 🙁 , so the second time I didn´t use paper and it came out amazing!) I changed the water portion of the cake for fresh brewed coffee and I got a richer flavor!
Thank you so much again! Let me know if there´s an address I can send you the picture of today´s cake !! I´m still working on my decoration skills, but the flavor was so good!! thanks again! you made my day!
Momo — This is an incredibly nice note! Thank you for taking the time. If you still want to send a pic, I’d love to see it. I’m at irina@pastrypal.com