

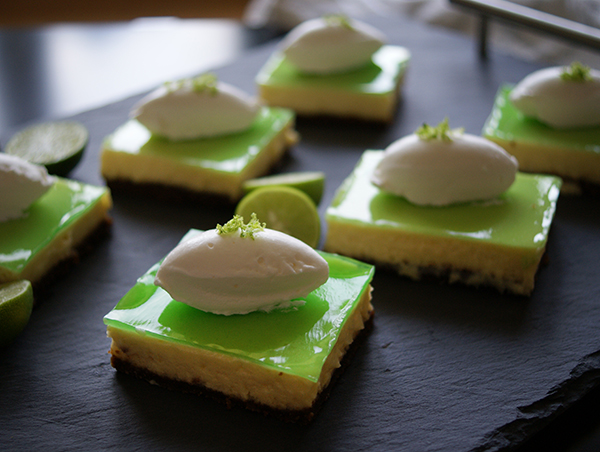
Glorious Key Lime Bars
April 24th, 2014 | 13 Comments
Last we left off, there were some graham crackers. This week, we have, what I consider to be the ultimate. Key lime bars. In my book, citrus wins out over chocolate any day of the week. No one will ever want to share a restaurant dessert with me because I seem to always choose the poor step sister. And if some (misguided) chef decides that a tart offering is not worthy of his menu, then I feel sorry for my dinner companion, because they’re in for some serious whining.
Anybody with me? Am I the only one with a deep love of citrus?
But ok, listen. These are soooooo smoooooooooooth. Sooooooooo creamy. Soooooooo rich and dreamy. So bursting with juicy freshness. Once you have a bite, it’s really all but impossible to stop. Oh lawd, I have to fan myself just thinking about it.
And I haven’t even mentioned what the graham cracker imparts to these babies. What a beautiful combination of warmth and crumbliness against the melty, custardy filling. Have mercy!
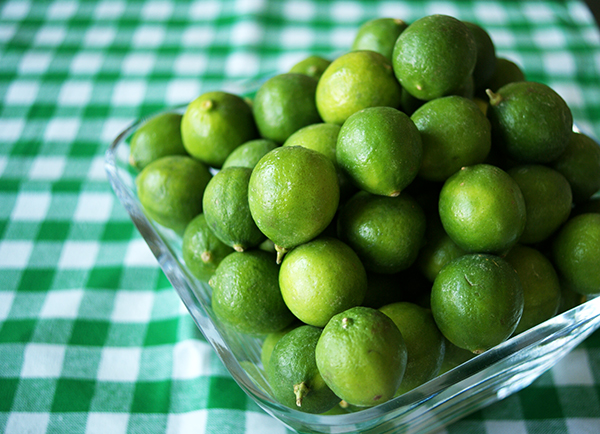
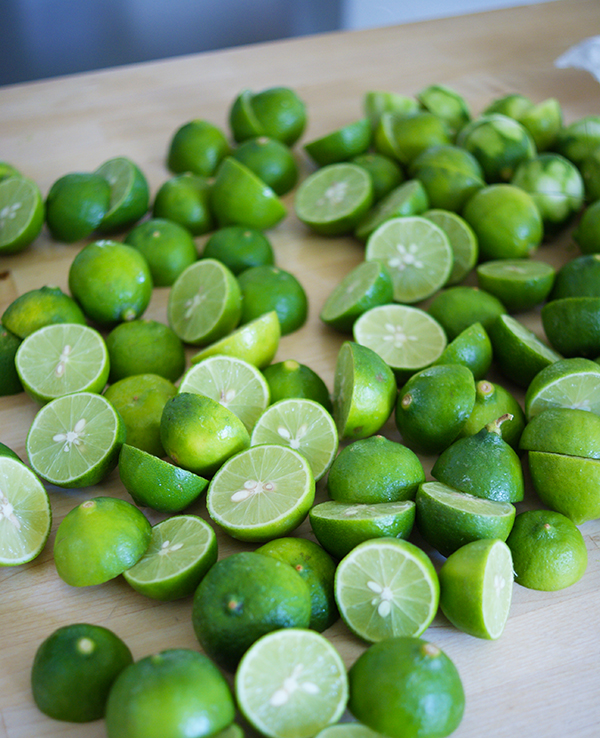
Now that my heart rate’s back to normal, let’s talk about the key limes. I did go ahead and order some from here. And I’ll tell you straight up that they are the size of golf balls. And do you know how many golf balls you have to squeeze to get enough juice for this recipe?
Well, I don’t know either because I made my boyfriend do it. Ha!
Ok, ok, all kidding aside, it’s a lot. About 5 pounds of them. And frankly, they are not easily found everywhere. Which means that you should feel free to substitute regular limes. The recipe will be just as good. In any case, whichever way you decide to go, please don’t opt for the bottled juice, because then you’ll wonder what I’m carrying on about, and why the little men in white coats haven’t yet hauled me away.
You don’t have to limit yourself to the “bar” format either. You can easily turn this into the classic key lime pie by switching out your baking vessel. Just press your crumbs into a pie plate instead of a sheet pan, and pour in your filling. The filling will be deeper, and therefore likely require a few more minutes of baking time. Maybe 10? As always, I like to judge the done-ness by what my product looks like, not by an exact time specified by someone with a completely different oven.
You are looking for the filling to set to the point where it doesn’t look completely wet in the center when you give the pan a little jiggle. Keep in mind that the bars (or pie) will firm up considerably once they cool.

Key Lime Bars!
Feel free to use regular limes instead of key limes here if you can’t get a hold of them.
These can also be a pie, not bars, if you use a pie dish. If that’s your preference, you can halve the recipe for the crust, but keep the filling proportion as is. The depth of a pie plate will likely use it up. Bake for 5-10 more minutes.
Makes about 24 3-inch bars
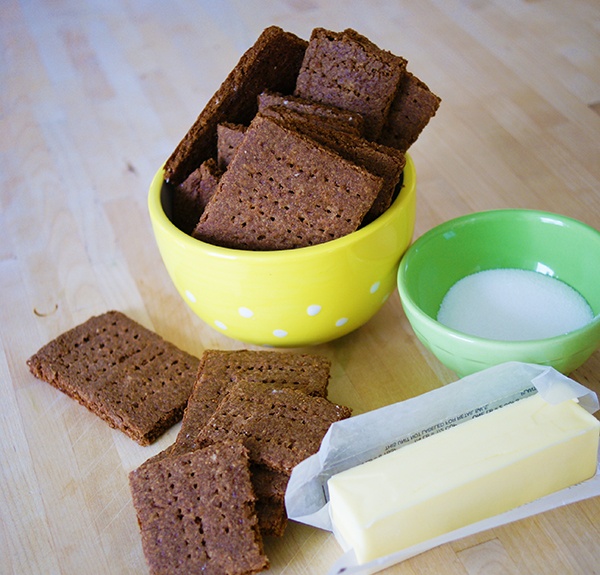
For the graham cracker crust:
4 cups (550 g) graham cracker crumbs (use graham crackers from this recipe, or store bought)
1/4 cup (55 g) granulated sugar
1 1/2 sticks (170 g) unsalted butter
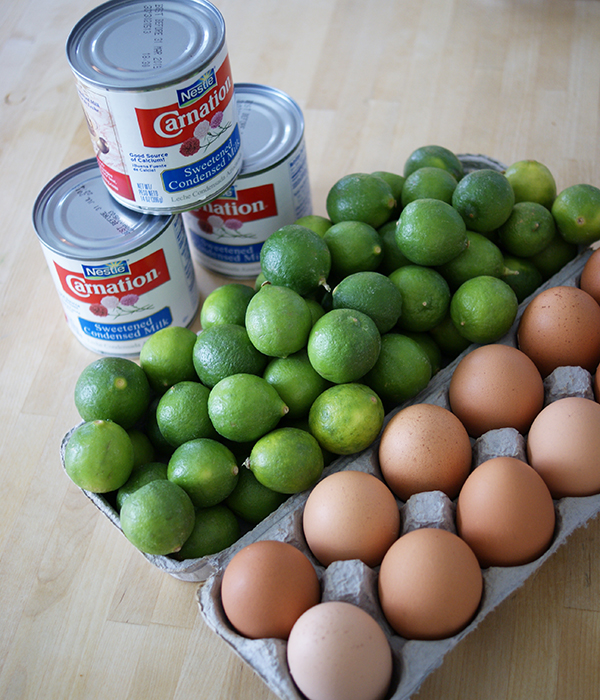
For the filling:
1 1/2 cups (355 ml) key lime juice
12 egg yolks
3 cans sweetened condensed milk (each can is 396 g, so a total of 1188 g)
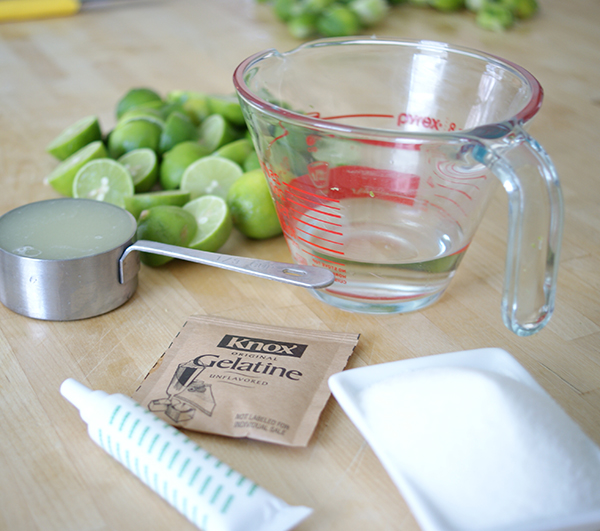
For the lime gelee (a completely optional step, and mostly done for garnish purposes):
1/3 cup (80 ml) key lime juice
1/3 cups (70 g) sugar
2/3 cups (140 ml) water
1 envelope (7 g) powdered gelatin
green food coloring
Optional: If you have some cooking spray around, that’ll help stick the parchment to the sheet pan.
Crust first:
Here is what we need for just the crust.
In a food processor, pulse enough graham crackers to yield 4 cups.
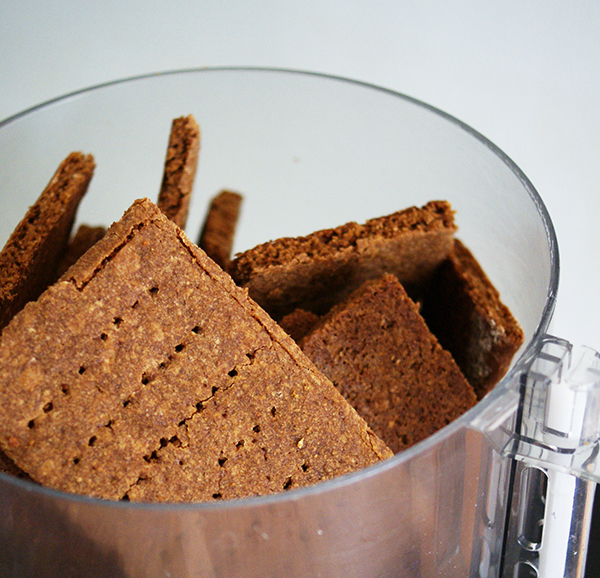
Here they are, finely ground and basking in the sunlight.
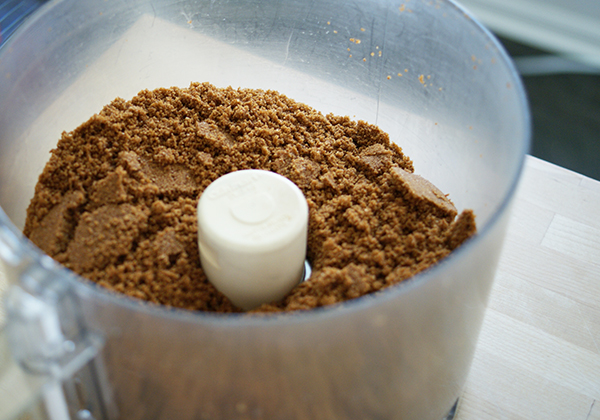
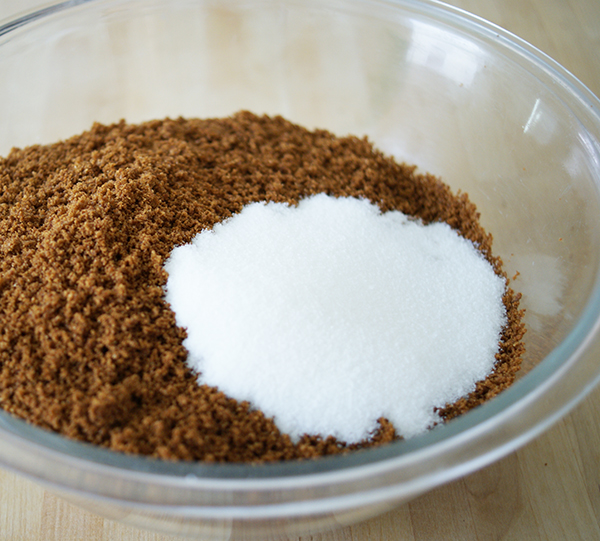
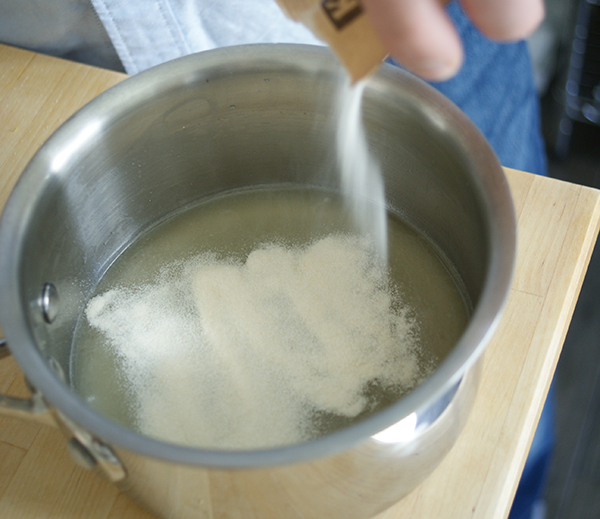
I measured out what I needed and transferred them to a bowl, but you can even continue with this directly in the food processor. Add the sugar, and stir in.
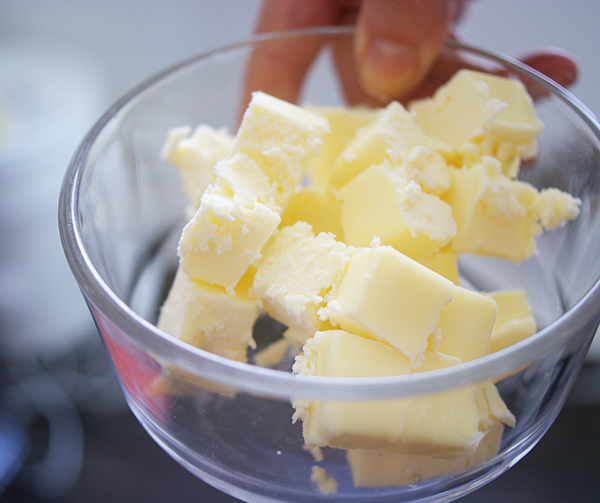
Take your butter, and melt it. I nuke it in the microwave in 30-second intervals until it is liquid gold.
Then pour it over the waiting crumbs.
Now the goal is to get everything in the bowl well-moistened.
Here they are, well-moistened.
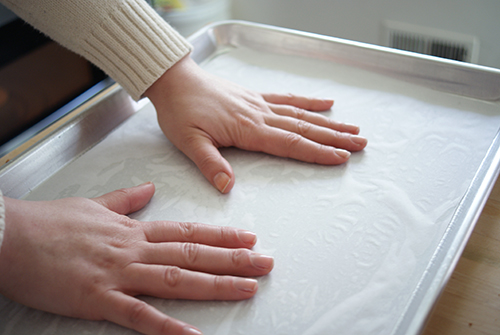
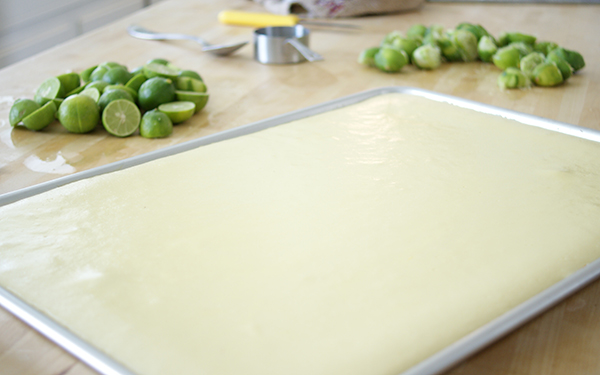
Grab a 13″ x 18″ sheet tray, and line with parchment paper. (You can also use a pie dish, and in that case I wouldn’t bother with parchment.) To get the parchment paper glued to the sheet pan, I like to first spritz the surface with cooking spray, then lay down the paper. This will be a huge help when pressing down the crumbs.
Dumped.
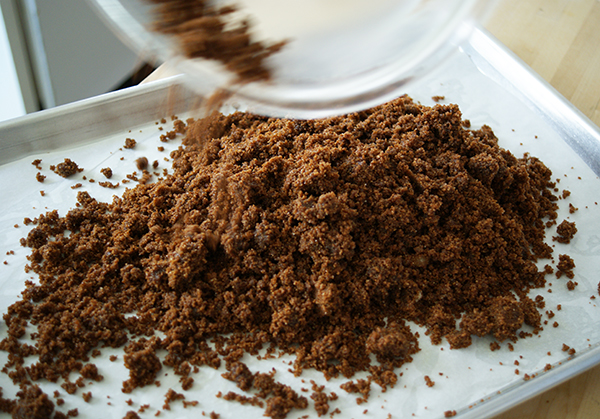
Then press as evenly as you can manage. The corners tend to get the least amount, so make sure you push some crumbs in that direction. Pack this down well, so that the bottom holds together when munching the baked bars.
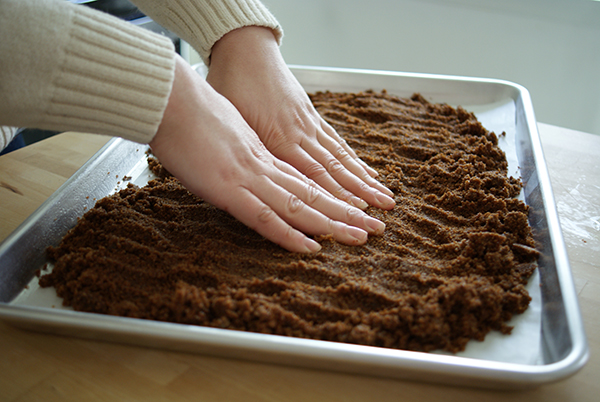
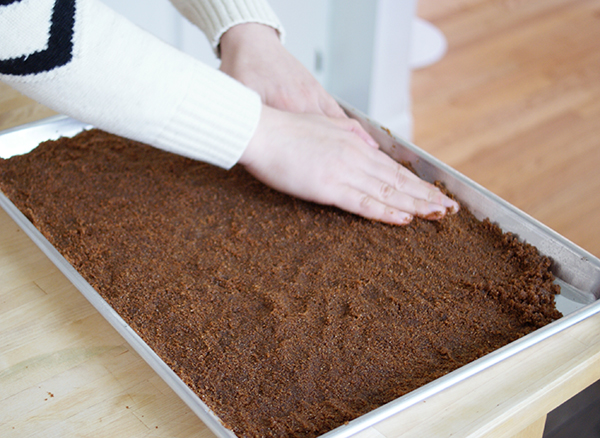
Well pressed, and packed down.
Let’s move on to the filling. Even though there are just 3 ingredients, the juicing of the limes is a thing. Prepare yourself mentally. Now is also a good time to preheat your oven to 325 degrees F.
Here are a halved bunch, taunting me.
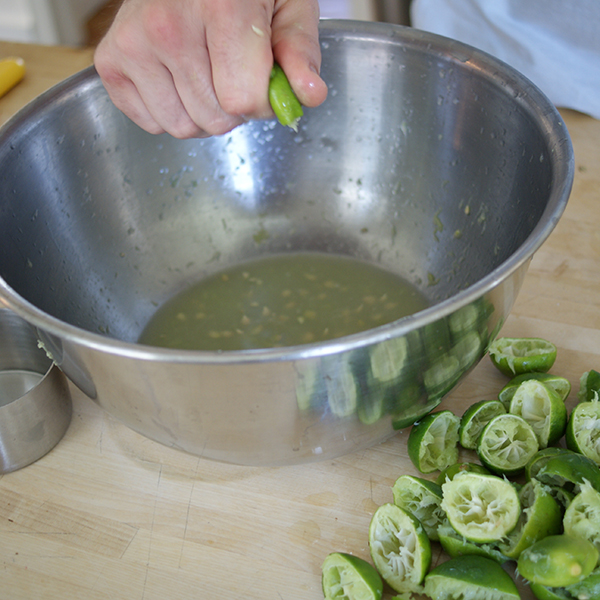
Squeeze. And squeeze. And squeeze. Strain out the seeds. Once you have a cup and a half, carry on.
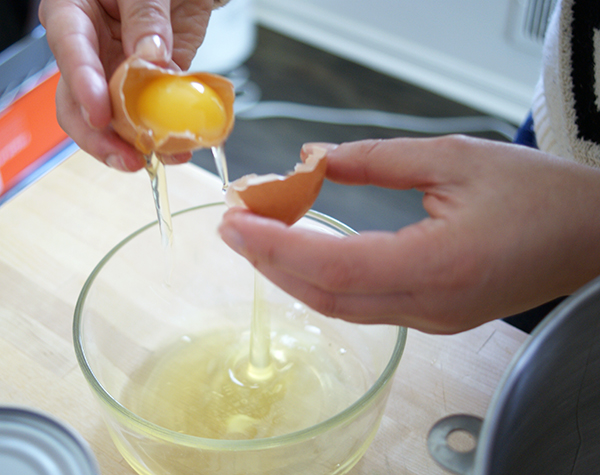
Separate the whites and the yolks. You will only need the yolks here. With the whites, you can either make egg white omelettes or freeze as described here.
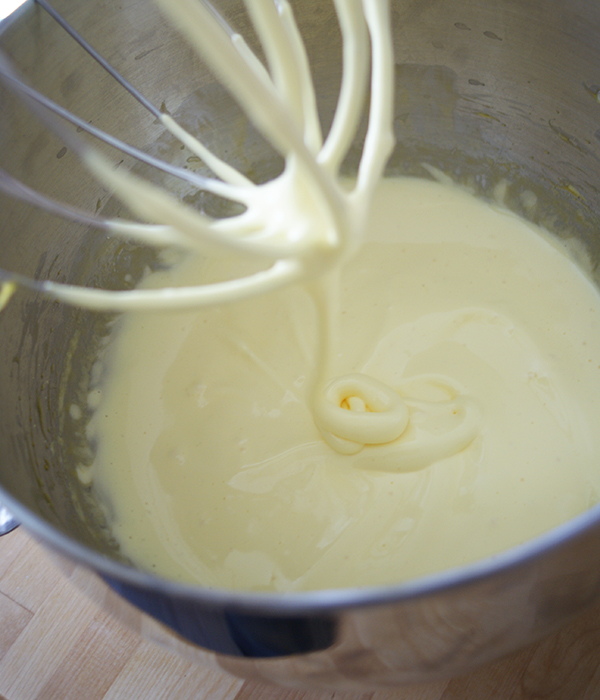
Whip the yolks on high speed. They start out quite yellow, but after two or three minutes…
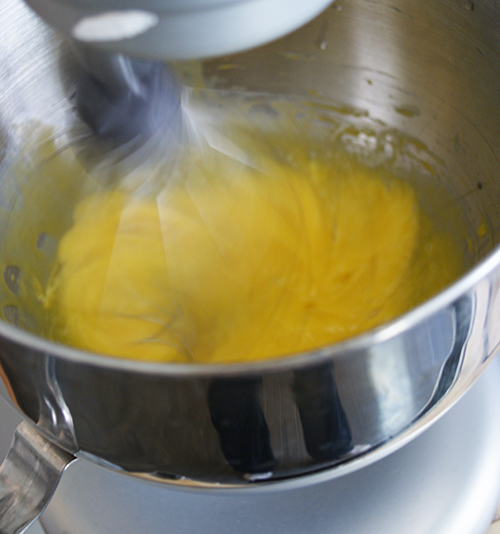
…become pale and thick, and leave a ribbon trail when drizzled. Whipping the yolks serves the purpose of beating a lot of air into the mix, and therefore making each bite light and ethereal.
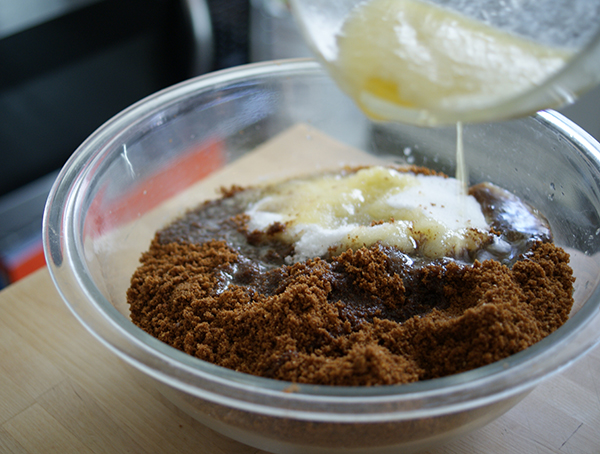
Pour in the condensed milks, and mix on medium speed for 30 seconds, just to get them incorporated.
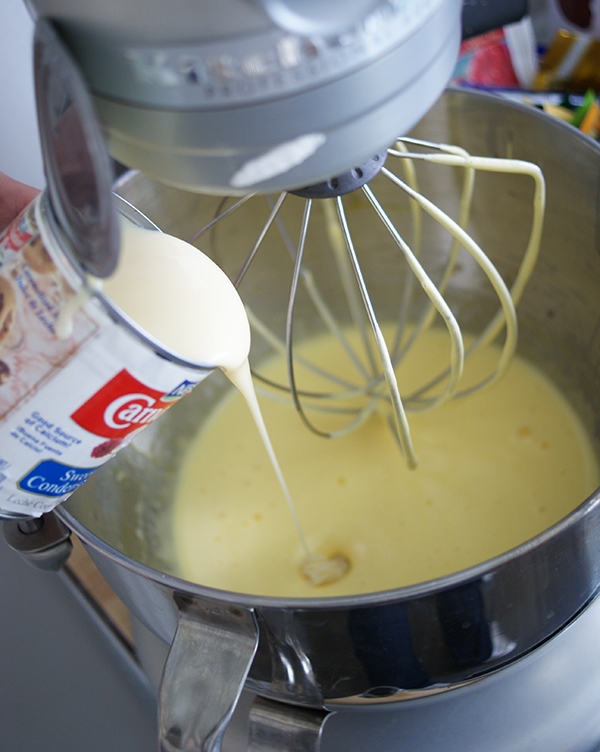
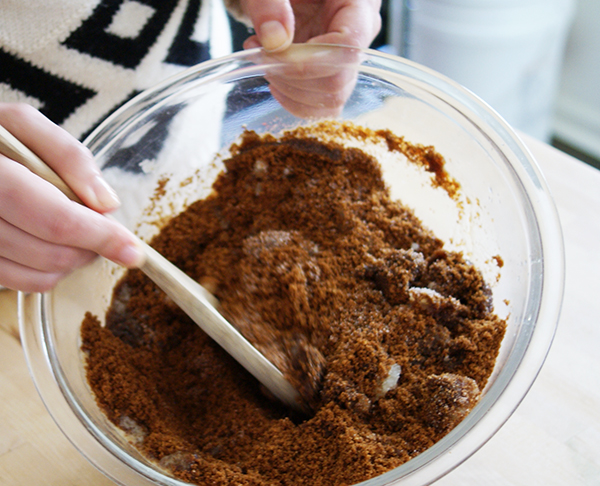
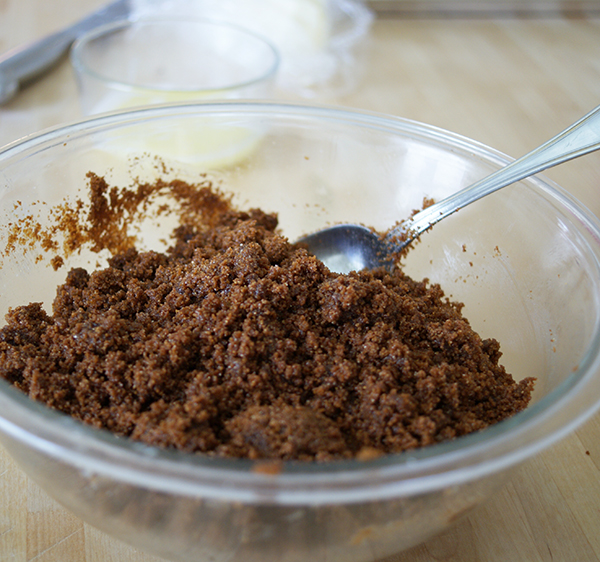
Then add the juice, and mix that for another 30 seconds. When the mix all looks smooth…

…pour it over the crumbs.
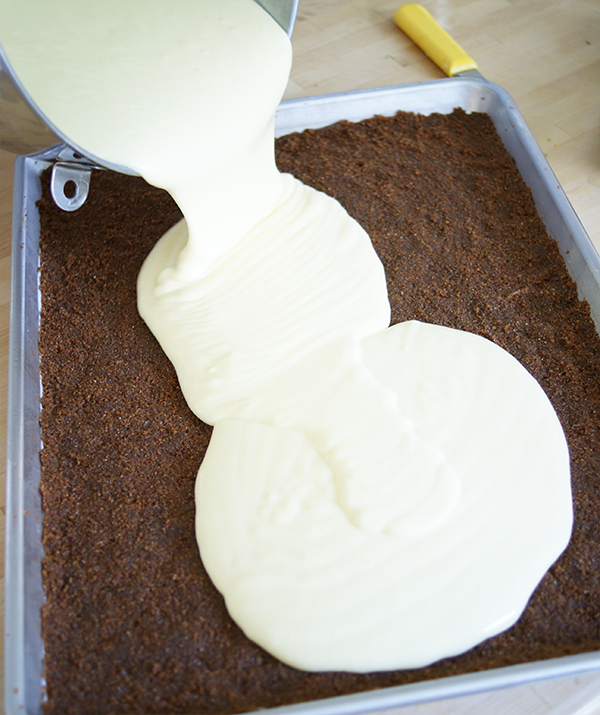
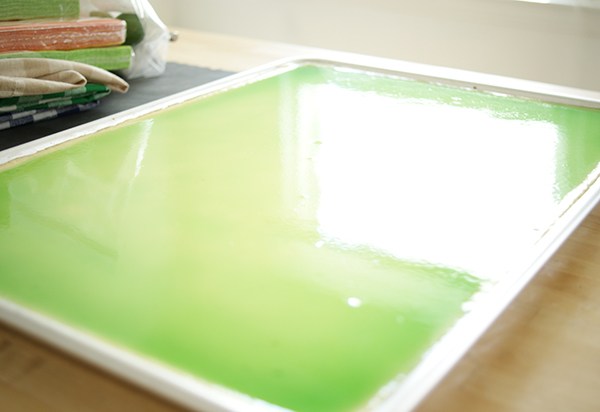
And shake the pan a bit just to distribute the filling evenly. Pop this in the oven and bake for about 20 minutes.
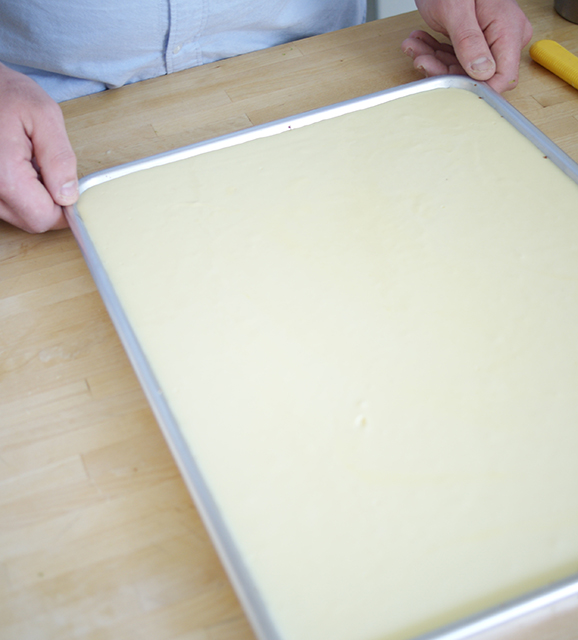
It will be hard to tell visually if it’s baked through, but it will continue to firm up even as it cools. Just make sure that there is no wet puddle in the center. If there is, give it another 5 minutes. If it looks set over the top when you wiggle the pan lightly, I’d call it done. This needs to cool, about an hour.
Once cooled, you can make the glaze, if you are opting for this step. Ugh, more squeezing of limes to get juice.
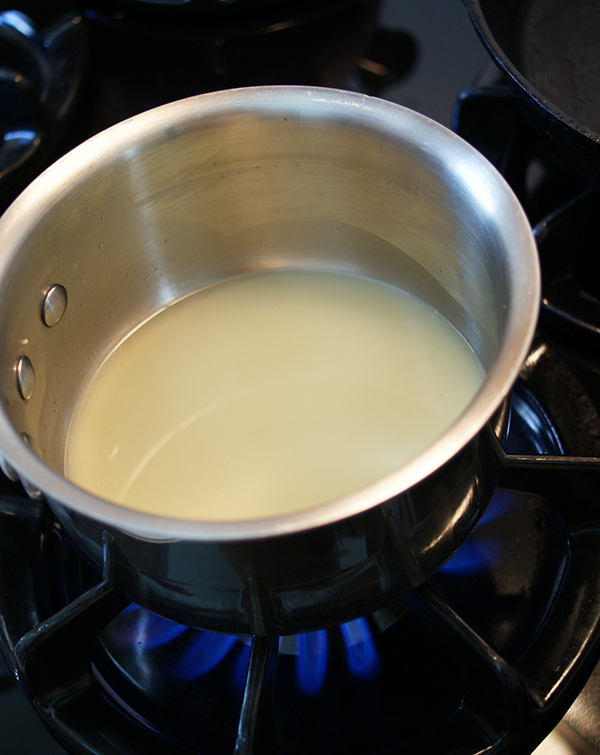
Add the lime juice, water and sugar to the pot.
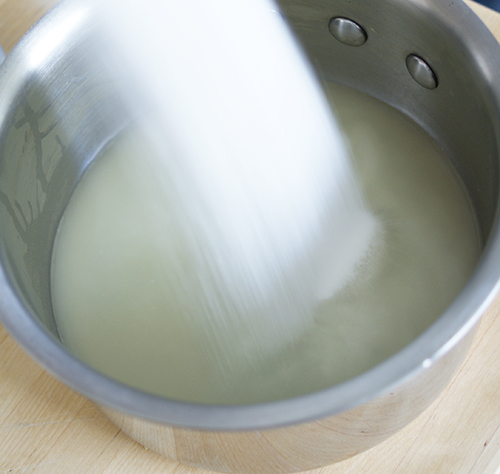
Heat it just long enough to melt the sugar. It doesn’t even have to come to a boil.
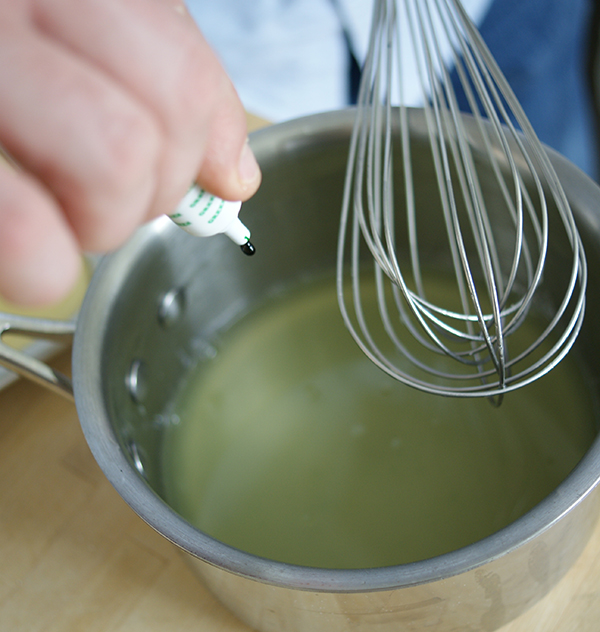
Off the heat, sprinkle the gelatin over the top, and let it rest for 5 minutes to absorb. You can then stir the liquid until the gelatin is completely dissolved, and everything looks clear.
Add food coloring to your liking. I literally added it one drop at a time, stirred, assessed the color, and went for another drop until I was satisfied. All in all, there were 4 drops in mine.
Working quickly, pour the liquid over the top…
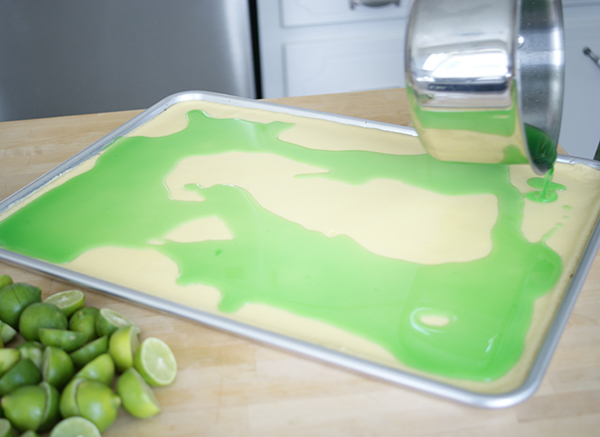
And wiggle the pan around until the entire top is coated.
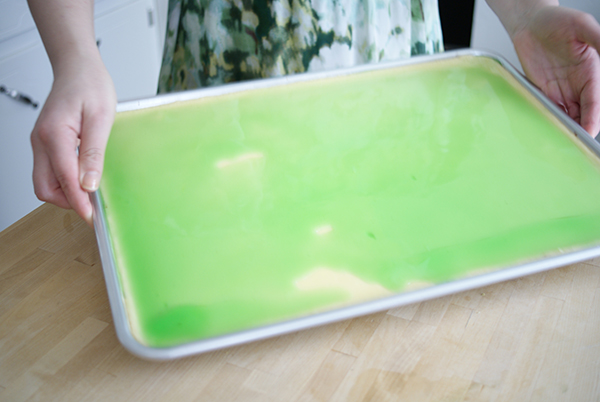
Here it is, glistening away. Now you can refrigerate this for at least two hours, to let everything set and firm up.
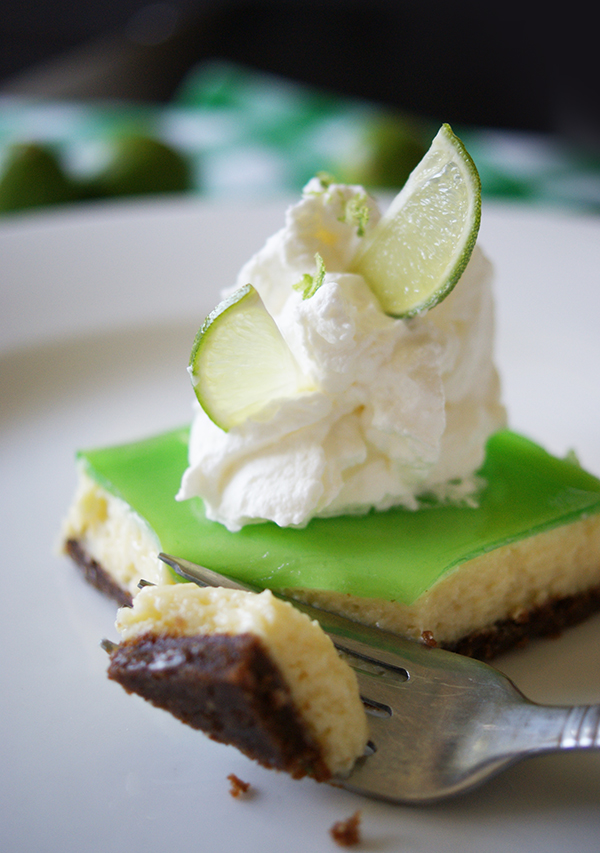
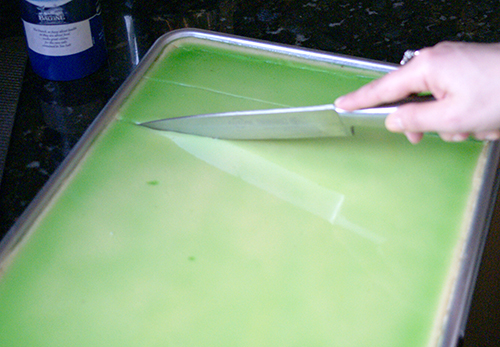
The easiest way I’ve found to slice bars of this nature is to run my knife under hot water…
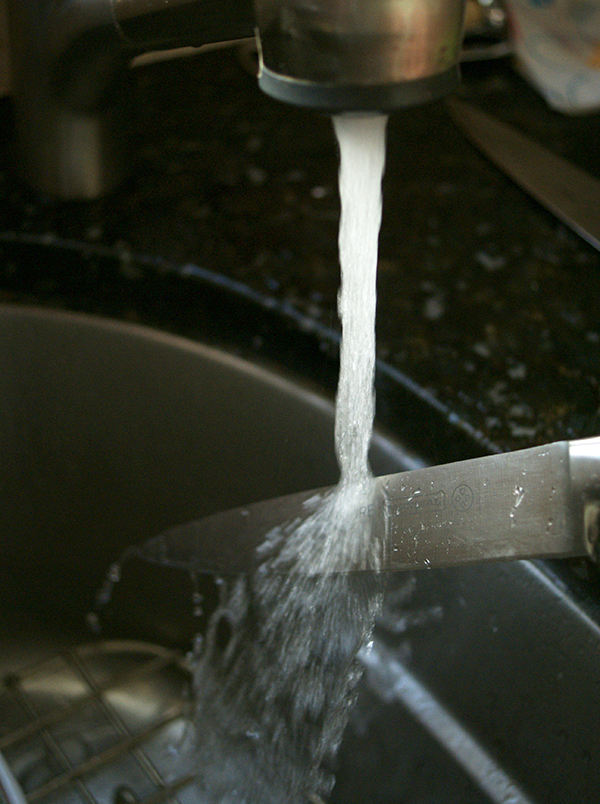
… dry it…
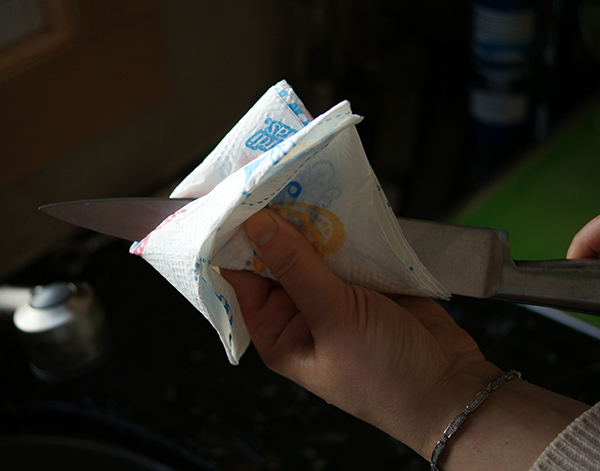
…then make just one slice down the tray. I repeat that for each slice I make. Then slice horizontally. You can make these bars as large or as small as you like.
You can use an offset spatula to work them out of the pan, but I’ll admit the first slice tends to be a sacrificial lamb. These can be stored in the fridge for a couple of days in a single layer, but they really are best the first day.
If you like, throw some whipped cream on top.
Oh heavens!
Key Lime Bars!
Feel free to use regular limes instead of key limes here if you can’t get a hold of them.
These can also be a pie, not bars, if you use a pie dish. If that’s your preference, you can halve the recipe for the crust, but keep the filling proportion as is. The depth of a pie plate will likely use it up. Bake for 5-10 more minutes.
Makes about 24 3-inch bars
For the graham cracker crust:
4 cups (550 g) graham cracker crumbs (use graham crackers from this recipe, or store bought)
1/4 cup (55 g) granulated sugar
1 1/2 sticks (170 g) unsalted butter
For the filling:
1 1/2 cups (355 ml) key lime juice
12 egg yolks
3 cans sweetened condensed milk (each can is 396 g, so a total of 1188 g)
For the lime gelee (a completely optional step, and mostly done for garnish purposes):
1/3 cup (80 ml) key lime juice
1/3 cups (70 g) sugar
2/3 cups (140 ml) water
1 envelope (7 g) powdered gelatin
green food coloring
Optional: If you have some cooking spray around, that’ll help stick the parchment to the sheet pan.
Let’s make the crust:
1. In a food processor, pulse enough graham crackers to yield 4 cups. Stir in the sugar.
2. Melt the butter and pour over crumbs. Stir that around until all the crumbs are well-moistened.
3. Line a 13 x 18″ sheet pan with parchment paper. Press the crumbs into the pan, packing well, and keeping the bottom as even as possible. Set aside.
Let’s make the filling:
1. Preheat the oven to 325 degrees F.
2. Once you’ve squeezed enough limes to yield 1/2 cups of juice, proceed with whipping the egg yolks on high speed in a mixer. They start out quite yellow, but after two or three become pale and thick, and leave a ribbon trail when drizzled.
3. Pour in the condensed milks, and mix on medium speed for 30 seconds, just to get them incorporated.
4. Then add the juice, and mix that for another 30 seconds. When the mix all looks smooth, pour it over the crumbs.
5. And shake the pan a bit just to distribute the filling evenly. Pop this in the oven and bake for about 20 minutes.
It will be hard to tell visually if it’s baked through, but it will continue to firm up even as it cools. Just make sure that there is no wet puddle in the center. If there is, give it another 5 minutes. If it looks set over the top when you wiggle the pan lightly, I’d call it done. This needs to cool, about an hour.
Let’s make the glaze:
Once cooled, you can make the glaze, if you are opting for this step.
1. Add the lime juice, water and sugar to a small pot.
2. Heat it just long enough to melt the sugar. It doesn’t even have to come to a boil, just be warm.
3. Off the heat, sprinkle the gelatin over the top, and let it rest for 5 minutes to absorb. You can then stir the liquid until the gelatin is completely dissolved, and everything looks clear.
4. Add food coloring to your liking. I literally added it one drop at a time, stirred, assessed the color, and went for another drop until I was satisfied. All in all, there were 4 drops in mine.
5. Working quickly, pour the liquid over the top of the sheet pan and wiggle the pan around until the entire top is coated.
6. Now refrigerate this for at least two hours, to let everything set and firm up.
Slicing Tip:
The easiest way I’ve found to slice bars of this nature is to run my knife under hot water, dry it, then make just one slice down the tray. I repeat that for each slice I make. Then slice horizontally. You can make these bars as large or as small as you like.
You can use an offset spatula to work them out of the pan, but I’ll admit the first slice tends to be a sacrificial lamb. These can be stored in the fridge for a couple of days in a single layer, but they really are best the first day.
If you like, serve with some whipped cream.
Tags: baking, bar cookies, dessert, key lime bars, key lime pie, key lime recipe, recipe
13 Responses to “Glorious Key Lime Bars”
Post a Comment
Your E-Mail will be kept private. * = required fields.
ABOUT ME
![]() I had a career going in advertising when one day I got the crazy idea to start over and become a pastry chef. Now I'll show you what I learned working in fine dining restaurants all over NYC right here with step-by-step photos. So grab your rolling pin and join in.
I had a career going in advertising when one day I got the crazy idea to start over and become a pastry chef. Now I'll show you what I learned working in fine dining restaurants all over NYC right here with step-by-step photos. So grab your rolling pin and join in.
-
AWARDS AND DISTINCTIONS


-
SPONSORS


WOW!! these look great, so glad you’re back!
Thanks, Krissybox. Thanks for reading!
Looks fantastic as always! Now how come there are no instructions for making those cute little quenelles shown in the first photo? 🙂
PL — Actually, I’m working on that ;).
Can these be frozen?
Peg — I have frozen these before, and it works pretty well.
Hi,
Your blog is my nomber ONE – honest! Everithing looks great!
Can i bake this bars on 375 degrees F?
Sorry for my bad english.
Hi Milena,
Thank you, that’s really nice of you to say!
I’d say that temperature might be too high because the eggs start to bubble and curdle at such a high temperature. Since this is a custard, it needs gentler heat. You can certainly try, and then I’d recommend placing the sheet pan in a larger sheet pan that has water in it, so you can create a water bath while you bake.
Hello Irina!!! Is there any way I can cook this 12 raw egg yolks? I am afraid to use raw egg yolks in cooking. I want to make this recipe but the only thing that is preventing me is the 12 raw egg yolks.
!!!! Thank You!!!! Kelp
Kelp — Not sure what you mean about your question. The yolks will cook through when you bake the bars.
hahaha silly me!!! I over read and over saw that part about BAKING it in the oven. Thank you Irina!!!
Couldn’t agree more on the chocolate vs. citrus thing. So glad you are back!
These are definitely a keeper!
I made a batch for a party and everybody asked me where I got the recipe, and I pointed them your way.
Last night I decided to play with it and subbed passion fruit for lime and it was also a big hit.
I bought a bag of frozen Maracuya Pulp (aka Parchita to Venezuelans).
Look for them in most largish Latino markets.
Defrosted it and added 1/2 cup of water and blended it.
I decided to strain it before using to avoid any pulpy bits.
I was left with a tad less than 1/3 of a cup for the gelee part, but simply added enough water to reach 1 cup of liquid. That did not affect the taste at all, given that passion fruit is pretty acidic to begin with. A little Yellow Coloring really deepened the gelee nicely and made a great contrast!