Creme Caramel, So Saucy
July 17th, 2009 | 23 Comments
When I was an impressionable young teenager, I spent many a lazy summer afternoon splayed out on the outdoor deck, flipping through my parents’ food magazine subscriptions. Sooner or later, hunger would win out, and I’d get up off my ass long enough to attempt one of the recipes. Like a typical ungrateful youth, I held out my hand, begging for grocery money and a ride to the store. After a couple of hours, my sorry “creation” would be served—typically something like a dense turd of a shortcake, or a zucchini bread so wet and leaden, you could wring juices out of it. The folks were good sports about it, graciously sampling all the horrors that crawled out of the kitchen.
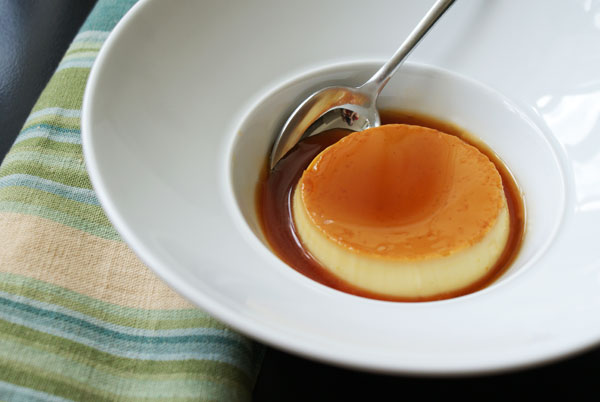
One particular day, I was leafing through said periodicals and suddenly let out an audible gasp. There, splashed across the page was what was called a crème caramel. It looked like a Miami beach babe, all shiny and glistening, practically quivering in its golden pool. Food porn, if I ever saw it. This was something curious alright, because in Russia they didn’t have anything like it. The desserts I grew up with were tall, over-the-top butter confections, injected with thick layers of buttercream, then coated with more buttery spackle. Don’t get me wrong, those were worthy, and I put away my fair share (or unfair, if you ask the bro), but this crème caramel business was something to behold. It beckoned and purred and I had to have it.
The recipe was intimidating. It asked for steps I’ve never attempted before, like caramelizing sugar, and baking small cups in scalding water. This baby was going to make me work for it. But how would I know if I was doing it right? A little existential crisis ensued over crème caramel. I took a calming breath and very patiently and methodically, followed the recipe.
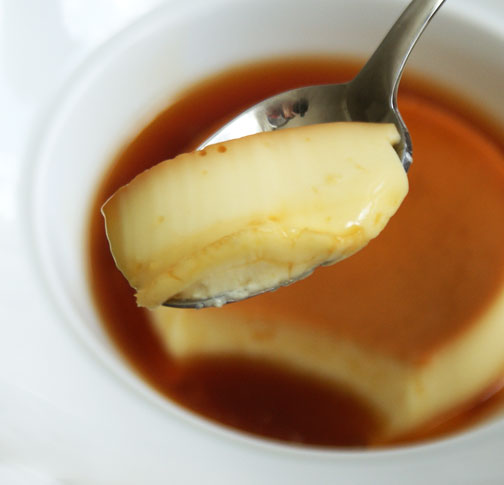
Turns out, there was no need to fret because it wasn’t that hard. The steps were pretty straightforward. Once the beauties were all baked, cooled and unmolded, they gave up the same glistening, saucy puddle as in the photo. And the flavor was so much more than I imagined. It was silk on the tongue, and my head bobbed from side to side like a car ornament in my state of bliss. That day, it was just the two of us. Me and the custard. Perfection it was, with the sweet, cool cream dancing with the syrupy, honey-like sauce. (Am I going too far?) Pure luxury. As if lounging around all day wasn’t enough. When the parents got a hold of a plate, they nearly dropped their silverware. Though I like to think it had something to do with the dessert, it was probably from the shock that I had a success in the kitchen.
This is a great make-ahead dessert.
Vanilla Crème Caramel
Makes 6 5oz ramekins
Recipe can be doubled
For the caramel:
1 cup sugar
2 tablespoons light corn syrup
water, approximately 1/4 cup (the amount doesn’t effect the recipe)
For the custard:
1 cup (8 oz) milk
1 1/4 cups (10 oz) heavy cream
1/2 vanilla bean or 1 tsp vanilla extract
1 cinnamon stick (optional)
1/2 cup (4 oz) sugar, separated
3 large eggs
3 egg yolks (from large eggs)
pinch of salt
Make the caramel:
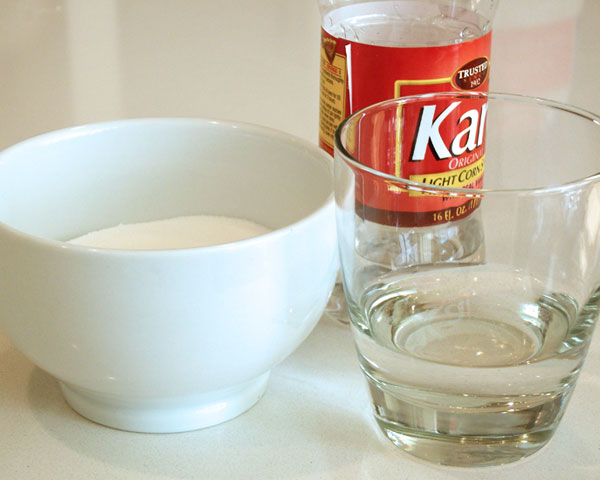
1. Ingredients
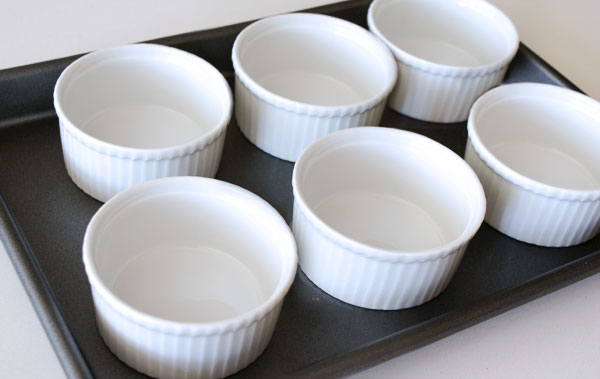
2. Have your ramekins ready.
3. Pour the sugar, and corn syrup into a sauce pan, one with a light metal, so you can see your sugar caramelizing. Add just enough water to achieve a slushy, sandy mixture. Don’t worry if you add too much water. It needs to evaporate anyway before your sugar starts to color.
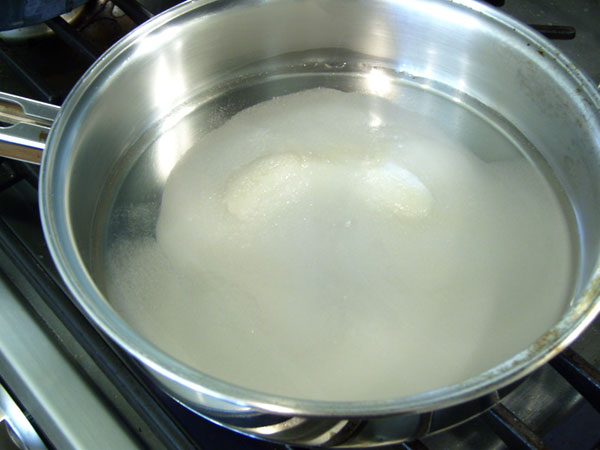
4. Bring to a boil over high heat. Do not stir. Swirl the pan occasionally to heat evenly. (Stirring increases the danger of the sugar crystallizing, where the sugar becomes cloudy.)
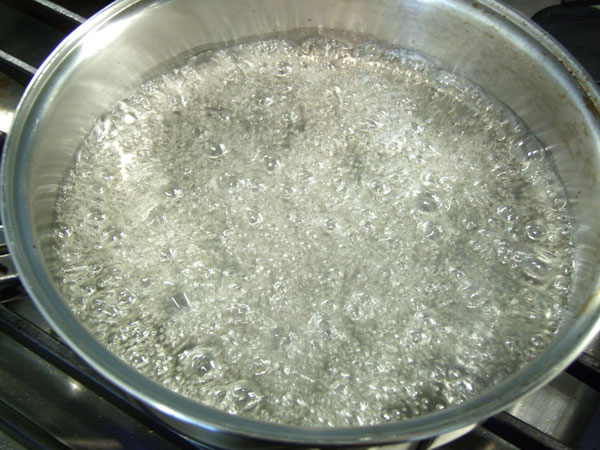
The edges begin to get golden. At this point, the sugar starts coloring very quickly, so stand over it and watch. Swirl the pan to encourage even caramelization.
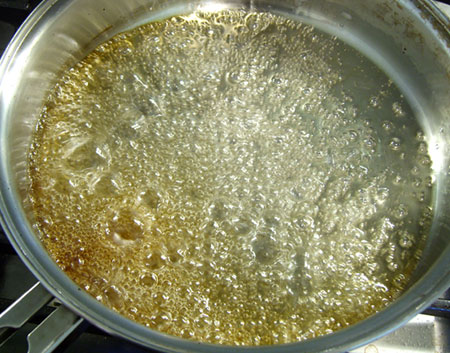
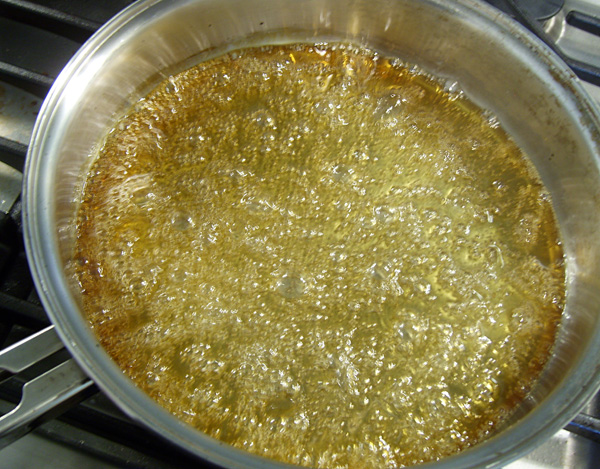
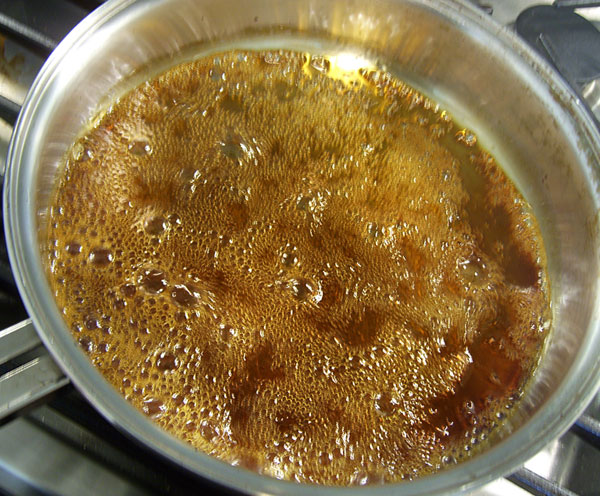
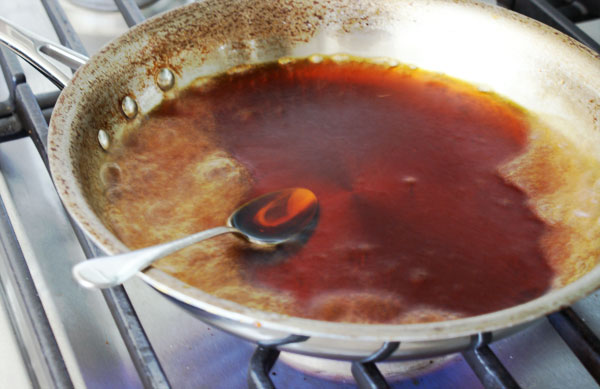
I like the caramel pretty dark for a more well-rounded flavor. This next pic shows good color. Once it gets to this point, it will continue to darken quickly, even off the heat, so work fast here. This stuff is blistering hot, and will gift you burns you won’t soon forget, so do be extra careful.
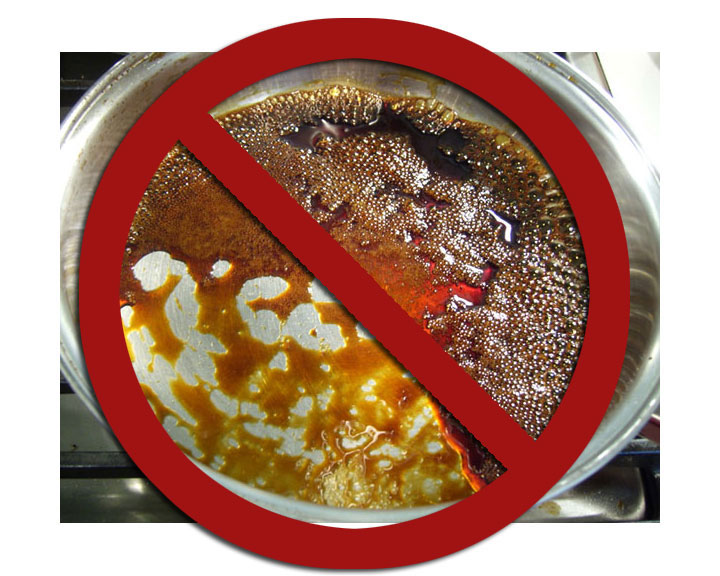
This one has gone too far. If that happens, start again. You’ve only wasted a cup of sugar.
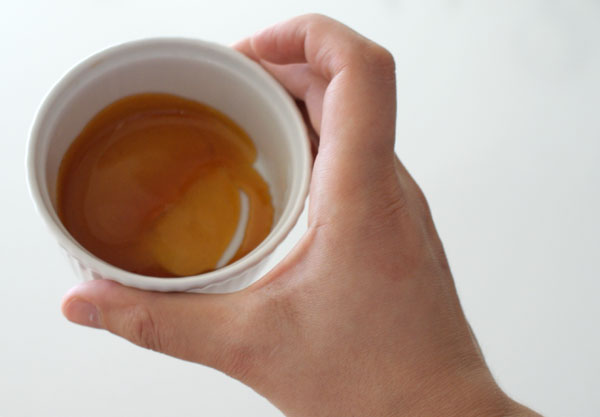
5. Pour about a tablespoon’s worth into each of your reserved ramekins. You have about 30 seconds after pouring to swirl and coat the bottom of the cup before it cools and hardens.
Make the custard:
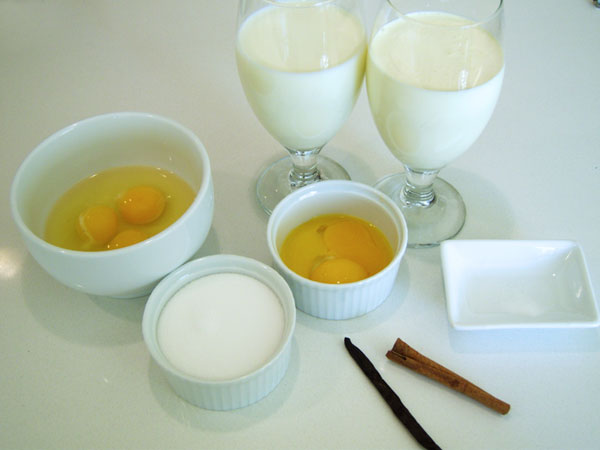
1. Ingredients
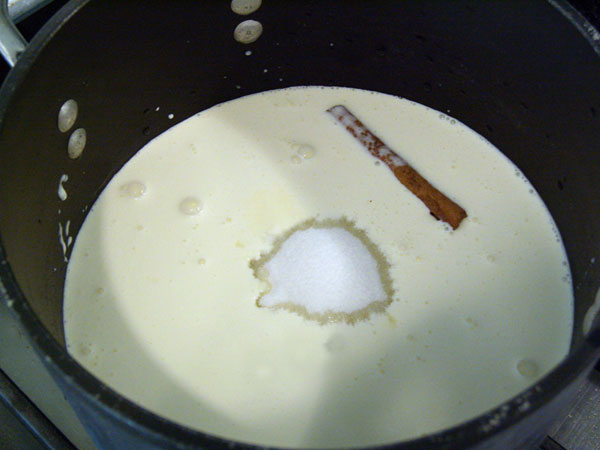
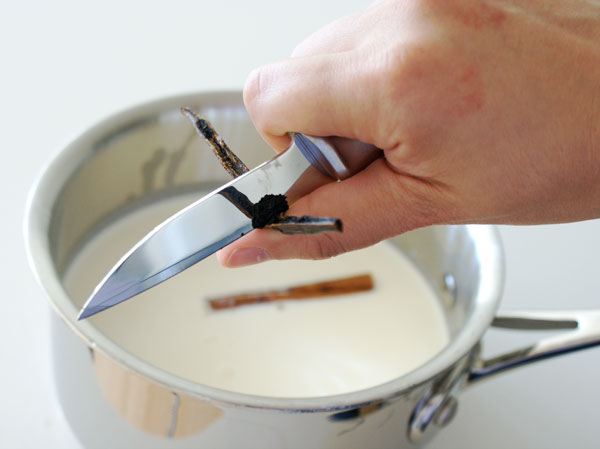
Split the vanilla bean in half lengthwise, and scrape the seeds into the pot. Throw the scraped vanilla husk in there with it.
Bring to a simmer. Stay close by. This mix has a tendency to boil over just when you get distracted.
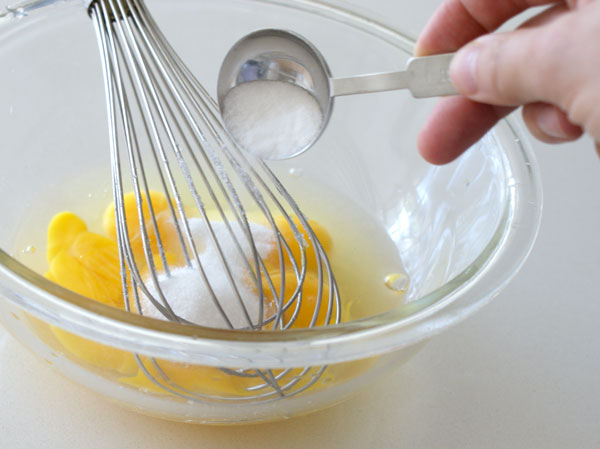
3. Once it simmers, turn off the heat, then whisk the remaining sugar into the eggs.
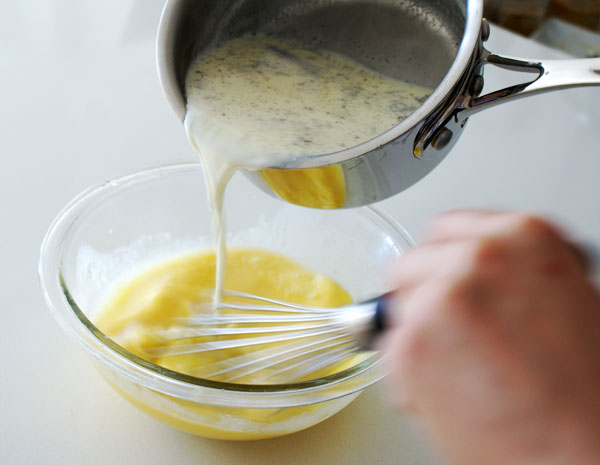
4. Working quickly, pour the milk mixture into the eggs in a steady stream, whisking the entire time. This helps warm the eggs gradually, so they don’t scramble. (You might want to recruit someone to help with this maneuver, or you can do it one handedly like me, and spill it all over the place, like me.)
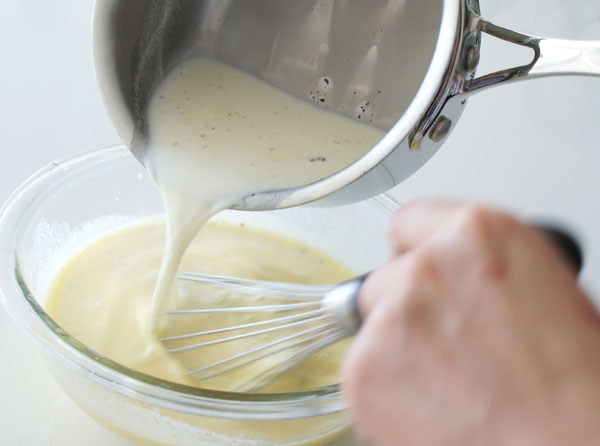
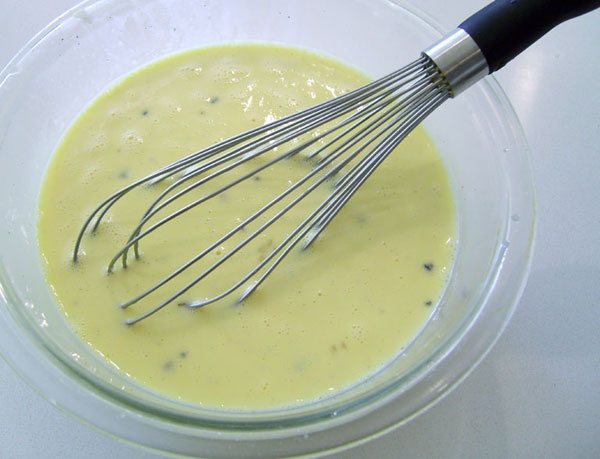
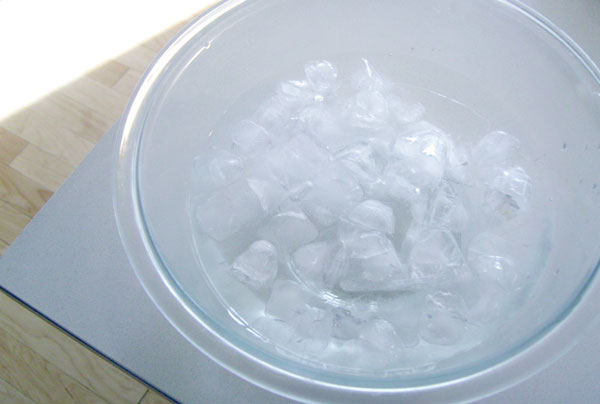
5. Fill a large bowl with ice and cold water, like so.
5. Strain the mix through a fine mesh sieve into a medium bowl that will nest well in the ice-filled bowl.
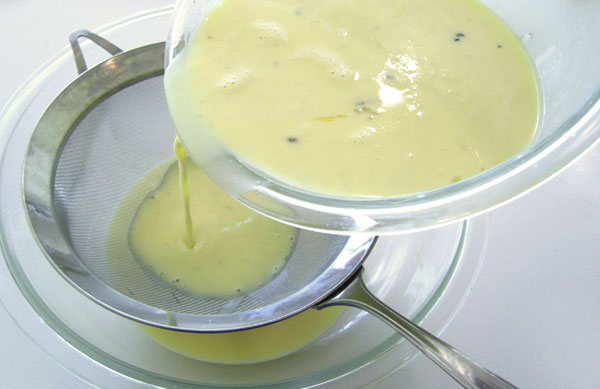
Set the medium bowl with the strained mix into the ice bath bowl. Be careful that there isn’t so much water in the ice bath that it flows into the creme caramel base. Let cool. Whisk occasionally to help it cool faster (faster! faster!).
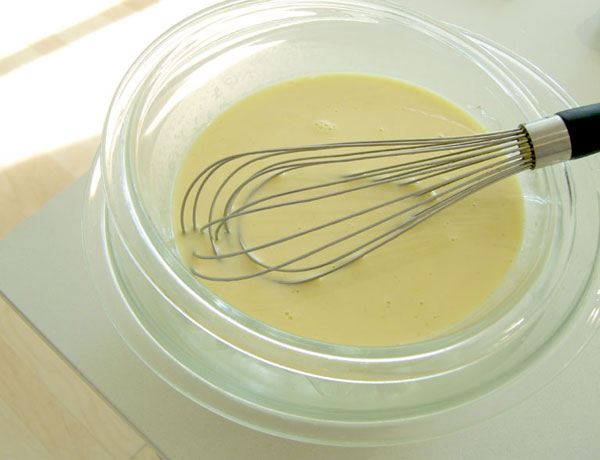
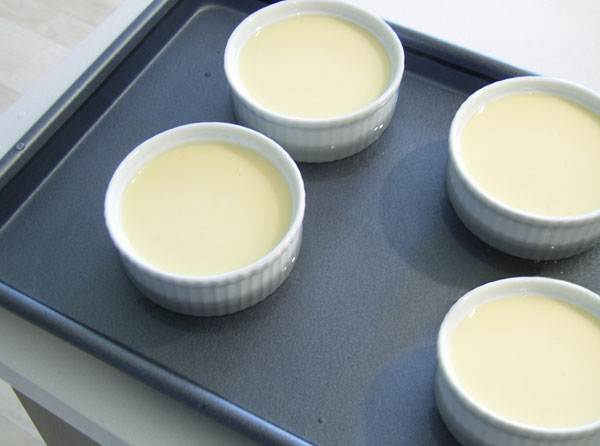
6. Once chilled to the touch, fill the ramekins, place them in a baking pan with high sides and pour enough hot water in the pan to come half way up the sides of the ramekins.
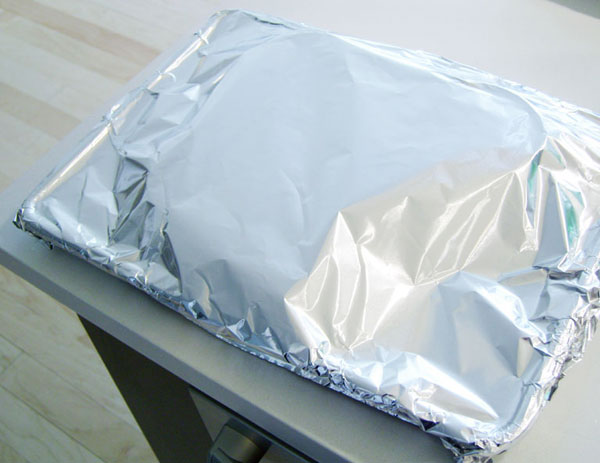
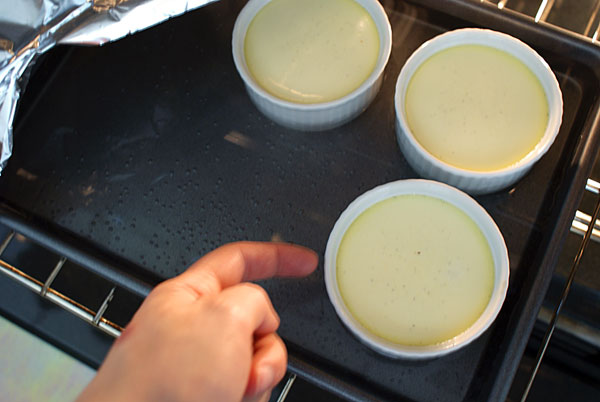
7. Cover tightly with foil, and carefully transfer to the oven. You don’t want the water in the pan to slosh into the ramekins. Bake at 325°F degrees for about 35 minutes.
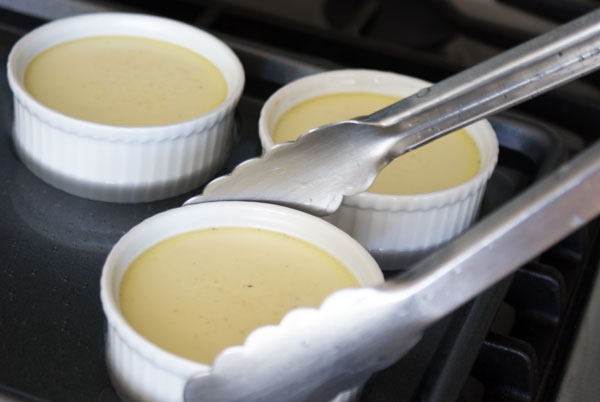
The custards tend to bake at varying speeds. To decide if they’re done, tap each cup. If the centers jiggle like jell-o, they’re done. They will firm up considerably more when chilled. If the centers still look liquidy, keep baking for 5 minute intervals, check again, and remove each cup as it’s finished.
I pull them out with tongs as they’re finished. Make sure your grip is good, as the water bath makes them slippery.
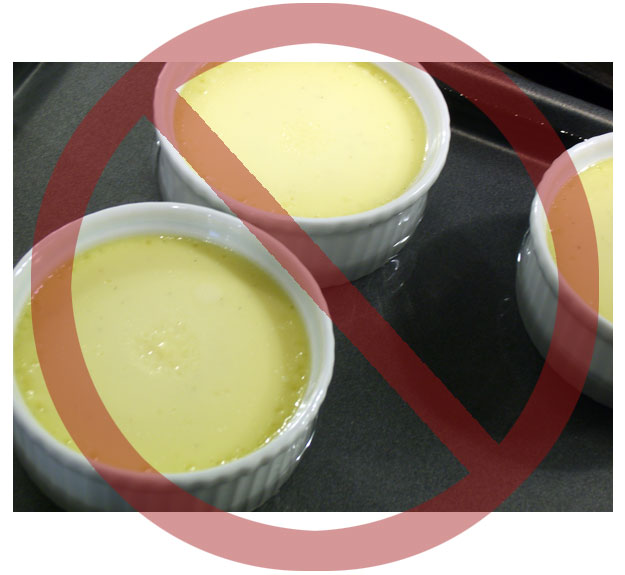
Here are overcooked custards. You can tell by the curdling and bubbling happening around the edges. This means they were in the oven either too long, or the oven’s too hot. You can still eat them, and they will taste kinda ok, but they will have that scrambled egg texture.
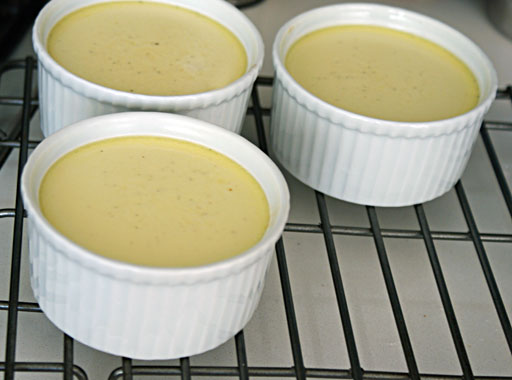
Cool on rack, then refrigerate for at least 4 hours, uncovered to prevent condensation. After 4 hours, wrap the cups in plastic so they don’t form skins.
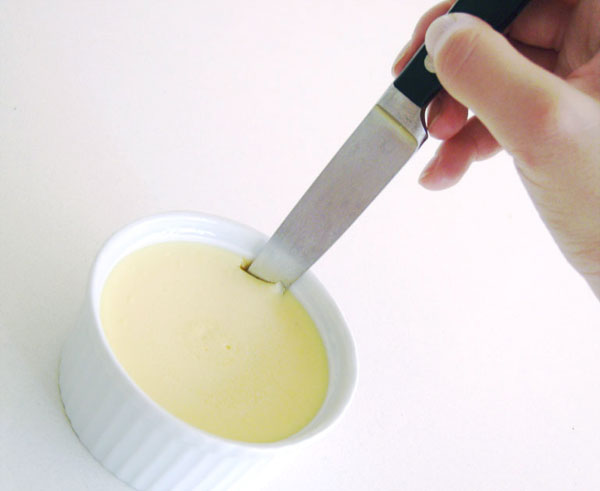
8. When ready to serve, run a knife around the custard’s edge in one smooth swoop.
Invert onto a plate.
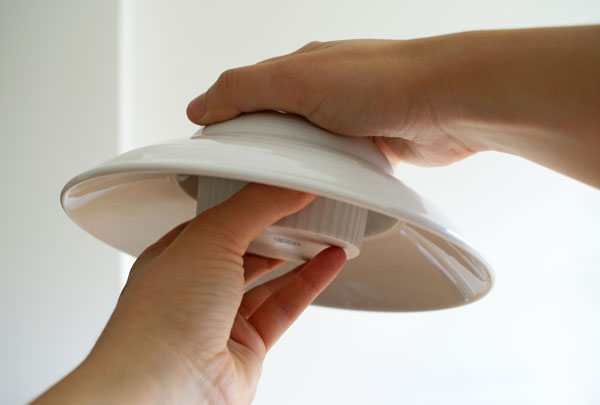
Sometimes it is a little stubborn about sliding out and requires a jolt. Give it a jerk like a martini shaker. Now that you’ve got martinis on the brain, make yourself a martini.
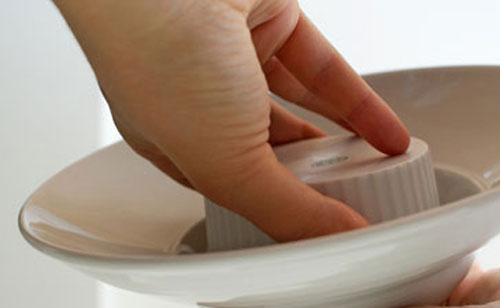
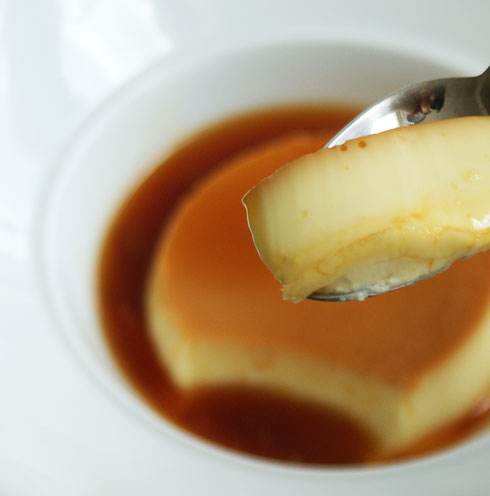
The syrup will pool around the dessert. Dig in.
***
Now that the recipe is done what do you do with this hardened mess?
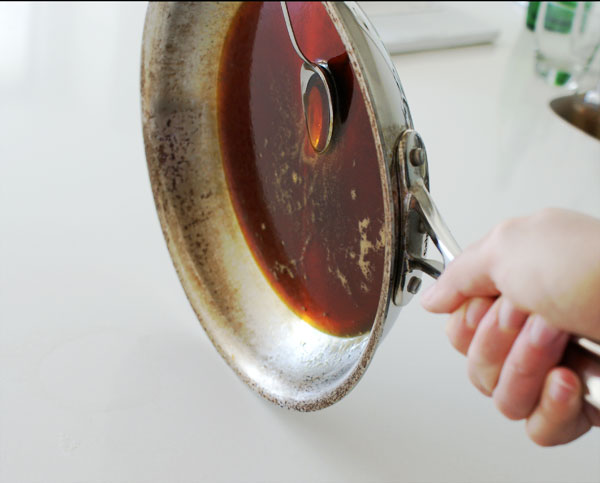
Fill the pan with water and bring it to a boil. The whole thing dissolves.
Vanilla Crème Caramel
Makes 6 5oz ramekins
Recipe can be doubled
For the caramel:
1 cup sugar
2 tablespoons light corn syrup
water, approximately 1/4 cup (the amount doesn’t effect the recipe)
For the custard:
1 cup (8 oz) milk
1 1/4 cups (10 oz) heavy cream
1/2 vanilla bean or 1 tsp vanilla extract
1 cinnamon stick (optional)
1/2 cup (4 oz) sugar, separated
3 large eggs
3 egg yolks (from large eggs)
pinch of salt
Make the caramel:
1. Have the ramekins ready and waiting. Pour the sugar, and corn syrup into a sauce pan, one with a light metal finish, so you can see your sugar caramelizing. Add just enough water to achieve a slushy, sandy mixture. Don’t worry if you add too much water. It needs to evaporate anyway before your sugar starts to color.
2. Bring to a boil over high heat. Do not stir. Swirl the pan occasionally to heat evenly. (Stirring increases the danger of the sugar crystallizing, where the sugar is no longer clear.)
3. The edges begin to get golden. At this point, the sugar starts coloring very quickly, so stand over it and watch. Swirl the pan to encourage even caramelization.
4. Keep cooking until it turns a deep amber color.
5. Pour about a tablespoon’s worth into each of your reserved ramekins and swirl ramekins to coat their bottoms. Set ramekins aside and make the custard.
For the custard:
1. Preheat oven to 325°F.
2. Pour milk, cream, 6 T of the sugar (hold the other 2 T sugar on the side), and cinnamon stick into a small pot. Split the vanilla bean in half lengthwise, and scrape the seeds into the pot. Throw the scraped vanilla husk in there with it. Bring to a simmer. Stay close by. This mix has a tendency to boil over just when you get distracted.
3. Pour the eggs into a large bowl. Whisk the remaining sugar into the eggs.
4. Working quickly, temper the milk mixture into the eggs in a steady stream, whisking the entire time.
5. Fill a larger, separate bowl with ice and cold water.
6. Strain the custard through a fine mesh sieve into a medium bowl that will nest well in the ice-filled bowl and cool. Whisk occasionally to help it cool faster.
7. Once chilled, fill the ramekins, place them in a baking pan with high sides and pour enough hot water in the pan to come half way up the sides of the ramekins.
8. Cover the entire pan tightly with foil, and carefully transfer to the oven. You don’t want the water in the pan to slosh into the ramekins. Bake at 325°F degrees for about 35 minutes. The custards tend to bake at varying speeds. To decide if they’re done, tap each cup. If the centers jiggle like jell-o, they’re done. They will firm up considerably more when chilled. If the centers still look liquidy, rewarp in foil and keep baking for 5 minute intervals, check again, and remove each cup as it’s finished.
9. Cool on a rack, then refrigerate for at least 4 hours, uncovered to prevent condensation. After 4 hours, wrap the cups in plastic so they don’t form skins.
10. When ready to serve, run a knife around the custard’s edge in one smooth swoop. Invert onto a plate. Sometimes it is a little stubborn about sliding out and requires a jolt. Give it a jerk like a martini shaker.
Enjoy!
23 Responses to “Creme Caramel, So Saucy”
Post a Comment
Your E-Mail will be kept private. * = required fields.




love the don’t shots. now that is brilliant and no one else does it.
Beautiful explanation in images. I made mine with cardamom and coffee as flavorings.
http://www.phamfatale.com/id_290/title_Coffee-and-Cardamom-Flavored-Creme-Caramel/
Excellent post. I love the beautiful photos ~ very talented photography!! And thanks for such a wonderfully explained recipe.
Linda–Thanks! In my experience, the screw ups are the best to learn from.
Jackie–Ooh, I love the idea of coffee and cardamom. I suppose any flavoring you can think of goes. I’ve tried rose water and orange essence with good results as well.
Michelle–Aw, you’re making me blush.
perfectly velvet inside! great photos, too!
Just visiting your site for the first time, saw you on Foodgawker. I must say, the creme caramel looks absolutely amazing. Where did you get that fabulous bowl? I’ve been searching for something just like it!
Hi Kitchenette, Thanks for stopping by. The bowl comes from Crate and Barrel.
This is so interesting! I may have to try it out.
You had me at shiny and glistening! They look fantastic, especially appreciate the step by step photos.
By coincidence I tried a similar recipe yesterday, but think mine got a little overcooked lol, oh well they still tasted good!
I wish more people would have photos showing how to not do it, haha. Good recipe.
LOVE the step by step photos almost as much as I love creme caramel. Lovely photos, great guide to making it.
i love the fact that you’ve included pictures of discarded sugar and custard, and what to do with the pan with hardened sugar in it. very helpful indeed!
cheers! 🙂
i well definitly be trying this recipe tomorrow! it well help me use the leftover egg yolks from marshmallows i am making tonight
You know what I love about your site? You don’t just post the “perfect” stuff… you show the screw-ups too! I love that you showed your burnt caramel (and how you can clean the pan after) because, God knows, I’ve done that a lot too.
This is my hubby’s family’s favorite dessert, but i never actually dare to taste it, coz it looked quite unapetizing with rough ‘omelette’-like bottom and sides, not to mention the eggy smell! But out of the blue, yesterday i stumbled upon this gorgeous looking baby…and i told myself, yes!! This is how a creme caramel should look! Tried it….its was a huge success, i’ll be sure to make this for my next friday lunch with his fam, and if there is a way to impress them, this is it! Thank you so much 🙂
Thanks you very much for sharing this. Your Recipe and photos are Great. I tried it and I used the 7oz metal Ramekins. It worked great. My carmel was on the edge of no return but was able to make it. My mistake was I stirred the sugar at first and forgot to swirl the pan, but it was ok. I also did not see where to add the salt. haha. I just added it where it made sense.
I have received request to make it again. that’s a plus, huh? Well again thanks for sharing and I will send you some pictures as well. can’t wait to try the Gingerbread cake. By the way what kind of Camera are you using, the pictures are wonderful as well as the setting. I would like to see photos of your photograph setup area. that would help us take better pictures of what we cook…..
well later,
Cheers
Terry B
great tutorial!!! so detail….thank you so much!
I happened to stumble on your blog by accident. I am amazed by the step-by-step photos and clarity in instruction. If I wanted to make it in a 9″ pie-plate or something similar (instead of individual ramekins), do I need to do anything different? Thanks 🙂
Anita — Thanks for stopping by! You don’t have to do anything different, except it may take a longer to bake, my guess is 15-20 minutes longer. Keep an eye on it as you’re baking it, and watch for the center to jiggle like jello. Then let it cool completely before unmolding. Hope it works!
Hi pastry pal, I made your recipe and it has come out really well. However the caramel gets stuck to the ramekin and I get very little syrup. Can you suggest what to do?
Neeha — I suggest you pour a little more caramel into each ramekin before adding the custard mix. Hope that works!
Hi there, I’ve been trying with many failed attempts to make a tea (chai) flavoured caramel for the vanilla creme (the flavours work beautifully together). I’ve been doing this by making the tea, chilling it and using that as the cold water to make the caramel. The issue I’m having is that the teais already dark Iin colour so it is very difficult to know when the caramel is ready when cooking it. Are there any other ways to determine if the caramel is ready other than colour or do I just need to give up on this idea?
fantastic blog by the way! well done!
thanks
hi there,
I love your tips and all the photos, good job.
I wanna make this and I wanna make it in advance.
The question is how many days in advance is ok?
I have an upcoming party and I’ve lots to do, so anything that can be made well ahead of time is a blessing.
I’ve checked out many recipes for this but no one mentions how many days in advance you can make something.
Do you know?
Thanks
Brenda